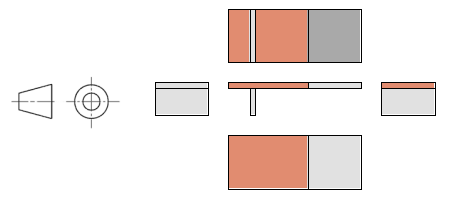
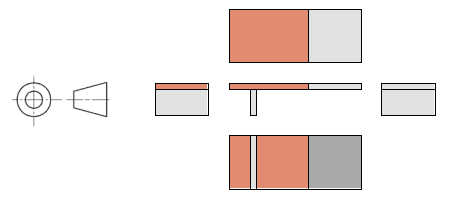
Projection angle
The projection angle defines the method used to generate projected views in the Drawing workspace in Fusion.
First angle projection

When you use first angle projection, projected views placed to the right of a base view depict the appearance when viewing it from the left. Projected views placed below the base view depict the appearance from above.
In the ISO drafting standard, drawings use first angle projection.
Third angle projection

When you use third angle projection, projected views placed to the right of a base view depict the appearance when viewing it from the right. Projected views placed below the base view depict the appearance from below.
In the ASME drafting standard, drawings use third angle projection.
Override the standard projection angle
A drawing created in the ISO standard will use first angle projection, and a drawing created in the ASME standard will use third angle projection. However, you can override the default projection angle in the Preferences dialog.