Activity 2: Place the PCB components
In this activity, you place and mirror the components on the circuit board. The exact positions are not critical, except for the LEDs, LM555ND timer, and JSTPH2, which should be in the relative positions shown. Resistors and capacitors should also be placed as shown relative to other components.
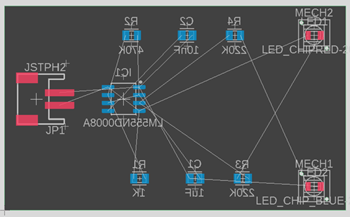
PCB components positions.
Prerequisites
- Activity 1 is complete.
Steps
Position the timer on the PCB.
Click, hold, and drag pointer around the timer to select it. Click the handle of a timer
 in the center of the footprint. Note: You know that a part is selected when the color changes to a deeper, brighter red.
Drag the timer on the PCB.
Click Design > Modify > Mirror
 .
.Click the footprint of the timer to mirror it.
Note: The blue color represents that the component is on the bottom side of the PCB.
Position the LED's on the PCB.
Click Design > Modify > Move
 .
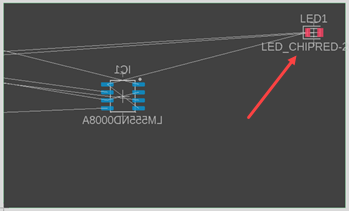
.Click and hold on the handle for LED1.
Drag the LED on the PCB as shown.
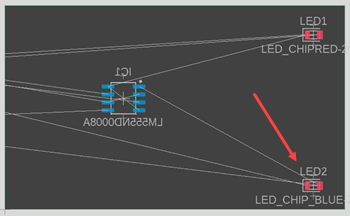
Click and hold on the handle for LED2.
Drag the LED on the PCB as shown.
Position the light pipes on the PCB.
Click Design > Modify > Move
.Click and hold on the handle for a labeled MECH1.
Drag a light pipe to the center, over one of the LED's on the PCB as shown.

Drag the second light pipe over the other LED on the PCB.
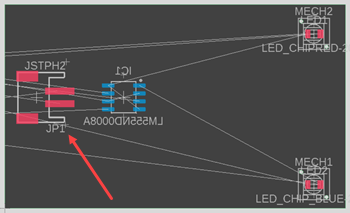
Position JSTPH2 on the PCB.
Click the handle for JSTPH2 once to rotate the component 90 degrees.
Click Design > Modify > Move
.Click and hold on the handle for JSTPH2.
Drag the JSTPH2 on the PCB as shown.
Position the resistors and capacitors on the PCB.
Click Design > Modify > Move
.Click and hold on the handle for a resistor or capacitor.
Drag the component on the PCB as shown.
Continue to place all the components.
Click Design > Modify > Mirror
.Click the handle for each resistor and capacitor to mirror the component.
Activity 2 summary
In this activity, you positioned and mirrored the components for the PCB.