Activity 5: Define values
In this activity, you enter values to define the capacity of components. Although the construction of the resistors and capacitors has been defined by the part name of the components, their capacity has not. This is needed to make the circuit function as intended.
Prerequisites
- Activity 4 is complete.
Steps
Define the value for Resistor 1.
- Click Design > Modify > Value
 .
. - Click the symbol for the R1 resistor.
- Enter the value of 1K.
- Click Design > Modify > Value
Define the value for Resistor 2.
- Click the symbol for the R2 resistor.
- Enter the value of 470K.
Define the value for Resistor 3.
- Click the symbol for the R3 resistor.
- Enter the value of 220.
Define the value for Resistor 4.
- Click the symbol for the R4 resistor.
- Enter the value of 220.
Define the value for Capacitor 1.
- Click the symbol for the C1 capacitor.
- If you get a warning message box, click Yes.
- Enter the value of 1uf.
Define the value for Capacitor 2.
- Click the symbol for the C2 capacitor.
- If you get a warning message box, click Yes.
- Enter the value of 10nF.
- Press Esc to finish.
Check to make sure you have not made any mistakes on the schematic.
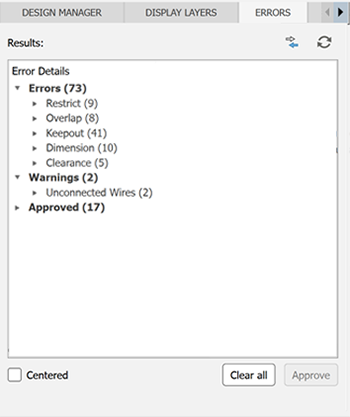
Click Validate > Validate > ERC
 .
.Check the ERC Errors panel that shows the list of errors. There should be one warning for the IC1 voltage. This is to be expected. If you have anything else, mistakes have been made. Go back and fix the problem.
Activity 5 summary
In this activity, you defined the values of resistors and capacitors. The values are documented in the Schematic design.
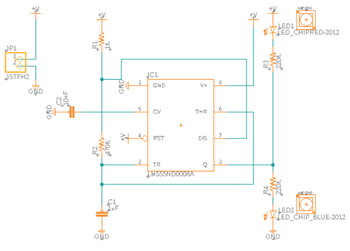
Resistor and capacitor values added in the Schematic design.