Insert canvas (image)
Learn how to insert an image onto a planar face, plane, or sketch plane to use as a reference in Fusion.
Insert a canvas
On the toolbar, click Insert > Canvas
 .
.The Insert dialog displays.
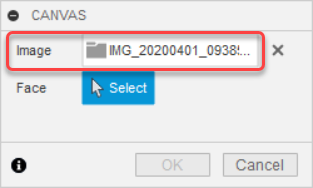
Select an image file from a project or your computer.
Click OK.
The Canvas dialog displays with the image you selected.
Select a face to place the image on.
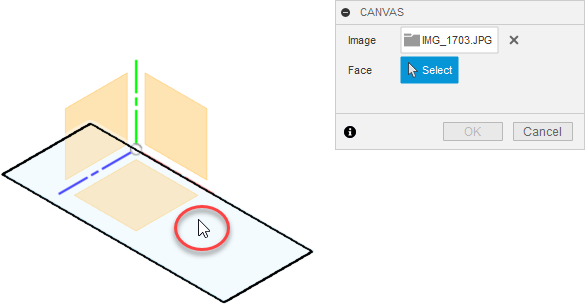 .
.The image is displays on the face you selected, and the Canvas dialog expands with additional settings.
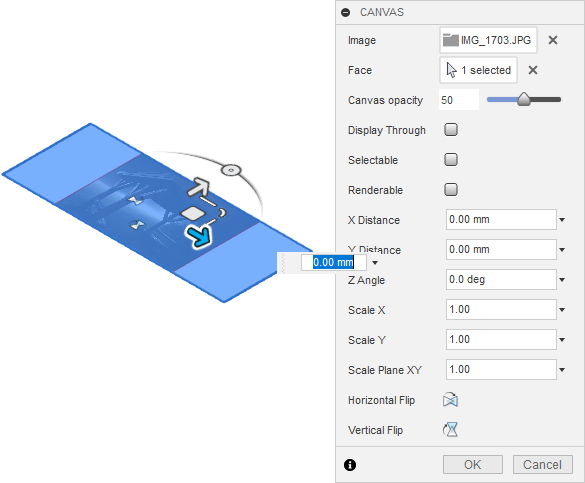
In the dialog, adjust the image settings:
- Display Through: Lets the image show through objects that are in front of it.
- Selectable: Lets you select the image like any other object.
- Renderable: Renders the image as a part of the assembly in the Render workspace.
Adjust image position with the manipulator handles on the image or specify values in the dialog:
- X Distance: Specify a distance to move in the X direction.
- X Distance: Specify a distance to move in the Y direction.
- Z Angle: Specify a value to rotate around the Z axis.
In the dialog, adjust the Scale values:
- Scale X: Specify a scale value in the X direction.
- Scale Y: Specify a scale value in the Y direction.
- Scale XY: Specify a scale in the both the X and Y axes to maintain the aspect ratio.
Optionally, flip the image horizontally or vertically:
- Horizontal Flip: Mirror the image horizontally.
- Vertical Flip: Mirror the image vertically.
Click OK.
The image displays in the canvas according to the settings you specified.
Tips
- Use Calibrate to scale your canvas to a specific size so you can use it as a reference for your design.
- For a successful import, ensure the file extension matches the true file format. Supported file types include
PNG,JPG,JPEG,TIF, andTIFF.