Activity 3: Create the spout
In this activity, you
- Create a construction plane angled from the origin XY axis
- Create a construction plane offset from the angled plane
- Sketch an ellipse at the center of the back of the body, using the new offset plane; this is the profile for the start of the spout
- Create an angled construction plane that intersects the new ellipse along its horizontal axis
- Create a construction plane offset from the angled ellipse plane
- Create an ellipse on the new construction plane, to be used as the mouth profile for the spout
- Create the spout using the two elliptical profiles you have created
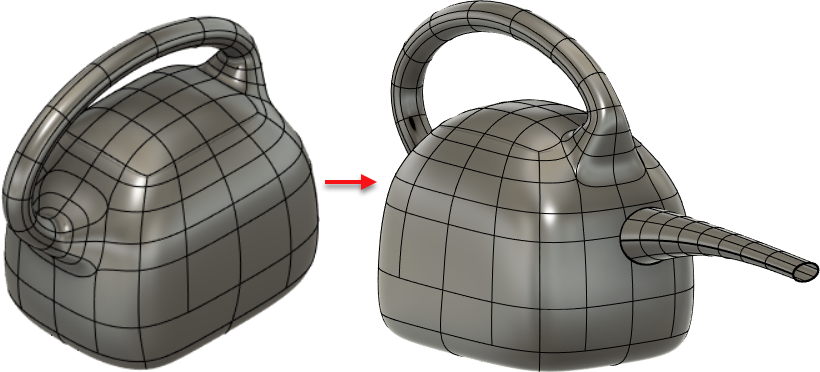
Pail with handle created in Activity 2 (left), and the finished example with a spout (right).
Prerequisites
- Open the file you saved at the end of activity 2.
Steps
Create a plane angled from the XY plane by 7 degrees.
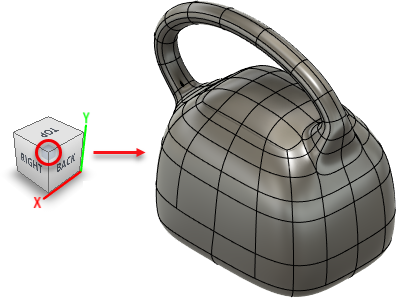
Click the top Right-Back corner of the ViewCube to rotate the model.
From the Form toolbar, click Construct > Plane at Angle.
Click the X-axis.
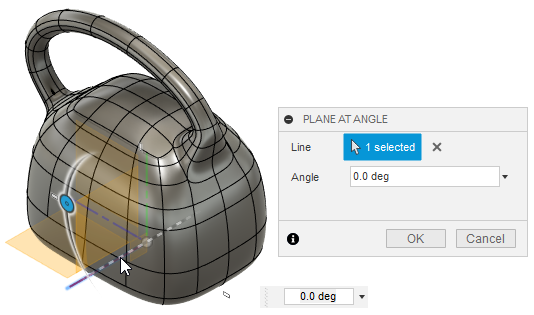
Drag downward on the handle to rotate the new plane by 7 degrees.
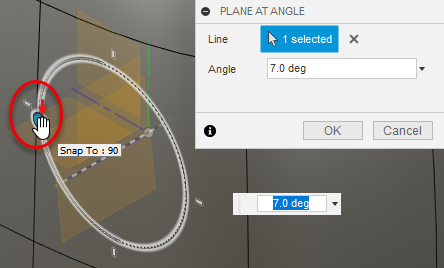
Tip: If you are unable to drag exactly 7 degrees, enter 7deg in the Angle box.
Click OK.
A plane is created at a 7 degree angle from the XY plane.
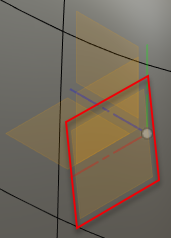
Create a plane that is offset from the angled plane by 155mm.
From the Form toolbar, click Construct > Offset Plane.
Click the angled plane you just created.
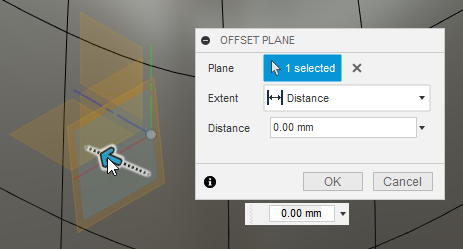
Drag outwards (to the back of the body).
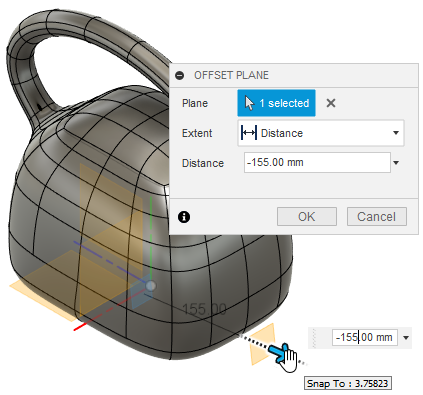
Enter 155mm in the distance box and click OK.
Now you can use this offset to draw an ellipse that will be used for the base of the watering pail spout.
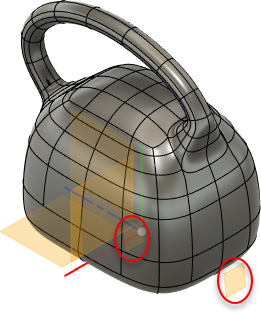
Sketch an ellipse at the center of the back of the body, on the offset plane you just created.
This ellipse will be one of two profiles used to create the spout.
Right-click the offset plane at the bottom of the design, then click Sketch.
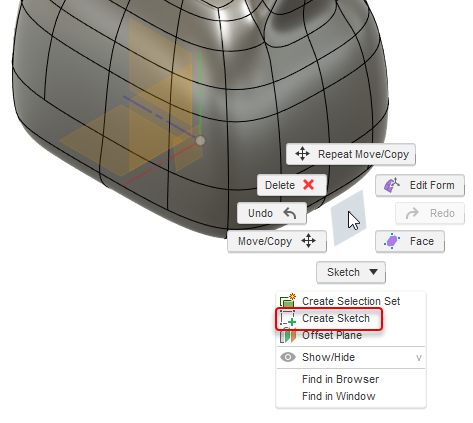
From the Sketch toolbar, click Create > Ellipse.
On the back side of the body, click the center of the segments to place the center point of your ellipse.
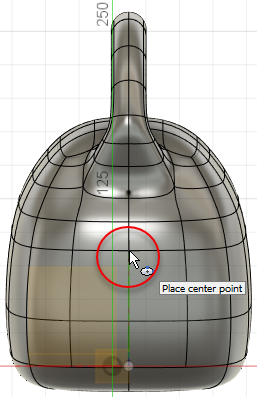
Click to the right of the center point to create the first axis point, and above the center point to create the ellipse.
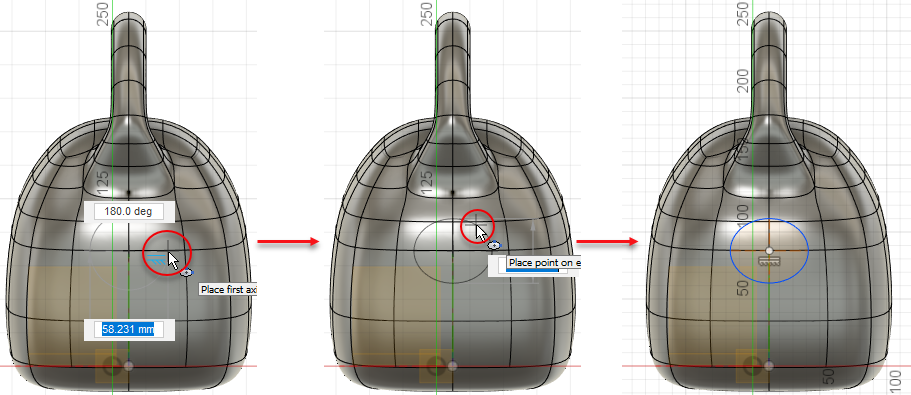
Set the height of the ellipse to 35mm and width to 45mm.
Click the ellipse, then click Dimension
 on the Sketch toolbar.
Click just above the ellipse to see its width radius.
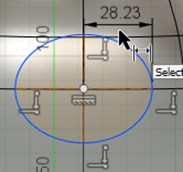
Double-click the width radius and enter a value of 22.5mm, so that the full width of the ellipse will be 45mm.
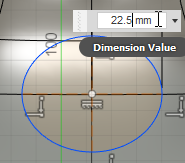
With Dimension still enabled, click the ellipse, then click to one side of the ellipse to see its height radius.
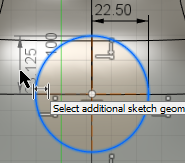
Double-click the height radius and enter 17.5mm, so the full height will be 35mm.
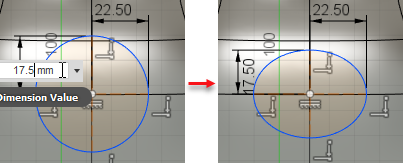
Click Finish Sketch.
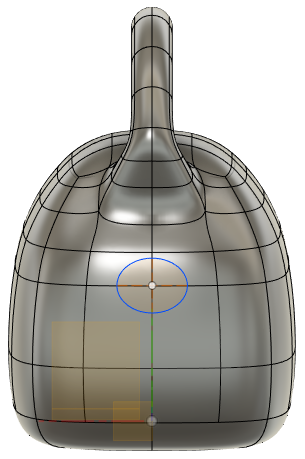
Create a plane that intersects the horizontal axis of the ellipse, with an angle of 5 degrees.
From the Form toolbar, click Construct > Plane at Angle.
Click the horizontal axis of the ellipse.
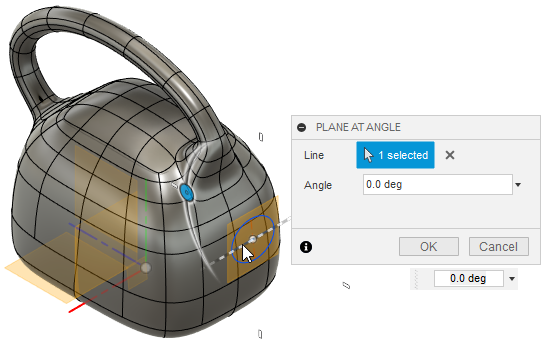
Click Right on the ViewCube and zoom in to see the new plane better.
Enter 5deg in the Angle box.
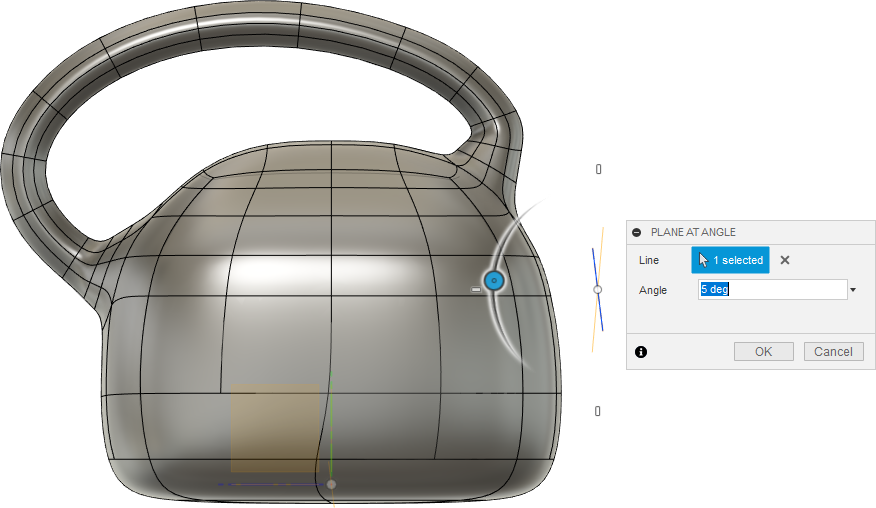
Click OK to create the angled plane.
Create a plane that is offset from the new angled plane by 200mm.
From the Form toolbar, click Construct > Offset Plane.
Click the angled plane you just created.
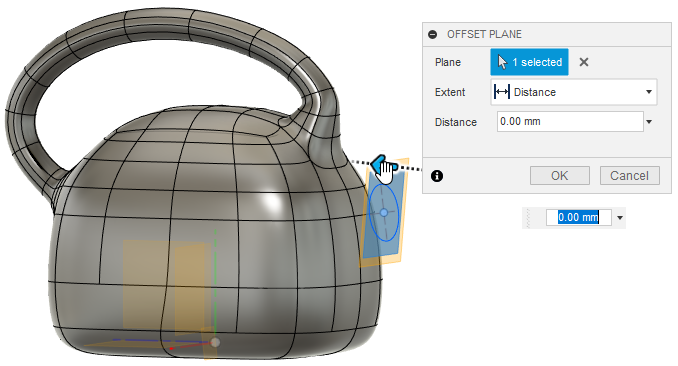
Drag away from the back of the body until the offset plane is 200mm away.
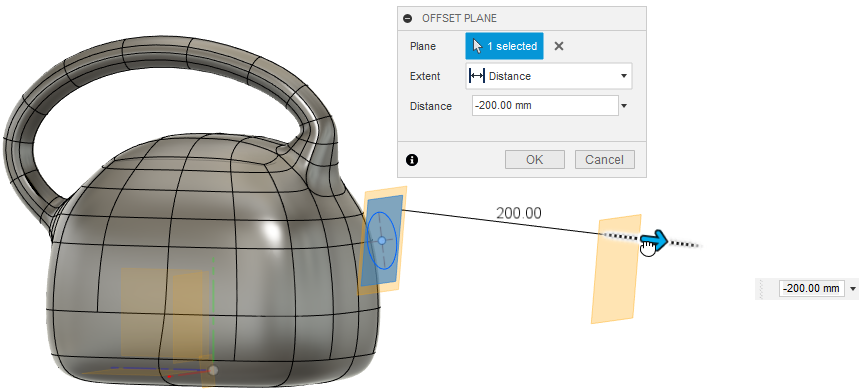
Click OK.
The offset plane is created. Now you can use this offset to draw an ellipse that will be used for the end of the watering pail spout.
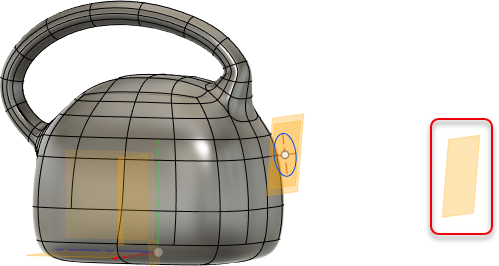
Create an ellipse on the new offset plane with height 15mm and width 25mm.
Note: This step describes a different method for dimensioning than used for the other ellipse in this tutorial. Try both methods and use what works best for you.
Right-click the new offset plane, then click Create Sketch.
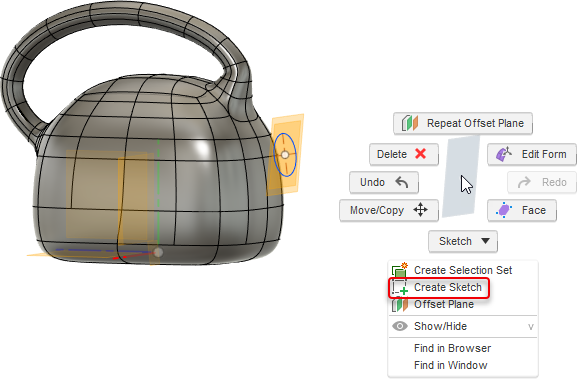
From the Sketch toolbar, click Create > Ellipse.
Click the top of the existing ellipse to set it as the center point of the new ellipse.
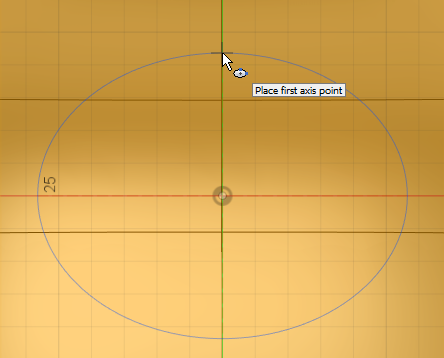
Mouse to the right along the horizontal axis until the width of the new ellipse reaches 25mm, then press Enter to set its width.
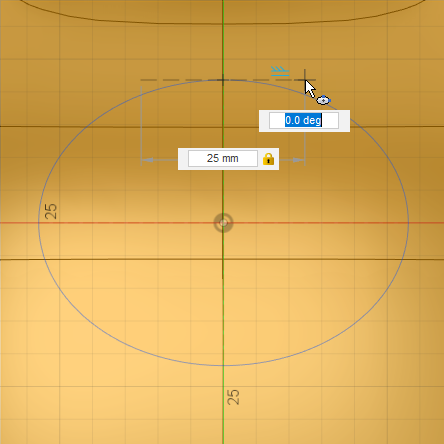
Mouse upward until the height of the new ellipse reaches 15mm, then press Enter to set its height.
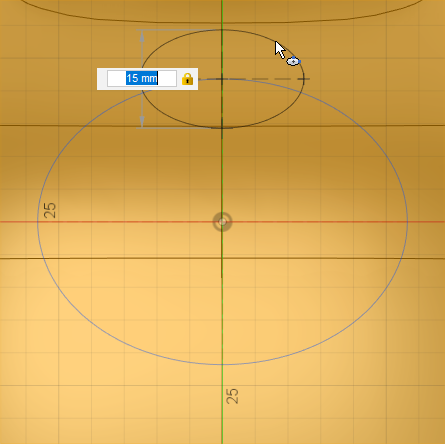
Click Finish Sketch.
The ellipse is created.
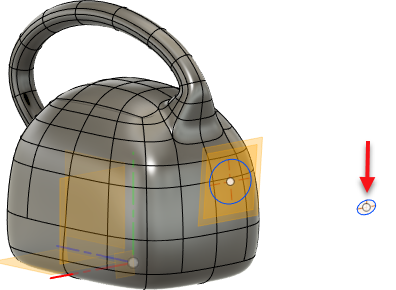
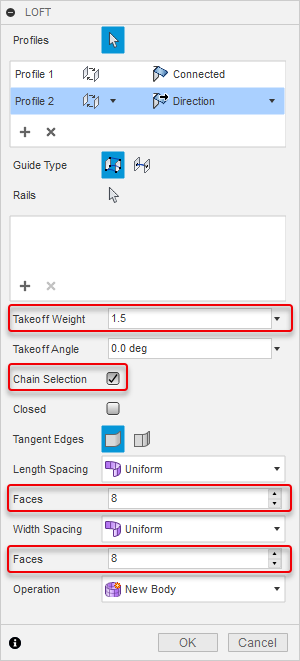
Create a spout using the two elliptical profiles you have created, with Chain Selection enabled, the loft of the smaller ellipse set to Direction, Takeoff Weight set to 1.5, and number of faces in both directions set to 8.
From the Form toolbar, click Create > Loft.
The Loft dialog displays.
With Profiles set to Select in the Loft dialog, click the ellipse closest to the body, then the ellipse further from the body.
This sets them as Profile 1 and Profile 2, respectively.
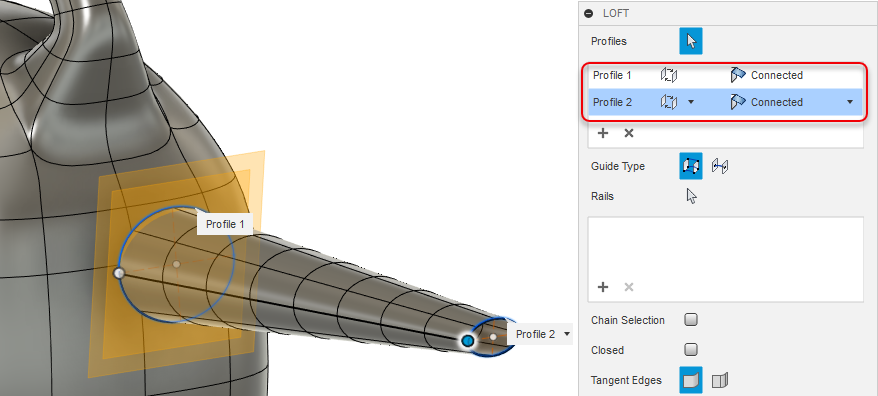
In the Loft dialog, set the loft type of the smaller ellipse profile (Profile 2) to Direction.
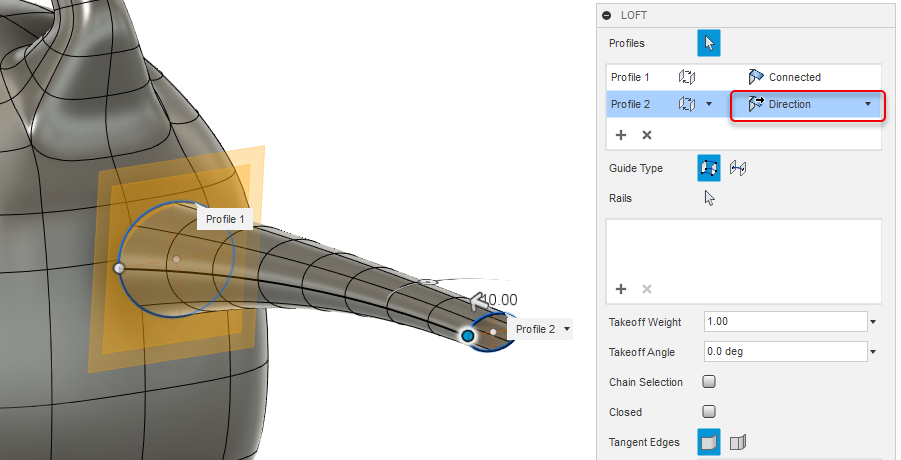
In the Loft dialog, set these values.
Takeoff Weight: 1.5
Chain Selection: Enabled
Faces: 8 (in both directions)
Toggle off visibility for all construction planes (Origin node and Construction node).
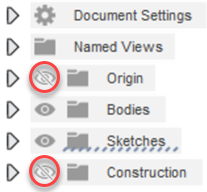
This hides the origin planes as well as the angled and offset planes you created to make the spout.
Click OK.
The spout is created.
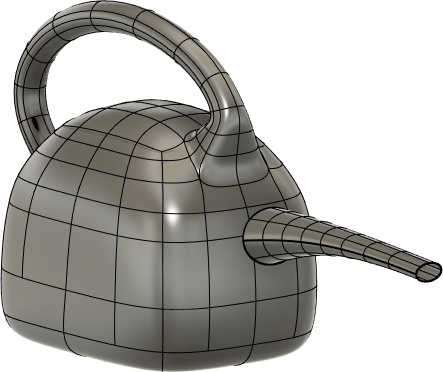
Save your work.
Activity 3 summary
In this activity, you
- Created a construction plane angled from the origin XY axis
- Created a construction plane offset from the angled plane
- Sketched an ellipse at the center of the back of the body, using the new offset plane; this was the profile for the start of the spout
- Created an angled construction plane that intersected the new ellipse along its horizontal axis
- Created a construction plane offset from the angled ellipse plane
- Created an ellipse on the new construction plane, to be used as the mouth profile for the spout
- Created the spout using the two elliptical profiles you created

Pail with handle created in Activity 2 (left), and the finished example with a spout (right).