Activity 2: Create the handle
In this activity, you
- Create a path for the handle using a Fit Point Spline
- Create a circular profile to use as a sweep for the handle
- Give shape to the handle using the sweep
- Create openings to use to merge the handle to the body
- Merge the handle to the two openings in the body
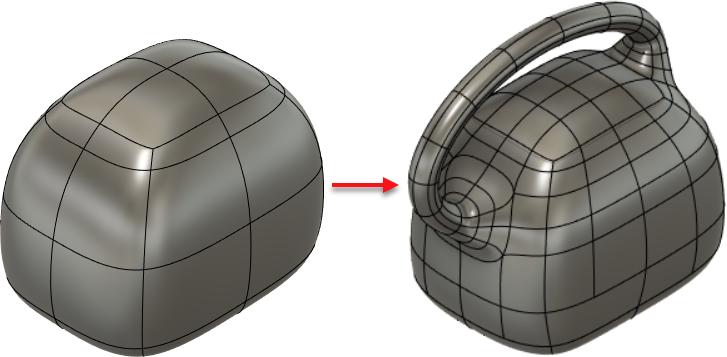
Beveled box created in Activity 1 (left), and the finished example with a handle (right).
Prerequisites
- Open the file you saved at the end of activity 1.
Steps
Create a Fit Point Spline to use as a path for the handle.
Toggle on the Origin node and toggle off the Bodies node to see the axis system.
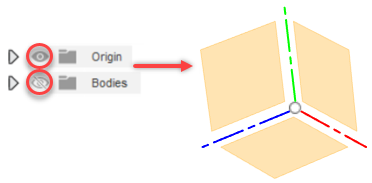
Right-click the YZ plane and click Create Sketch in the context menu.
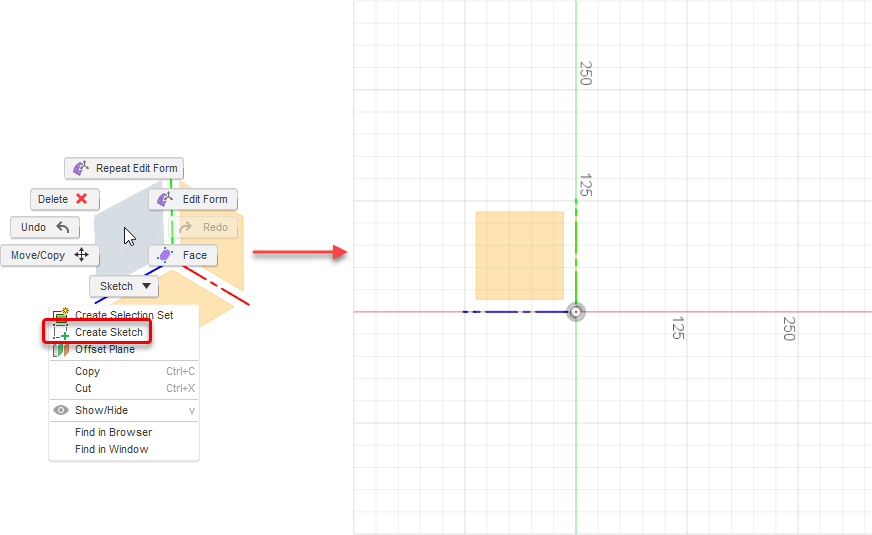
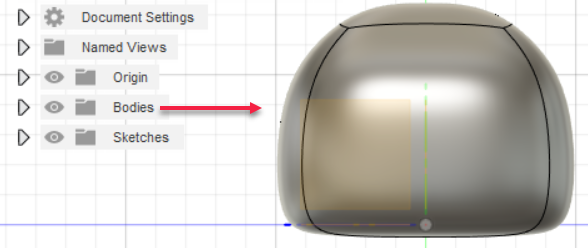
Toggle on visibility for the Bodies node.
From the Sketch toolbar, select Create > Spline > Fit Point Spline.
Click points in the shape of a handle.
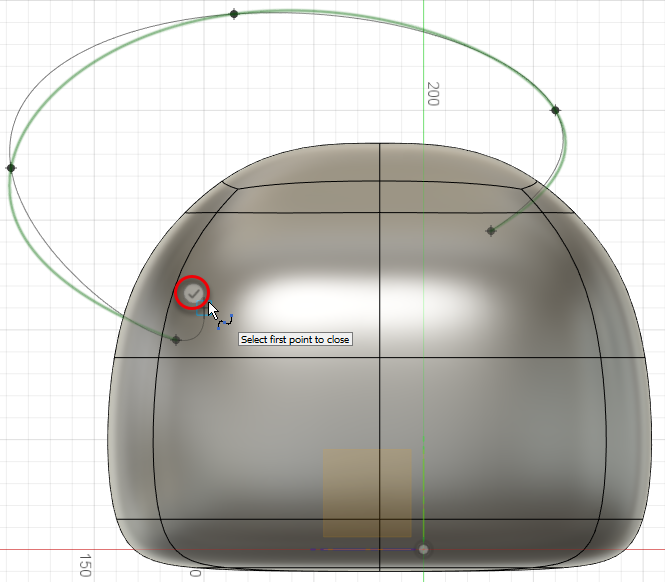
To finish drawing, click the Create and Continue spot
 near the last point.
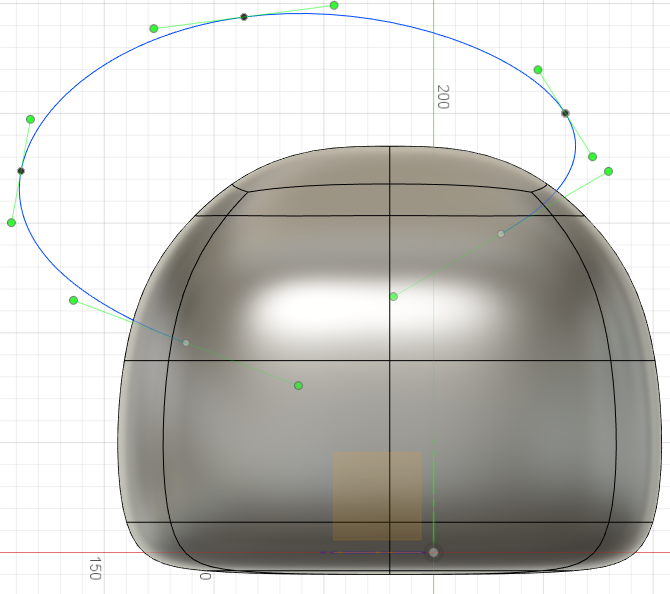
Click Finish Sketch.
The spline is created.
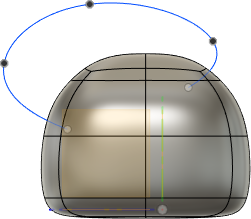
Create a circular profile to use as a sweep for the handle.
From the Form toolbar, click Construct > Plane Along Path.
This is so you can sketch a circular profile on a plane at the beginning of the spline.
Click the first segment of the path.
The plane perpendicular to the path is shown in orange.
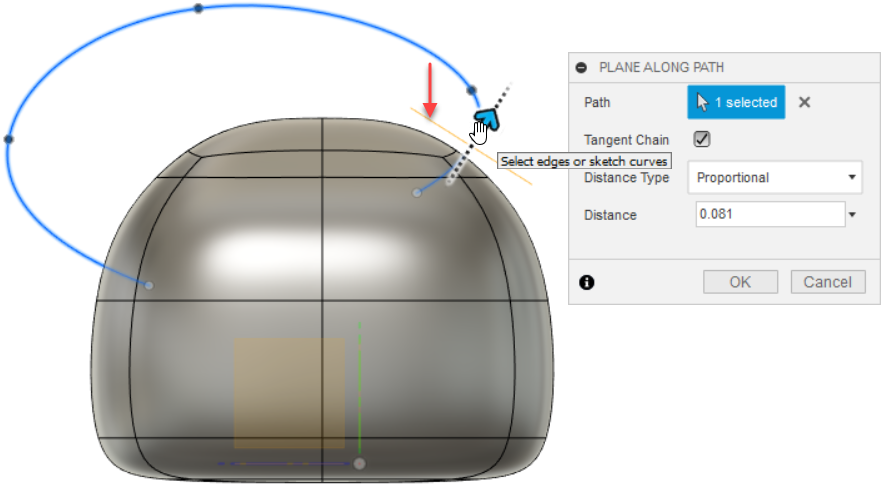
Drag all the way to the beginning of the spline so that the plane is moved to the start of the path.
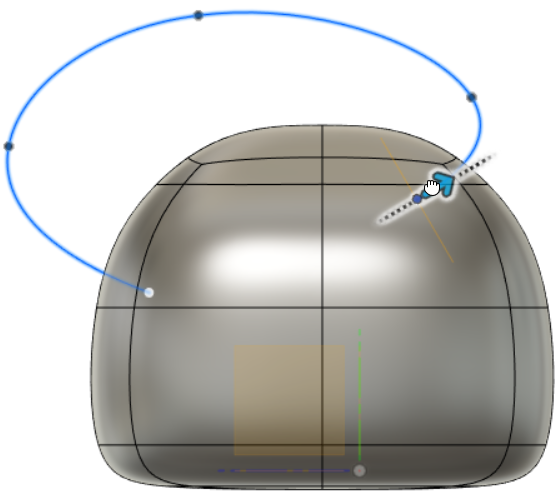
Click OK to close the Plane Along Path dialog.
Rotate the object and zoom in, then right-click the plane that you just moved and click Create Sketch.
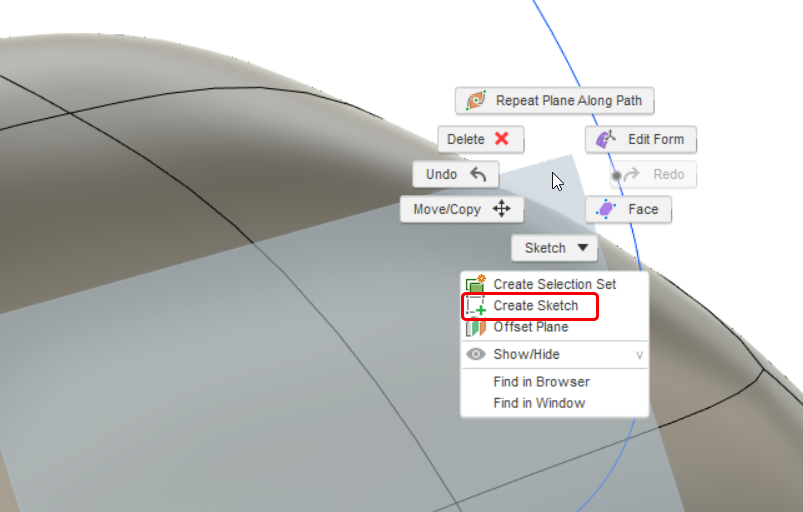
Tip: Click an area of the plane that is outside of the object to avoid selecting an object surface.
The object rotates and the Sketch Palette dialog displays.
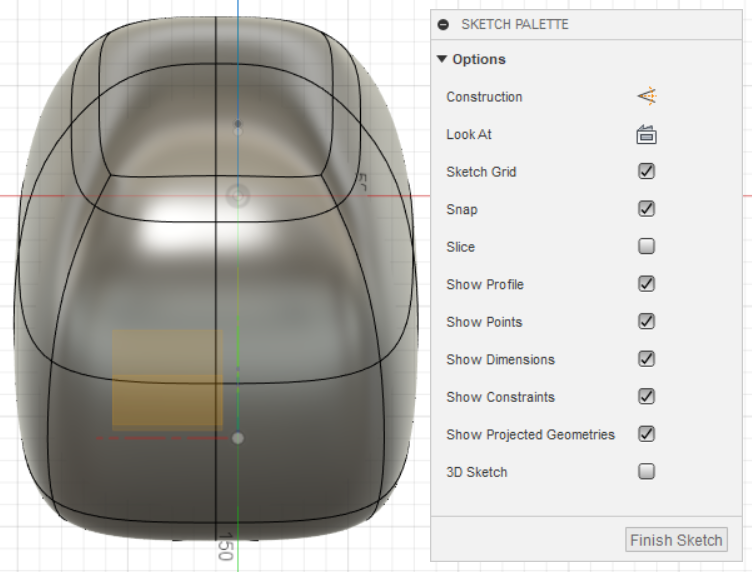
From the Sketch toolbar, click Create > Circle > Center Diameter Circle.
Drag outward from the point at the center of the plane (which is also the start point of the spline) to create a 25mm diameter circle.
Tip: While dragging, you can type the value to enter it in the diameter box if necessary.

Click Finish Sketch.
The circular profile is created.
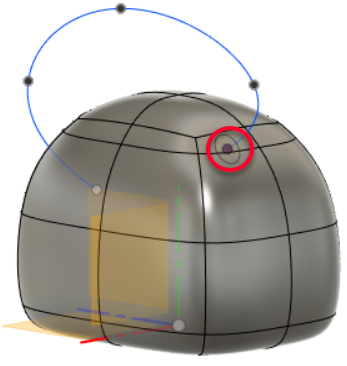
To give shape to the handle, create a sweep with these characteristics.
Profile Spacing: Curvature
Profile Faces: 8
Path Spacing: Curvature
Path Faces: 12
Chain Selection: enabled
Orientation: Perpendicular
Distance: 1.00
Operation: New Body
From the Form toolbar, click Create > Sweep.
With Profile set to Select in the Sweep dialog, click the circular profile.
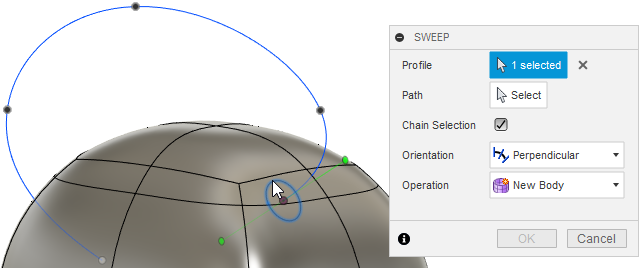
With Path set to Select, click the spline.
A handle is formed, and the Sweep dialog changes.
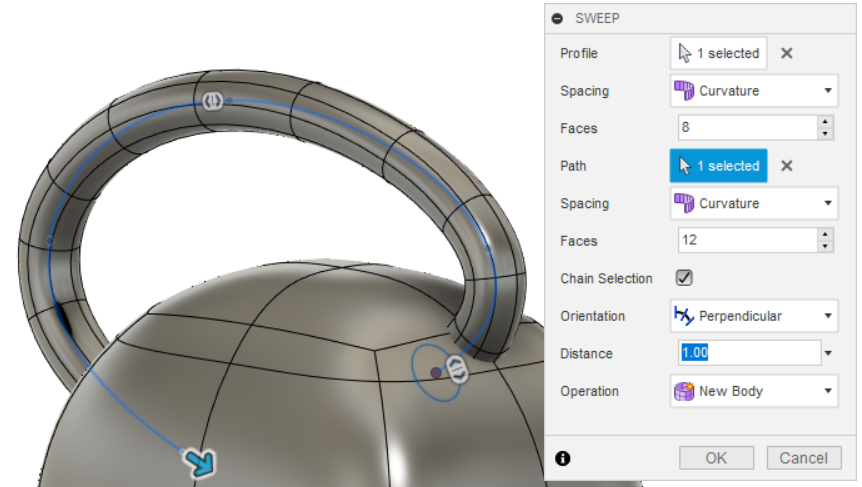
Enter these values in the Sweep dialog and click OK.
Profile Spacing: Curvature
Profile Faces: 8
Path Spacing: Curvature
Path Faces: 12
Chain Selection: enabled
Orientation: Perpendicular
Distance: 1.00
Operation: New Body
The handle is ready to merge to the body.
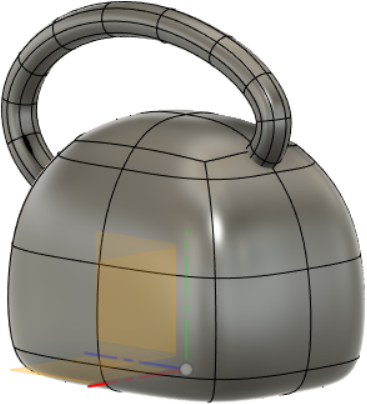
Create an opening to use to merge one side of the handle to the body.
Show the right side of the body and enable Select on the toolbar.
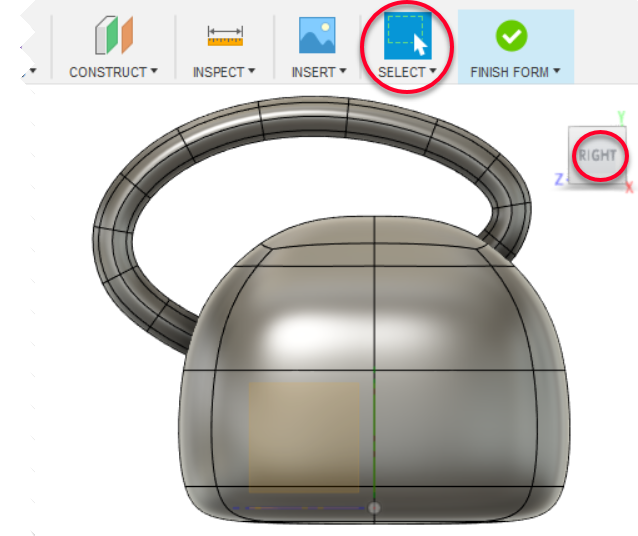
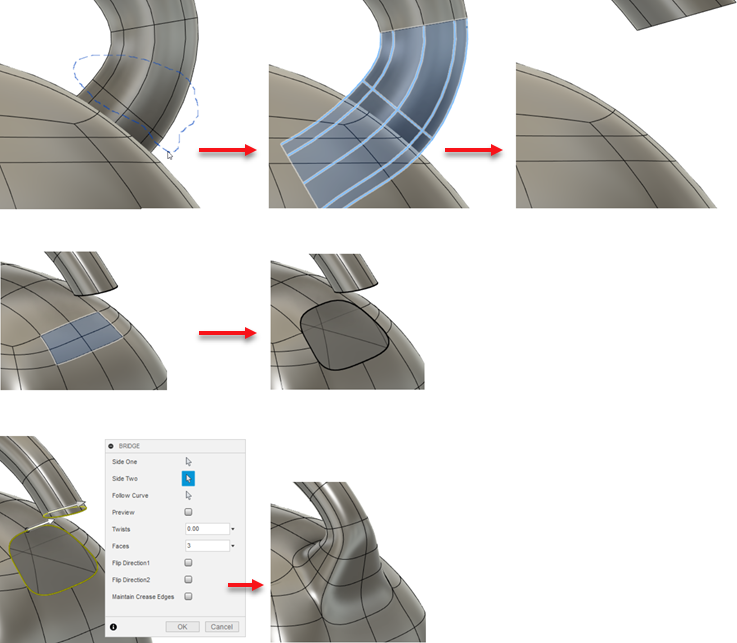
Marquee select the eight faces at the end of the handle and press Delete to delete them.

From the Form toolbar, click Modify > Subdivide, then set these values in the Subdivide dialog.
Insert Mode: Exact
Specify: Enabled
Length Faces and Width Faces: 1
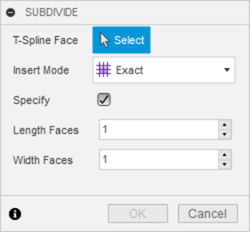
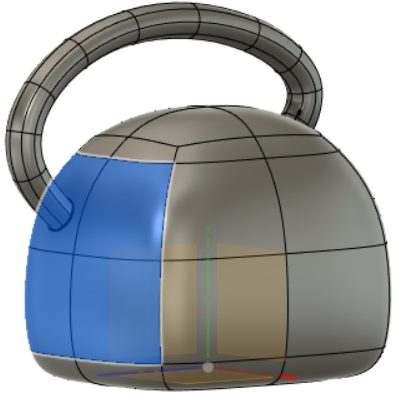
With T-Spline Face set to Select, click the four faces at the back of the body underneath the end of the handle.
Set Length Faces and Width Faces to 2.
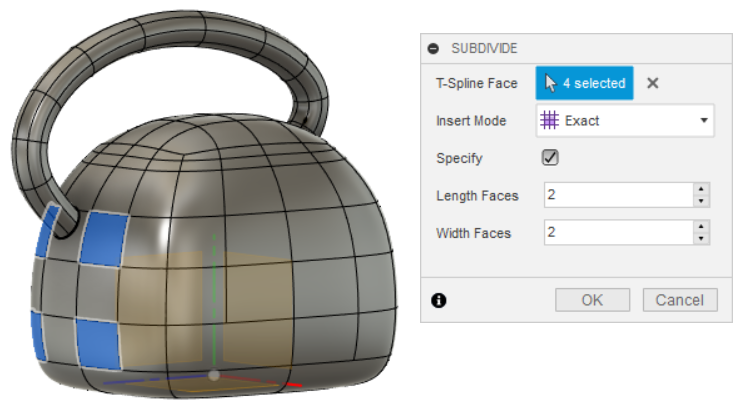
Click OK to close the Subdivide dialog and Shift-click the four faces underneath the end of the handle.
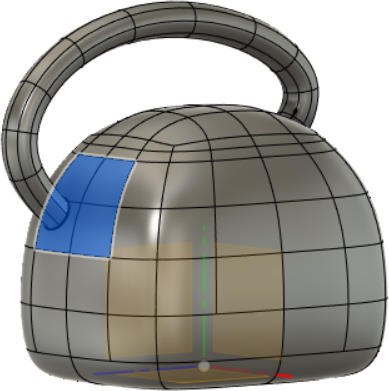
Press Delete to delete the four selected faces.
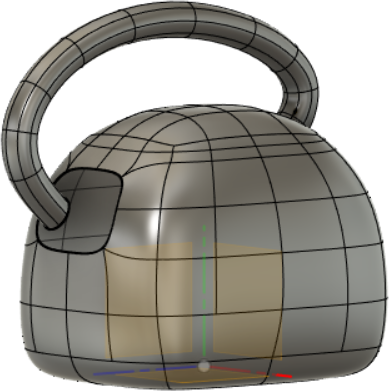
Merge the new opening at the back of the body with the handle opening, then create another opening and do the same for the front of the body.
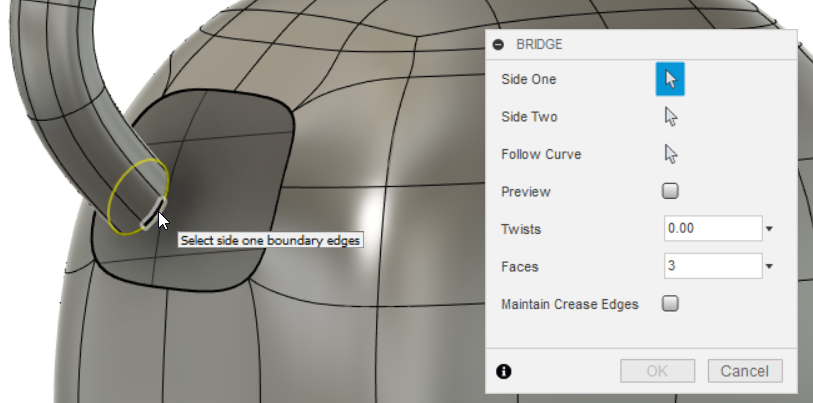
Use the Bridge feature to do this, with Faces set to 3.
From the toolbar, click Modify > Bridge.
With Side One set to Select
 , double-click an edge at the end of the handle.
With Side Two set to Select
 , double-click an edge of the opening in the body.
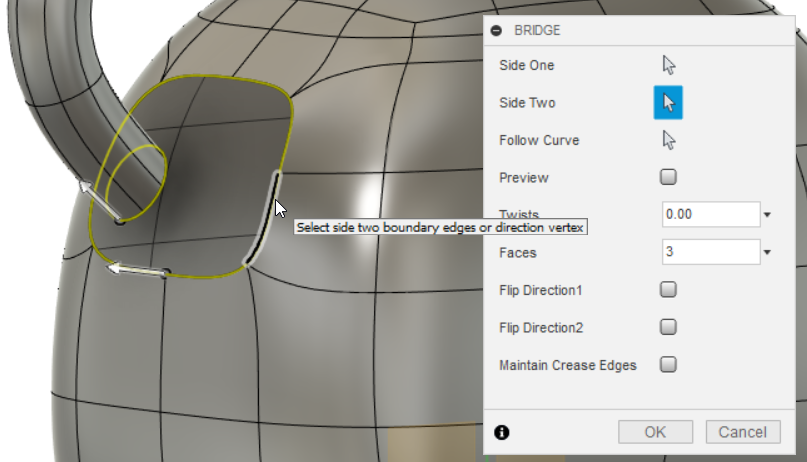
Set Faces to 3 and click OK.
The two openings are merged.
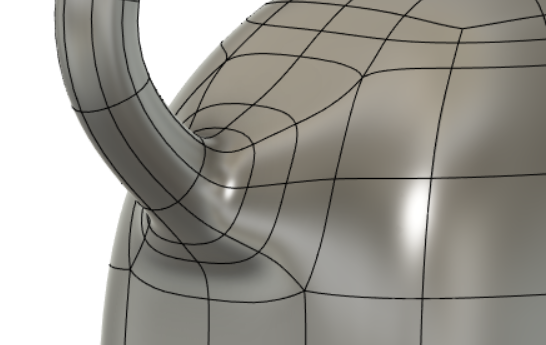
Use the same workflow to merge the other side of the handle.
Faces to delete at the front end of the handle: 16 (two sets).
Tip: On the toolbar, click Select > Freeform Selection so you can drag around the 16 faces.
Faces to delete from the body underneath the front end of the handle: 4
Save your work.
Activity 2 summary
In this activity, you
- Created a path for the handle using a Fit Point Spline
- Created a circular profile to use as a sweep for the handle
- Gave shape to the handle using the sweep
- Created openings to use to merge the handle to the body
- Merged the handle to the two openings in the body

Beveled box created in Activity 1 (left), and the finished example with a handle (right).