Activity 1: Setup a new thermal analysis
In this activity, you create Study 1 - Thermal in which you
- Define the mesh size
- Select the desired units system
- Change the model material. By default, the simulation study material is the same as the material defined in the Design workspace.
Note: The end goal of a simulation is to have results that are mesh independent. A typical workflow may include doing a mesh dependency study, changing the mesh to see the effect on the results. For this tutorial, you use a relatively coarse mesh to reduce computing time.
Note: The simulation units are independent of the units specified in the Design workspace.
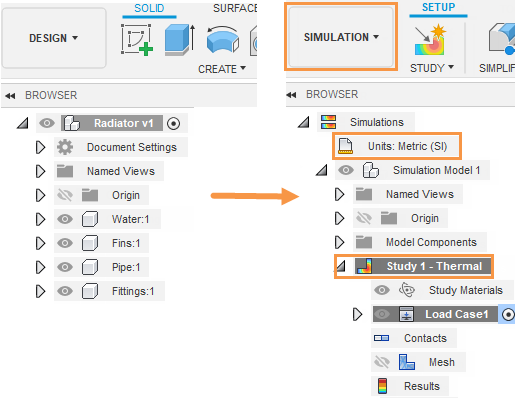
Browser when model is first imported (left). Browser after creating a new Thermal study (right).
Prerequisites
- Fusion is started.
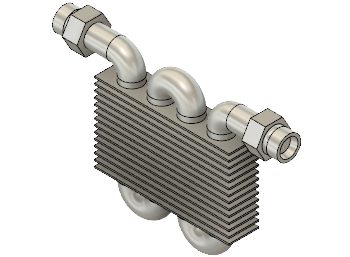
- Data file location: Samples > Basic Training > 11-Simulation > Radiator.
Steps
Open the starting shape model, Radiator, in the Z up direction from the Basic Training folder in the Data Panel.
- If the Data Panel is not currently shown, click
 Show Data Panel at the top of the screen.
 - The top level (home view) of the Data Panel is divided into two subsections: ALL PROJECTS and SAMPLES. Scroll down until you reach SAMPLES.
- Double-click the Basic Training folder to open it.
- Double-click the 11 - Simulation folder to open it.
- Double-click the Radiator model to open it in the canvas.
Note: The sample model is read-only, so you must save a copy of it to a personal project.- If the Data Panel is not currently shown, click
Identify a personal project in which to save the starting shape models.
- Click
 File > Save as.
 - Enter a name, such as Radiator, in the name field.
- Expand the arrow button next to the Location field.
- Locate and click on an existing project, or click New Project to start a new project.
- Click
Identify or create a folder in which to save the starting shape models.
- Double-click on a folder in the project to select it, or create a new folder.
- To create a new folder, click New Folder.
- Type a name, such as Radiator for the folder.
- Press Enter.
- Double-click the folder to make it the current file saving location.
- Click Save.
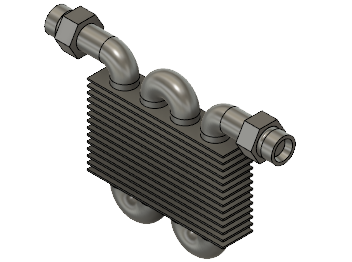
Create a new Thermal simulation study.
- Click on the Change Workspace drop-down menu at the top left end of the toolbar and select Simulation.
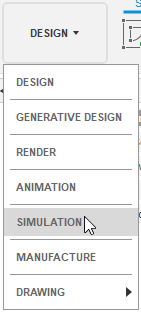
- In the New Studies dialog box, select
 Thermal.
- Click on the Change Workspace drop-down menu at the top left end of the toolbar and select Simulation.
Set the mesh size to 10 mm.
- In the upper right corner of the large thumbnail image, click the
 Settings icon to access the Settings dialog.
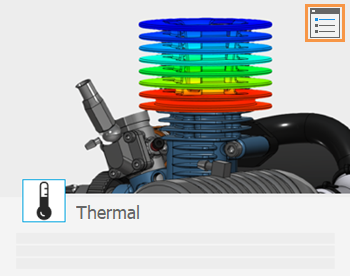
The General settings appear initially. - Select Mesh from the left frame of the dialog to display the mesh settings.
- Click Absolute Size and type 10 mm in the input field.
- Click Back to apply the changes.
- In the New Study dialog, click Create Study to create the study and close the dialog.
- In the upper right corner of the large thumbnail image, click the
Change the default units system to Metric (SI).
- In the Browser, hover over
 Units: Custom then click
  Edit.
Edit. - In the Units Settings dialog, choose Metric (SI) from the Default Unit Set drop-down list.
- Click OK to accept the change and close the dialog.
- In the Browser, hover over
Change the material for the radiator model to Aluminum. Materials need to have a conductivity, to run a thermal analysis.
Note: Materials defined in another workspace in Fusion are applied automatically to the Simulation workspace.- Click
 (Simulation workspace > Setup tab > Materials panel > Study Materials) to open the Study Materials dialog.
 - In the Study Materials dialog, click Select All in the bottom-left corner to select all components.
- Change the Study Materials for one of the drop-down menus to Aluminum.
- Click OK to close the Study Materials dialog.
- Click
Activity 1 summary
In this activity, you created a Thermal study in which you
- Defined the mesh size to be 10 mm
- Selected the Metric (SI) units system
- Changed the model material to Aluminum.