The following features can be exported from InfoDrainage to a GIS file:
- Inflows (including leader lines)
- Inflow Leader lines (a leader line shows the connectivity of an inflow)
- Stormwater Controls (including inlets and outlets)
- Junctions (including inlets and outlets)
- Inlets
- Outlets
- Connections
- Land Uses
- Soil Types
- 1D - 2D Analysis Contours (at maximum depths)
- 1D - 2D Analysis Triangles (at maximum depths)
| InfoDrainage Feature | GIS Feature Class |
| Inflow | Polygon |
| Inflow Leader Line | Polyline |
| Stormwater Control | Polygon |
| Junction | Point |
| Inlet | Point |
| Outlet | Point |
| Connection | Polyline |
| Land Uses | Polygon |
| Soil Types | Polygon |
| 1D - 2D Contours | Polyline |
| 1D - 2D Triangles | Polygon |
Currently supported GIS formats
Shapefile (.SHP)
A separate shapefile is written for each InfoDrainage feature type exported
The file name used for each feature type is the given filename, postfixed with an underscore and the feature type.
File Geodatabase (.GDB)
A separate table is written to the geodatabase for each feature type exported.
The GIS feature coordinates are exported in the current InfoDrainage units.
Non-ASCII Language Exporting
To ensure that all characters are exported correctly, please set your Operating System Locale appropriately for the language encoding desired. e.g. to ensure Chinese (Simplified) text exports to GIS files correctly, set your Operating System Locale to Chinese (Simplified, China)
Exporting to GIS file
There is a wizard to guide the user through the GIS feature export process. The wizard presents the user with a sequence of dialog boxes that lead the user through a series of well-defined steps. To progress through the steps in the wizard, press the Next button. To return to a previously completed step, press the Previous button.
You can use the Tree View to start the wizard. Right Click on the type of object that is to be exported and select 'Export to GIS'.
An entire phase can also be exported by right clicking the Tree View Phase and selecting 'Export to GIS'.
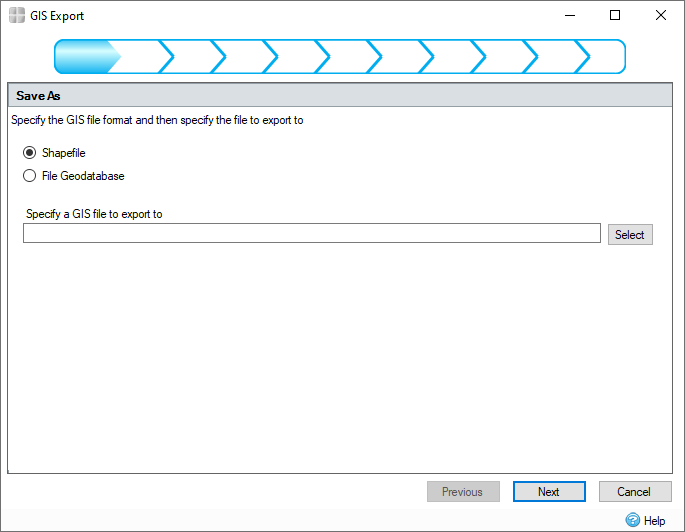
1.File Selection

This step allows you to specify the type of GIS file to be written and to locate the file/folder by pressing the Select button.
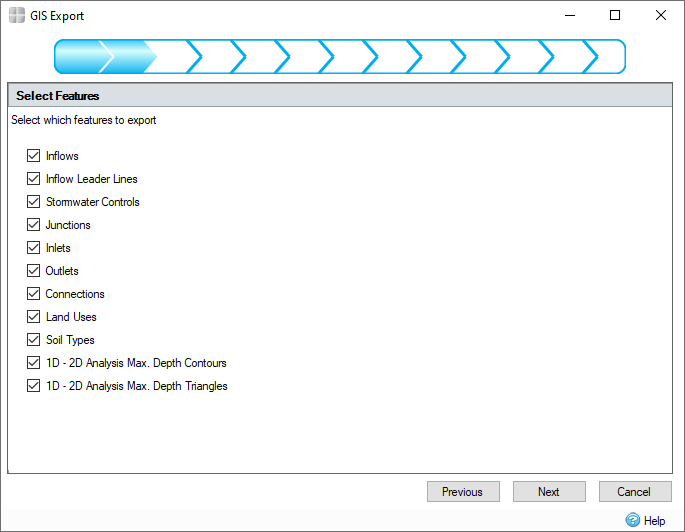
2. Feature Selection

If a feature type has been selected for export that contains multiple feature types to be exported (for example Phase), this step allows the user to select the features that will be exported. The selections here will modify the remaining number of wizard steps.
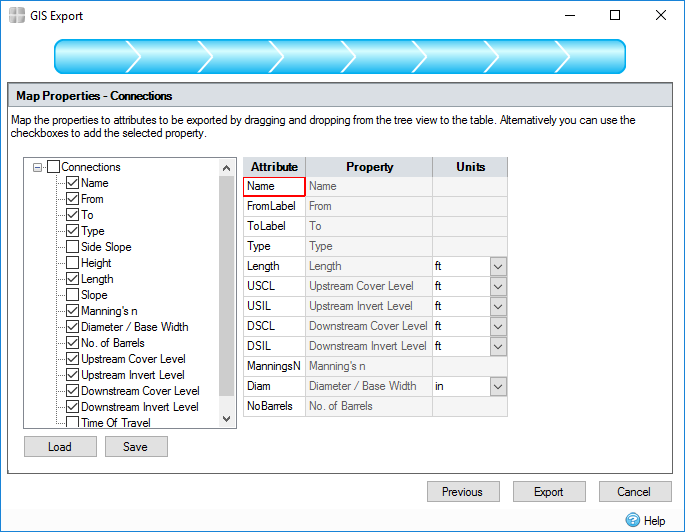
3. Property Association

The wizard will display to the user a property mapping step for each feature type being exported. Associated non-spatial information called attributes can be exported with each geographic feature. For example, a collection of manholes may be exported with their names, depths and diameters.
This step shows a control that allows the InfoDrainage properties to be mapped to attributes in the exported GIS tables. The left hand side of the control shows a tree view of the properties in the object that will be exported. The right hand side of the control shows a table of attributes that will be written to the GIS tables.
To make an association, a property can be dragged from the properties tree view and dropped in the attribute grid. Alternatively, simply check the required tree node. To remove an association, uncheck the tree node.
When an association has been made, if the property selected has units, the units column in the attribute table will be populated with a combo box, containing possible units for the attribute values. On export, the attribute values will be converted to this unit from the currently selected unit in the software.
After initial setup, the current association configuration can be saved by pressing the 'Save' button and a previously saved configuration can be loaded by pressing the 'Load' button.
At the final step on the wizard, pressing the 'Export' button will perform the export and create the GIS file(s). When this operation is complete, you will be shown a summary of the objects exported.

If you see a message that says that genuine Autodesk software is required, the GISDataProvider component has been tampered with or is corrupted. To resolve this, repair the installation by going to Add and Remove Programs.