
The Deformation widget appears in Attribute Editor shape tabs anytime that you add a deformer to geometry to let you view and manage deformers assigned to that shape.
To open the Attribute Editor: Deformation widget
- Click the <shape> tab in the
Attribute Editor of a shape that has deformers assigned and expand the
Deformation widget.
Note: The Attribute Editor Deformation widget is different from the Attribute Editor Deformer Attributes widget that appears in every <deformer> tab to let you add and remove geometry or create falloffs for a specific deformer.
Attribute Editor: Deformation widget
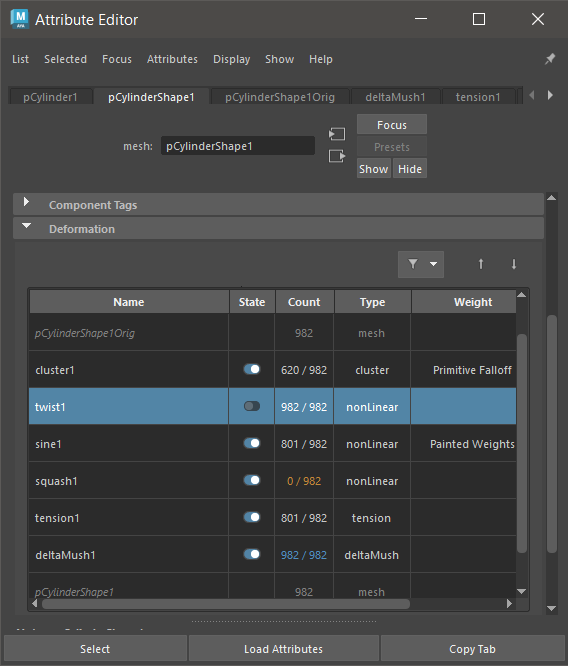
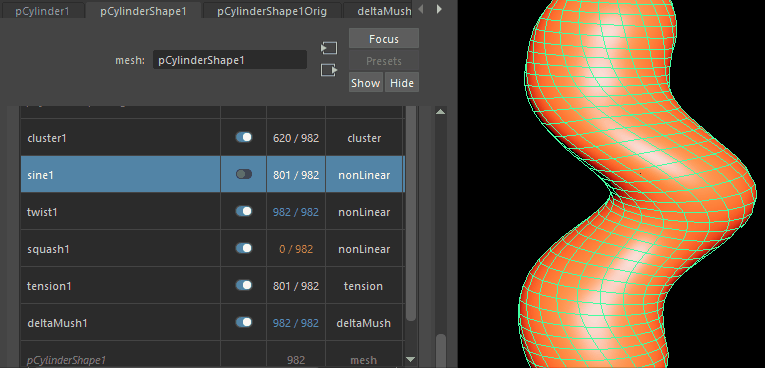
The Attribute Editor: Deformation widget lets you manage deformers applied to your geometry, letting you activate or disable, delete, rearrange, and paint deformer weights.
Deformation table
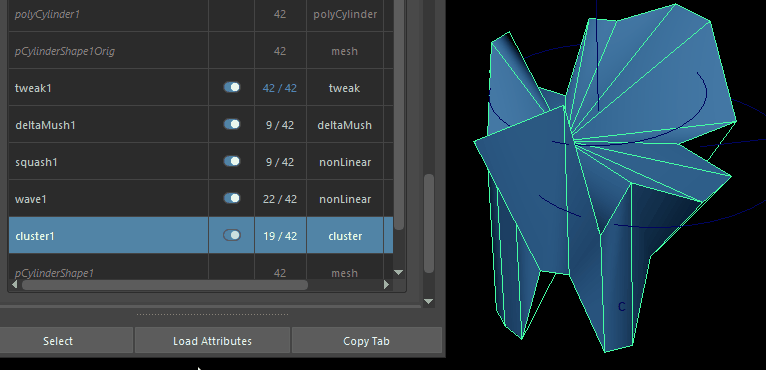
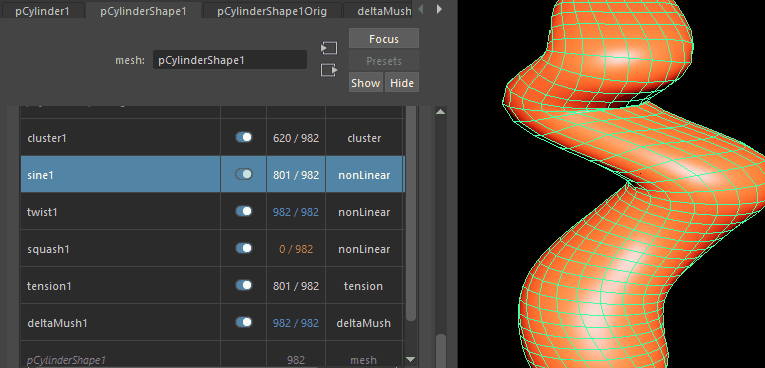
The Deformation widget consists of a table where you can see every deformer and topology modifier attached to an object.
 (Filter) (Filter)
|
Lets you choose what is shown in the Deformation widget table. |

 (Move deformer up/down) (Move deformer up/down)
|
Lets you reposition the deformer in the deformation chain. |
| Name | The name of the corresponding deformer. |
| State | Lets you activate or disable the corresponding deformer. |
| Count | Shows the number of vertices affected by the deformation / the total number of vertices in the shape.
For example, a cube that has a deformer applied to all of it will show 8/8 to indicate that the deformation affects all eight vertices. However, a cube with a deformer applied to only two vertices shows 2/8. 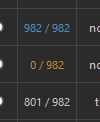 The Count column numbers appear in different colors:
|
| Type | Shows what kind of object, for example, a nonlinear deformer, or a mesh. |
| Weight | Shows the type of weighting applied to the deformer, if any. |
Deformation widget context menu
- Select Node
- Switches the Attribute Editor to the tab for the selected node, for example, the deformer, or shape node, unless the Deformation widget is pinned.
- Select Components
-
Right-click a deformer and choose Select Components to view the affected components
- Shows the components affected by the selected deformer.
- Select Falloff
- Opens the Falloff tab, if any, for the selected deformer. This option is disabled if no falloff is present on the deformer.
- Enable/Disable Deformer
-
Right-click a deformer and choose Enable/Disable Deformer to activate or disable the affected components
- Turns the deformation effect of the selected deformer off or on. You can do this with the switches in the State column
- Weights Visualization
-
Right-click a deformer and choose Weights Visualization to view the shape's deformer weighting
- Lets you show the deformer weighting (if any) on the shape. An
 icon appears next to the deformer name to indicate that weighting is shown.
- Painted Weights
- Opens a menu where you can activate weight painting on the selected deformation. You can also delete any weight painting, if applicable. See Paint skin weights and Paint skin weights tool.
- To exit Paint Deformer mode, select another tool, or press
Q to activate the selection tool

 .
.
- Reorder Deformers
- Opens a menu to let you rearrange the deformers in the deformation table and the deformer chain. Changing the deformer order impacts the deformation of an object.
You can also use the Move deformer up/down
Move Up Moves up the selected deformer one row in the table/deformation chain. Move to Top Makes the selected deformer first in the deformation chain/moves it to the top of the table. Move Down Moves the selected deformer down one row in the table/deformation chain. Move to Bottom Makes the selected deformer last in the deformation chain/moves it to the last place in the table.
buttons at the top of the table.
- Remove Tweaks
- Turns off any adjustments that you made to the deformer after it has been applied to the shape. See Point tweaking objects (Tweak node) for information about Tweaks.