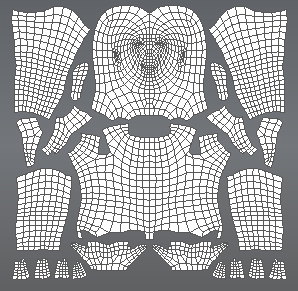
You can use Flatten to UV Space to perform basic repositioning of UV texture coordinates on a flattened 2D version of a model.

To adjust basic UV positions
- Select the model(s) whose UV positions you want to adjust.
You can flatten multiple objects at once by selecting them with the Objects selection tool.
- Select UVs & Maps > Flatten to UV Space (Hotkey: Alt + T).
A flattened copy of the selected model is created with vertex positions that are identical to the UV texture coordinates on the original model. The model appears unfolded exactly like its associated UVs, generally in multiple flattened pieces.
The original 3D version of the model is temporarily invisible. By default, the flattened model appears in the same camera position as the 3D version.
 Note: If you want the flattened model to automatically appear in an orthographic view (planar to the view), turn on the Autofocus on Flatten preference located in the Focus preferences. Otherwise, the model appears flattened relative to the current camera position.
If you flatten multiple meshes at once, they may appear stacked in the 3D View. You can select and translate each mesh to separate them for painting.
- From the Sculpt Tools tray, select the Pinch, Grab, or Smear tool.
- To display the original 3D version of the model, select
UVs & Maps > Unflatten from UV Space (Hotkey: Alt + T).
The UV edits modify the appearance of the applied texture map.Note: Use the Sculpt Tools in the 3D view, not the UV view to perform this task.