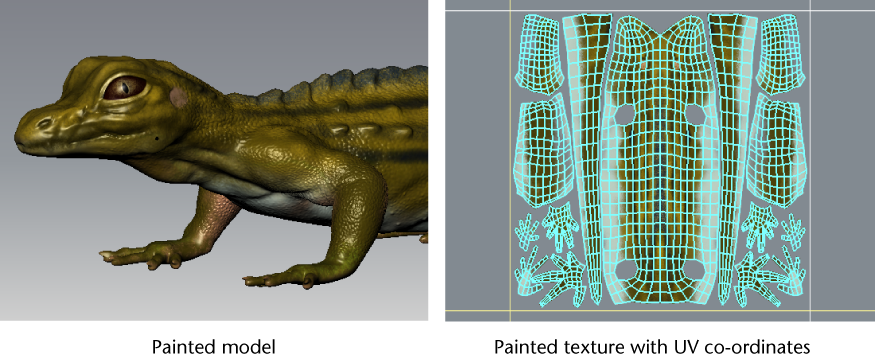
When you paint on your model you can preview the resulting 2D image in relation to the model’s UV texture coordinates (UVs) in the UV View.

- Apply paint to your model. See Paint your 3D model and Painting basics.
- Click the UV View tab (next to the 3D View tab) to switch to the UV View of your model.
This view lets you preview your painted image in 2D, including the UV texture coordinates for the model.
Note: If the UV mesh appears too dense in the UV View, press the Page Down key to display a lower subdivision level for the model. The UV display appears less dense and the painted image on the active paint layer is more visible as a result.Note: When multiple UV tiles exists on a model, only the paint associated with the currently loaded tile(s) appear in the UV View.
The grid spacing in the UV View represents a one by one UV tile area. That is, u1-v1, u2-v1, or u3-v1, and so on. You can dolly and track in the UV View using keyboard shortcuts similar to those for the 3D View.
|
To: |
Keyboard shortcut: (Windows and Linux) |
Keyboard shortcut: (Mac OS X) |
|---|---|---|
|
Track the camera |
Alt + Middle-drag |
Option + Middle-drag Command + Middle-drag |
|
Dolly the camera |
Alt + Right-drag |
Option + Right-drag Command + Right-drag |
You cannot paint on a model in Mudbox unless it has UVs. For more information, see Prepare a model for painting.
If UVs do not appear in the UV View it means either your model does not contain UV texture coordinates or that no UVs exist for that particular subdivision level.
If UVs do not exist on the model you will need to create and arrange them using a 3D modeling or UV editing application equipped with UV creation and editing tools. Maya and 3ds Max have tools for this purpose. If UVs exist only at the base level of the model, you can recreate them for the current subdivision level by selecting UVs & Maps > Recreate Level UVs.