Getting Started with the Navigation Lab
The Navigation Lab is a key tool for successfully using Autodesk Navigation in your game. Over the course of your integration and development, you will use the Navigation Lab to generate NavData for your own terrains, and to visually debug what is going on in your game in real time over a live connection.
The tutorial on this page serves two important purposes:
- It provides a quick introduction to the interface of the Navigation Lab. You'll learn how to connect the Navigation Lab to a running game, and how to control what you see.
- It shows how you can use the sample framework built into the Navigation Lab to get live demonstrations of some key features of the Navigation SDK. These samples demonstrate built-in features like data generation, path following and dynamic obstacles, and show how you can build other custom features like smart objects (e.g. jumps, doors and elevators) or higher-level behaviors (e.g. melee combat) on top of the built-in features.
Open bin/win<platform>_<toolset>_release-md/NavigationLab.exe . You will see the main window of the Navigation Lab:
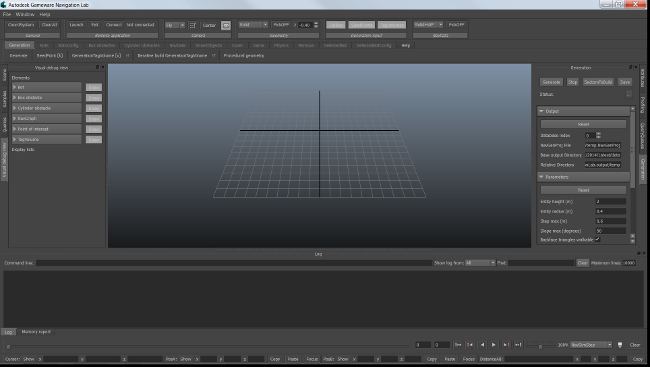
You should be presented with a series of drawings that present the main elements of the interface:
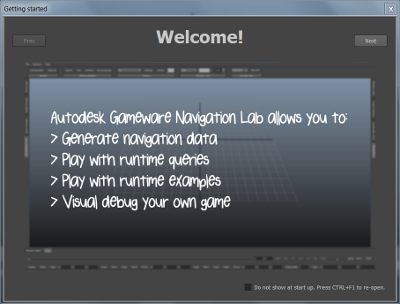
You can page through these drawings to get an overview of the controls related to the different workflows offered by the Navigation Lab. If at any point you need detailed information on any of the controls, see the tooltips in the interface.
The labgame is a small console application that contains a simple game engine that has been pre-integrated with Autodesk Navigation. It accepts commands that you send from the Navigation Lab, and shows you the results of your commands in the Navigation Lab through the same live visual debugging system that you will integrate into your own game.
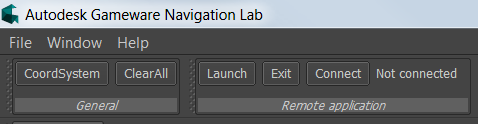
Click Launch in the Remote application toolbox.
Alternatively, you can simply open a sample; if you are not connected to the labgame when you start a sample, you will be asked if you want to launch and connect to the labgame on your local host.
The labgame runs on all platforms supported by Autodesk Navigation. You can launch it on any other machine or console on your network, and connect the Navigation Lab via TCP.
- Find the labgame executable for your target platform in one of the sub-directories under the bin directory. Deploy this executable to your target host and run it.
In the Navigation Lab, click Connect in the Remote application toolbox.
You will be prompted to provide some information about the host to which you want to connect.

If the host running your game is displayed in the Detected Servers list, you can select it and click Connect.
If not, enter the IP address of the host in the Address field. Leave the default port number.
When you initiate a connection to a running game, the Disconnect button in the Remote application toolbox becomes highlighted. You can click this button at any time to disconnect or to stop retrying an unsuccessful connection attempt.
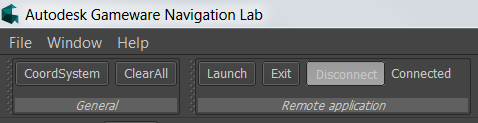
A successful connection is indicated in the Log window, and in the output printed by the labgame to the console.

Once you have successfully connected to the labgame, you can begin exploring the SDK samples supplied in the Navigation Lab. These samples are listed in the Samples panel, to the left of the main 3D view.
Open the avoidance folder, and click the FrontAvoidance entry.
The Navigation Lab opens a new window that shows you a description of the purpose of the sample, the location of the sample on disk, and the code of the sample.
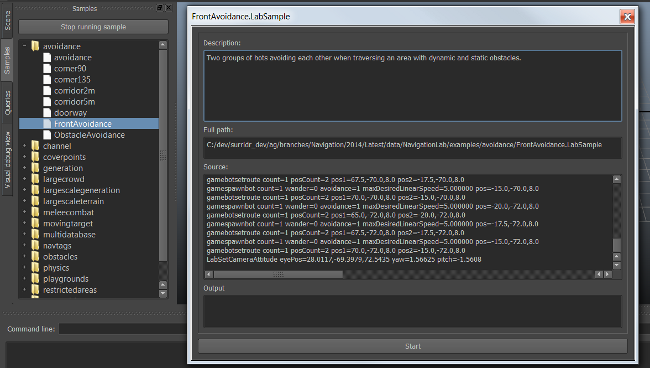
Note that the code consists of a series of commands, such as labopenfile, gamespawnbot, gamespawnboxobstacle, gamebotsetroute, etc. When you launch the sample, commands prefixed by lab are carried out in the Navigation Lab, and commands prefixed by game are sent to the labgame to be carried out in the game engine. You can also carry out commands yourself during the course of the sample. We'll look at different ways to do this later on.
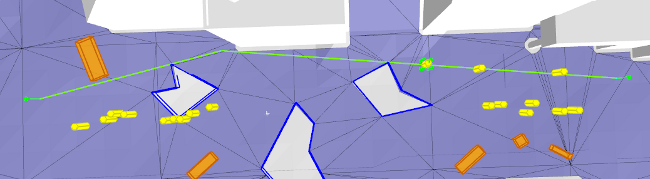
Click the Start button to launch the sample. (If you are not already connected to the labgame, you will be prompted to start it on your local computer.) When the sample loads, you should see an overhead view of a city street, with two groups of bots (yellow cylinders) walking from side to side. As they move, they alter their trajectories on the fly to avoid each other, the moving orange obstacles, and several static volumes tagged as non-walkable (areas with purple outlines that contain no NavMesh).

The actions panel, located immediately above the 3D view, contains many tabs that offer a wide variety of commands for spawning and interacting with different kinds of objects, and controlling what is happening in the game engine.

Most of these actions operate only when the Navigation Lab is connected to the labgame. They are primarily intended to provide an easy way to play with the SDK samples.
When you connect to your own game, by default these actions will have no effect. Although you have full control over what data gets rendered in the 3D view, manipulating the timeline, recording and playback, etc., you have limited possibilities for sending data from the Navigation Lab to your game, and you may not modify what is happening in your game (unless you choose to incorporate the command framework from the labengine project into your own game).
The main exception is the Generation tab, which only functions when the Navigation Lab is not connected to any game engine.
By default, you'll be using a flying camera, which you can move forward, backward and side-to-side using the arrow keys or the keys at the top left of your keyboard (the WASD keys on English keyboards). Use the mouse to rotate the view, and the mouse wheel to move up and down on the vertical axis.
Other camera modes and configuration values are available in the Camera toolbox at the top of the main window. See also Moving in the 3D View.
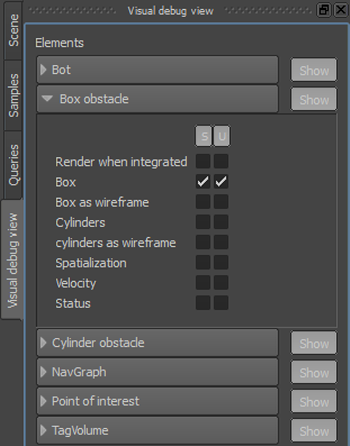
Open the Visual debug view panel to the left of the 3D view. Here, you can show and hide the different categories of data sent to the Navigation Lab by the game through the visual debugging system, such as bots and obstacles.
When you expand a category in the Visual debug view, you can show and hide particular items of information about the selected category. Note that you can configure separately what is rendered for instances that are selected in the 3D view, and what is rendered for instances that are not selected.
You can use the Geometry and NavData toolboxes above the 3D view to control the way the NavMesh and the terrain model are rendered.

Note that to conserve bandwidth, these items are not sent by the game to the Navigation Lab by the visual debugging system. Instead, when you debug your own game, the data files can be loaded automatically or on-demand from a location on your local machine. In this case, however, the built-in samples include commands that instruct the Navigation Lab to load the desired terrain and generate its NavData at startup.
Control-click any visual debugging object in the 3D view to select it. The 3D view will surround the object with a green, axis-aligned selection indicator box, and may render other information about the selected object.
- For example, control-click any of the moving yellow cylinders that represent the bots or characters in the game. You should also see the current path being followed by the selected bot.
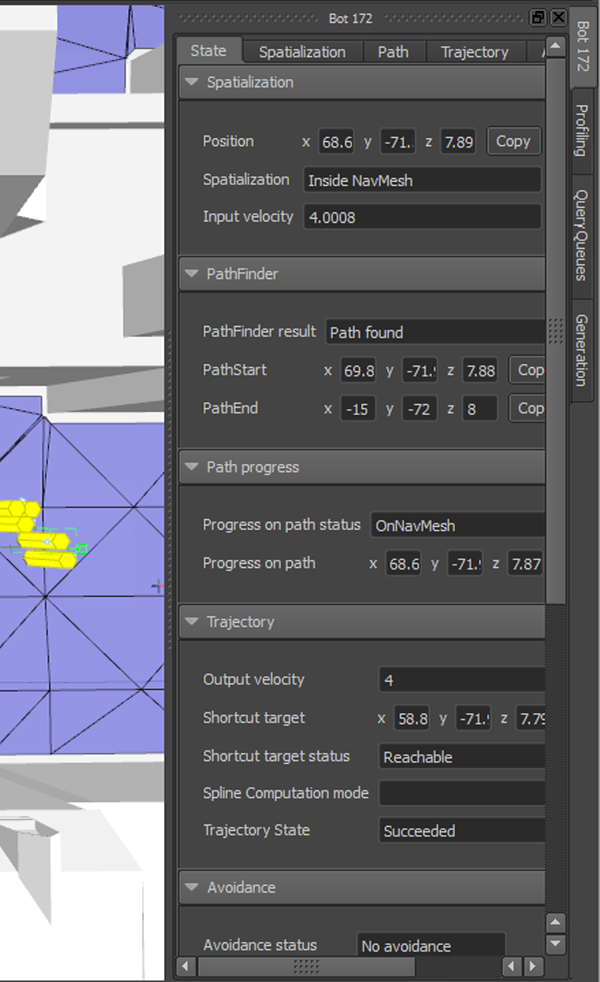
To view a list of properties for the selected object, open its panel on the right of the 3D view.
- For example, the panel for your bot indicates its current position, status of its path finding, and so on. You can also edit certain properties in the Spatialization, Path, Trajectory, and Avoidance tabs in the panel.
Additionally, you can control your selected object using the commands in the SelectedBot tab in the actions panel above the 3D view. This tab provides commands such as, for controlling where the Bot goes, what level of visual debugging information it sends to the Navigation Lab, removing the Bot completely from the game, and others. For instance, you can send a bot to a new destination by selecting Set target, or create a new set of waypoints for it to follow by selecting Set route.
If a keyboard shortcut appears after the command, you can use the shortcut instead of opening the contextual menu. For example, you can send the selected bot to a new location by simply pointing at the location and pressing the t key.
While you are connected to the labgame, you can spawn new objects in the scene, such as bots, dynamic obstacles, TagVolumes, etc. To spawn an object, select the appropriate command from one of the tabs in the action panel.
For example, to spawn a new bot, choose the Bots > Bot command (or just press the b key). You will be asked to point your cursor anywhere in the NavMesh to choose a spawning point for your new Bot. Press the spacebar to complete the command. The Navigation Lab sends a command to the labgame to create the Bot, which is visible in the Log window.
The labgame creates the new Bot, sets it up to find and follow paths to a random destination (or, if you spawn a bot with a route, between the waypoints you provided). It then begins sending back the visual debugging data about that Bot to the Navigation Lab. You should see it appear in the 3D view and begin following the first segment of its path.
You can configure many of the actions in the actions panel, particularly the spawning actions, by clicking the  icon next to the action button.
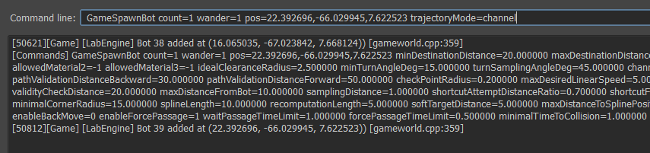
For example, you can configure new Bots to use the channel-based path following system by default. On the Bots tab, click the icon to the right of the Bot [b] action. In the Bot window, select the Trajectory tab, and set the trajectoryMode control to "Channel".

Any time you spawn a new Bot from now on, even after you close the window, the new Bot will automatically use these new settings. To revert back to the original settings, re-open the window and click the Reset button.
You can also paste commands directly into the Command line field at the top of the Log window. This allows you to customize all of the values sent by the commands, or to re-execute previous commands. Any parameters that you specify on the command line will override the default values for the action.
Smart objects are objects that can automatically take control of the way characters follow paths, in order to trigger custom movements or play custom animations.
Smart objects are typically specific to each game; they depend heavily on details about the gameplay scenario, and on technical considerations about the animation, physics and locomotion subsystems used in the game. The Autodesk Navigation SDK does not contain any generic smart objects; it attempts to provide the tools for you to make your own smart objects as easily as possible.
However, the labengine contains some sample smart objects that simulate common types of objects such as elevators, doors and jumping points. When you connect the Navigation Lab to the labgame, you can spawn these smart objects at any time. For example, the following steps create smart objects that Bots can use to get up to the rooftops.
- In the actions panel, open the SmartObjects tab.
- Click the Jump action.
Point your cursor anywhere on the ground at street level and press the spacebar. Point to the NavMesh on a rooftop, and press the spacebar again. Finally, press Enter to finalize the jump.
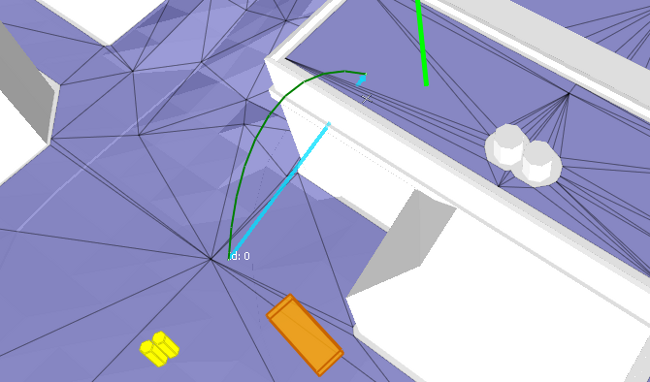
You should see a green arrow between the two points, which denotes an edge in a new NavGraph. For more information on NavGraphs, see NavData.
The new NavGraph is also automatically tagged with a custom data value that is associated with a smart object. You should see a green arc, which shows the trajectory that the smart object will make characters follow when they use the NavGraph in their paths.
- In the actions panel, click the Plank action.
Point your cursor anywhere on the same rooftop and press the spacebar. Point to the NavMesh on a different rooftop, and press the spacebar again. Finally, press Enter to finalize the plank.
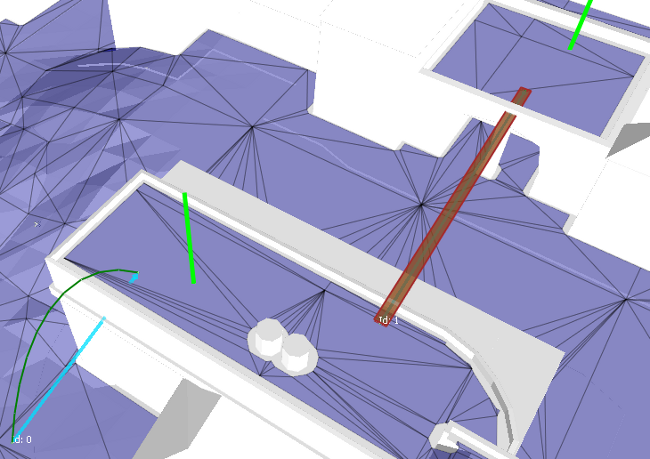
You should see another new NavGraph edge connecting the two rooftops, with a purple rectangle to visualize the location of its associated smart object.
Control-click any Bot to select it, hover the mouse cursor over the second rooftop, and press the t key to set that rooftop as the destination for the Bot.
The Bot should plan a new path that includes the jump object and the plank. As it follows the path, it turns blue each time a smart object like the jump takes full control of its movements to make it follow a custom trajectory. Note that the Bot does not turn blue when traversing the plank: the plank does not take full control over the character's movements, it uses the default path following system to direct the character along the NavGraph to the other end of the plank.
Smart objects can also control movement over an area of the NavMesh. For example:
- In the actions panel, click the Lava action.
Set the extents of the lava pool by pointing to the location of each corner and pressing the spacebar. Place it in the middle of the street, where the Bots are crossing the dynamic obstacles. Press Enter when you are done.
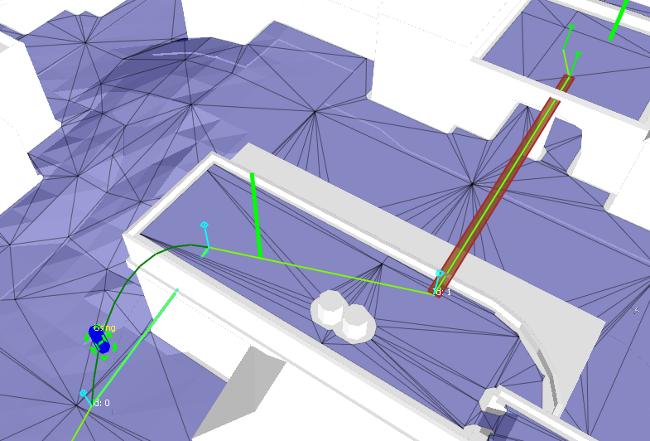
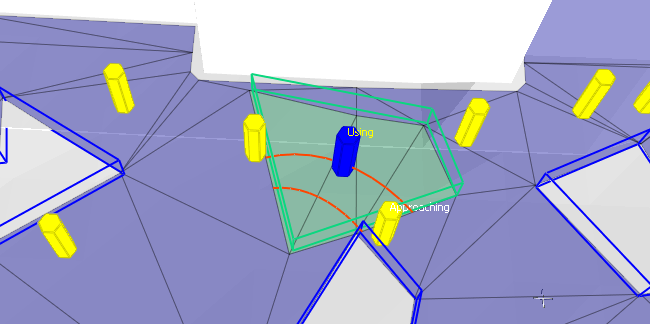
Note that the NavMesh in the area is automatically modified to reflect the presence of the smart object: the Spawn Lava command creates a TagVolume that marks the area with a custom data tag that is associated to a smart object. This smart object makes all Bots jump over the tagged area any time they use it in their paths. For example, in the following image, the blue Bot is in the process of jumping along the trajectory calculated for it by the smart object (shown in red), while the yellow Bot below it is approaching the tagged area.
For more examples of smart objects in the labgame and labengine, see the samples under the smartobjects category in the Samples panel.
For details on implementing your own smart objects in your own game, see Creating Smart Objects.
You can use the Navigation Lab to generate NavData for your own game levels, send them to the labgame, and use the commands provided by the sample framework to spawn bots, obstacles and even smart objects directly in your own terrain. You may find this useful for fast prototyping, or just to play around with the samples.
For details on generating NavData for your own terrains, see Integration Phase 2: Generating your First NavData.
- When you connect to the labgame, your NavData will be pushed automatically to the labgame.
- If you want to re-generate your NavData to try out spawning bots, obstacles and smart objects with a different set of NavData, you have to click Clear All in the Remote application toolbar, disconnect from the labgame, run your new generation, and re-connect to the labgame.
You can find the source code for all of the examples listed in the Samples panel under the data\labsamples sub-directory. Each sample is in its own .LabSample file, which contains a list of commands that are run in the Navigation Lab or sent to the labgame for execution.
You can create your own samples by creating a new .LabSample file in this directory, or by copying an existing .LabSample file and modifying its commands.
The tree view in the Samples panel reflects the current contents of the data\labsamples directory, so that you can launch your new file easily within the Navigation Lab.