Configure the Item Details tab
If you're a Fusion user, this feature is not available in the Components or Drawings workspaces. Learn more about system workspaces.
The Item Details tab is where you view and edit an item’s general information within a workspace. You can customize which fields appear and how they are organized from Workspace Manager.
Before you can configure the Item Details tab, you must first enable it for the workspace. See below for details.
Create and configure fields
From the main menu, go to Administration > Workspace Manager.
In the Workspace Manager, select the workspace you want to configure.
In the left-side panel, click Item details tab.
The Item details tab page opens.
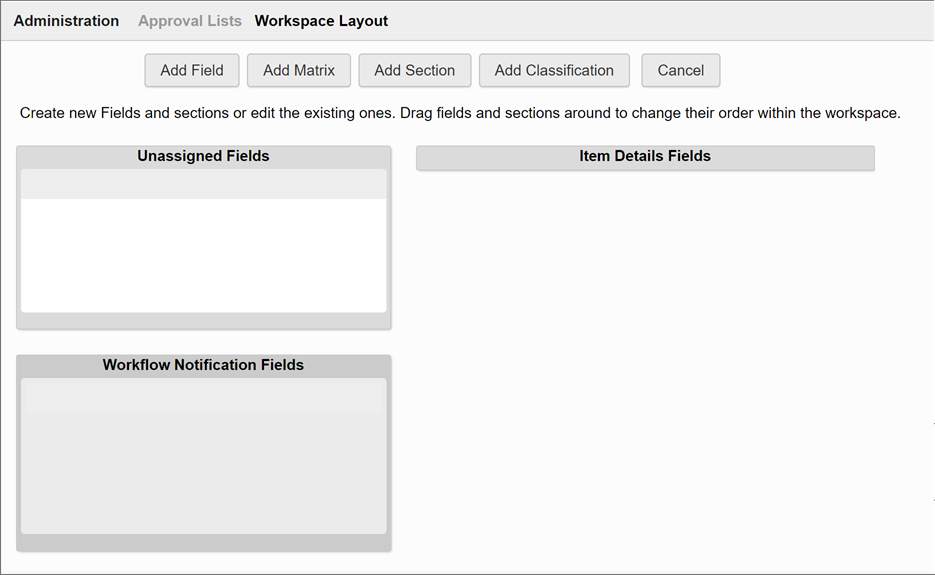
Click Add Field.
The Creating a Field window opens.
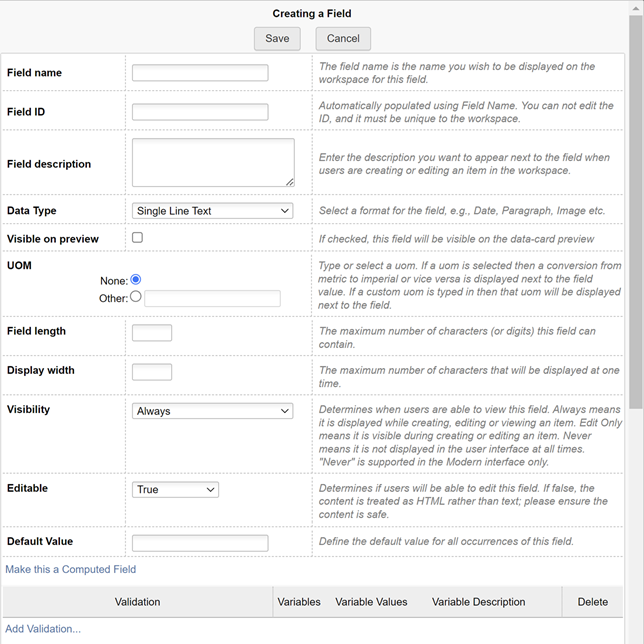
Enter a name and optional description of the field, and select the format you want to apply to the field in the Data Type drop-down.
For users to see the description when viewing the Item Details tab, they can click the information icon
 to the right of the field in question.
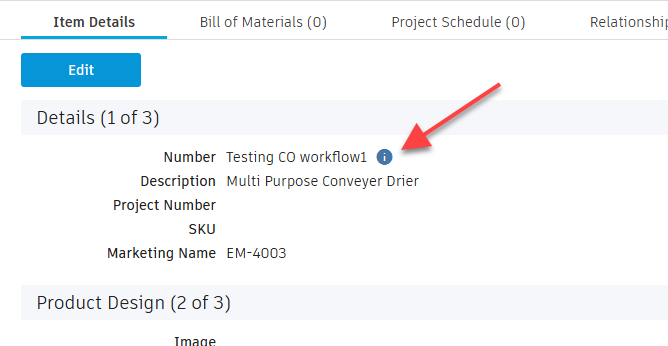
Turn on Visible on preview to display the field on the Item Preview data card.
Enter the remaining field details following the input hints. Details vary with the selected format.
Click Save.
Repeat steps 1 - 3 until you've added all the fields for the form.
For detailed help on creating and configuring fields, see Create fields.
- To edit a field, click the
 icon in the field container.
 - To clone a field, click the
 icon in the field container.
 - To delete a field, click the
 icon in the field container.
Adding sections and assigning fields
To make fields visible in the Item Details form, you must create form sections and assign the fields to them. Sections allow you to lay out fields in the Item Details form in a logical way that minimizes clutter. They also allow you to increase the granularity of user access to fields.
On the Item details tab page, click Add Section.
The Creating a Section window opens.
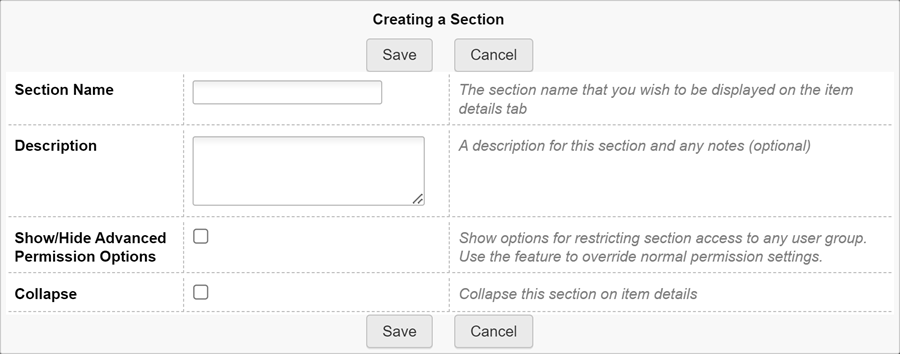
Fill in section details following the input hints.
To collapse the section on the tab by default, select Collapse.
Click Save.
Add any other sections in the same way.
- To edit a section, click the icon in the section container.
- To delete a section, click the icon in the section container.
Assign fields to a section
From Unassigned Fields, drag and drop a field onto a section container under Item Details Fields.
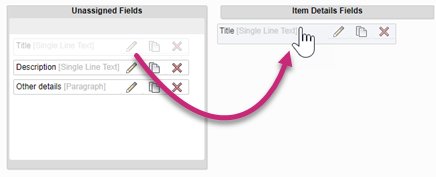
Assign other fields to the section in the same way.
Click Save Layout.
To change the order of fields in a section, drag and drop fields within the section's container as needed. To remove a field from a section, drag it back to Unassigned Fields.
Restricting access to sections by group
You can increase the granularity of user access to certain fields by assigning them to a section and restricting access to that section to specific user groups. When you restrict access to a section, you hide the section's fields from users in all other user groups no matter which permissions they are granted normally through users, groups and roles (see About Permissions). To restrict access to a section to one or more user groups:
On the Workspace Layout page, click the
icon in the section's container.In the Creating a Section window, select the Show/Hide Advanced Permission Options checkbox.
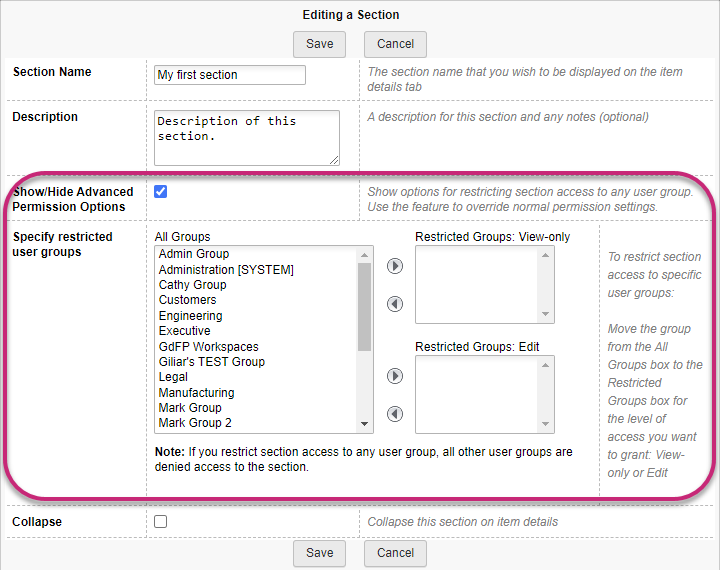
Under Specify restricted user groups, move a group or groups from the All Groups listbox to one of the Restricted Groups listboxes depending on the level of access you want to grant to the group: View-only or Edit.
Click Save.
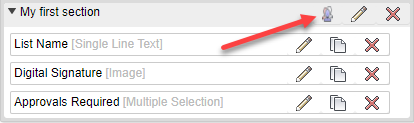
A user group icon appears next to the name in the section container.
Click Save Layout.
To mitigate these effects, the system displays a warning when you do any of the following:
- Restrict a section that has one or more fields with requirements validation,
- Apply requirements validation to a restricted field (see Field Validators),
- Choose a restricted field for a workspace descriptor (see Specify descriptor fields), and
- Select a restricted field to include in a workflow notification (see Configure the Item Details Form).
You can choose to ignore these warnings. However, make a note of how restricted fields are treated in the following:
- Reports: Not visible; cannot be selected for display columns, grouping, sorting, or filtering.
- Item Viewer: Not visible; cannot be selected for display columns or filtering.
- Imports: Not visible; cannot be mapped to.
- Item Preview: Section not visible. If all sections in the workspace are restricted, only Change and Owner Summary data appears.
- Workflow Notifications: Sent and visible to all users.
- Descriptors: Visible to all users.
- Warning: Restricted fields are visible to all users in the item Change Log. Grant access to the Change Log tab only to administrators who should see that history.
Adding tables and assigning fields to columns
You can lay out fields in the Item Details page in a table by adding a matrix to the form. Fields for tables are added in the same way as other fields except they are assigned to specific columns in the table.
Add table to Item Details tab
Add the fields you want to assign to the table columns.
On the Workspace Layout page, click Add Matrix.
A matrix container for the new table appears under Unassigned Fields. You can expand and collapse the matrix for editing.
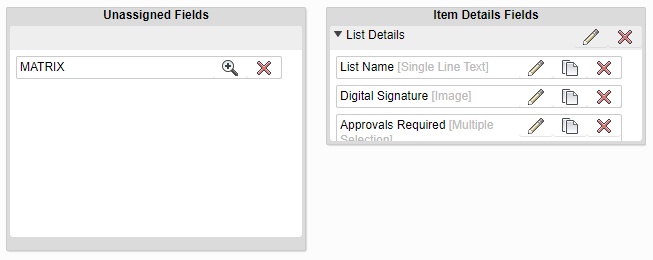
Drag and drop the matrix container onto an item details section.
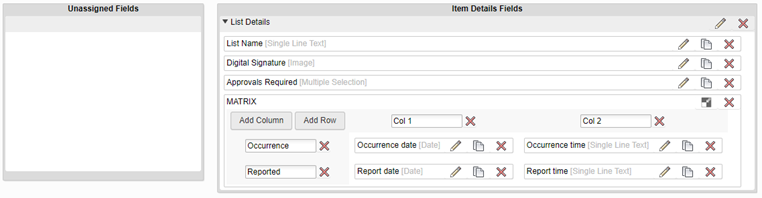
All tables start out with two columns and two rows. If needed, add more columns and rows to the table or delete columns and rows.
Enter labels for the table's columns and rows.
Assign fields to columns
Drag and drop an unassigned field onto the appropriate table cell in the matrix.
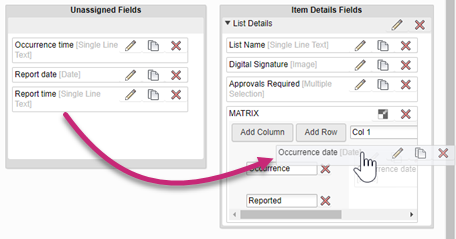
Continue to assign fields to table columns in the same way until all cells in the table are filled in.
- To remove a field from the table, drag its container back to Unassigned Fields.
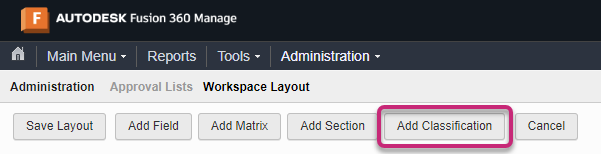
Add a classification section to Item Details tab
Click Add Classification.
A classification section is configured like any section on the Item Details tab. In the Add Classification dialog, fill in the section details.
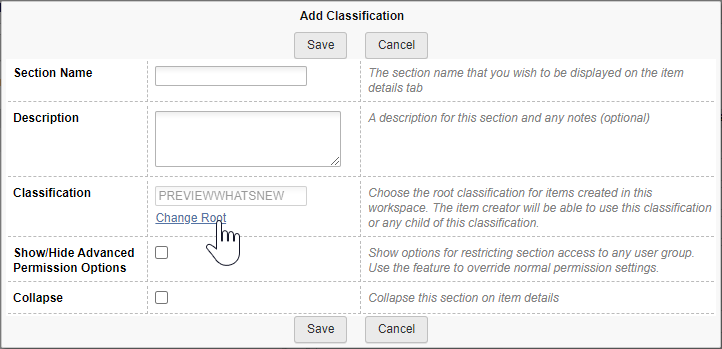
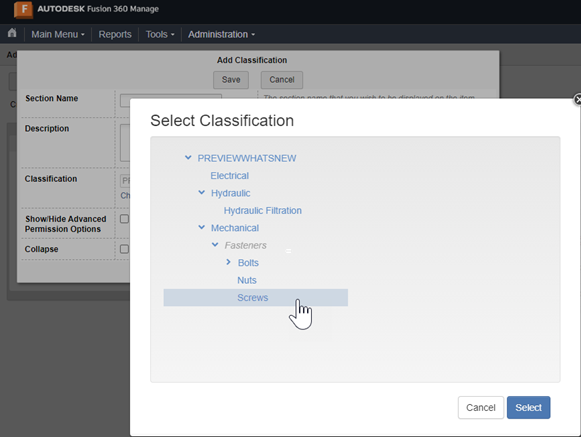
By default, the classification begins at the top of the class structure defined in the Classification Manager. Users filling out the classification section can select any class below the specified root. Changing the root changes the point in the classification tree where users can begin creating a catalog. Click Change Root to select a different sub-class within the classification structure as the starting point.
In the Select Classification dialog, choose the root class and then click Select.
Click Save. The classification section is added at the bottom of the form but can be moved to any location.
Click Save Layout.
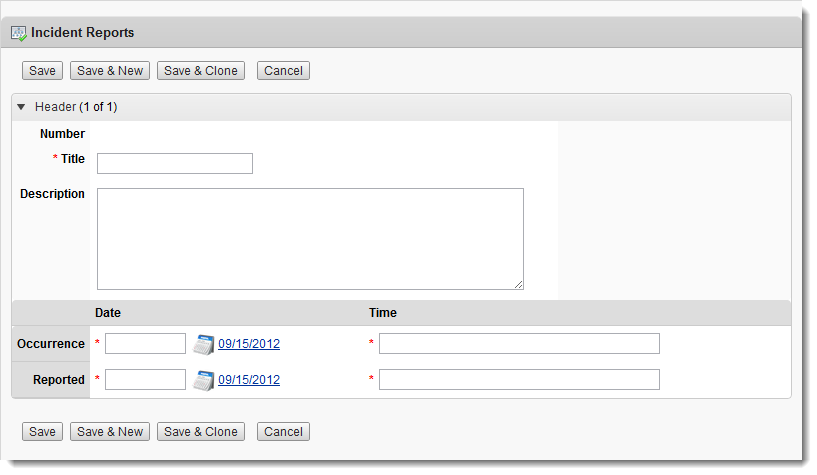
View the Item Details form
On the Main Menu, click the workspace name to open it.
On the Workspace Header, click the New icon to create a new workspace item.
Selecting fields to include in Workflow Notifications
In workspaces that use workflow or revision control, you can choose which fields appear in workflow action notification email. For background on those notifications, see Action Notifications.
Drag and drop a field from Item Details Fields onto Workflow Notification Fields. Any field can be a workflow notification field, including fields from within a matrix.
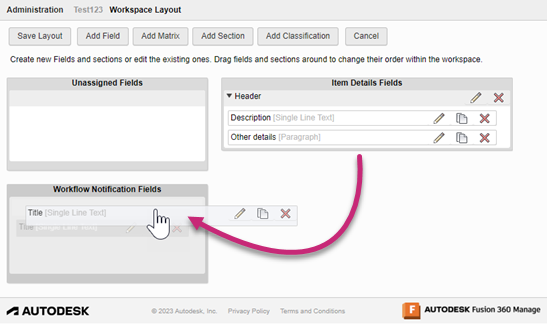 Note: Selected fields are copied to Workflow Notification Fields. Specifying a field as a workflow notification field does not change the layout of the form.
To change the order of fields in the notification email, drag and drop the fields within the Workflow Notification Fields container as needed.
To remove fields you no longer want to include in notifications, click the
icon in the field's container.When you are finished, click Save Layout.
Enabling the Item Details tab in a workspace
To enable the Item Details tab in a workspace, set up the following permissions:
- Create a user role for the workspace and add Workspace permissions to it as needed (View, Add, Edit, Delete).
- Create a user group for users who need those permissions.
- Assign the user group to the role you created in step 1.
For more help, see About Permissions and Set up Permissions.