Configure the Grid tab
If you're a Fusion user, this feature is not available in the Components or Drawings workspaces. Learn more about system workspaces.
The Grid tab lets you view workspace items in a table format.
Before you can configure the Grid, you must first enable the Grid tab for the workspace. Once enabled, you can customize it in a similar way to configuring tables in the Item Details form by adding columns and assigning fields.
To configure the Grid tab for a workspace:
- From the main menu, go to Administration > Workspace Manager.
- In the Workspace Manager, select the workspace you want to configure.
- In the left-side panel, click Grid tab.
The Grid tab page opens.
Add and configure fields
Follow the same instructions for adding fields to the Item Details form found in the Configure the Item Details Form. The instructions can also help you to edit, clone, and delete Grid fields.
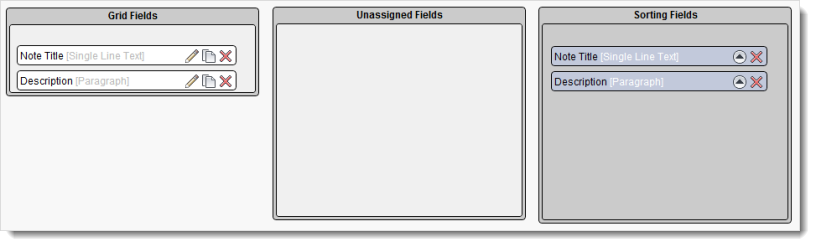
Assign fields
- Click the fields under Unassigned Fields, and drag and drop them onto Grid Fields.
- Click Save Layout.
Configure the default sort order
- In the Grid Fields container, click the first field you want to sort rows on and drag and drop it onto the Sorting Fields container.
- Click the up/down icon in the field's container to specify ascending or descending order.
- Drag and drop additional fields you want to sort on and specify their sorting order in the same way.
- To change the order of the sorting fields, drag the fields up and down within the container as needed.
- To remove a field from the Grid row sorting order, click the
 icon in the field's container.
 - When you are finished, click Save Layout.
Enabling the Grid tab in a workspace
To enable the Grid tab in a workspace, set up the following permissions:
- Create a user role for the workspace and add Grid permissions to it as needed (View, Add, Edit, Delete).
- Create a user group for users who need those permissions.
- Assign the user group to the role you created in step 1.
For more help, see About Permissions and Set up Permissions.