Learn how to add sections to the list of available sections in the project.
- Click
Model
 Attributes
 Sections.
The Assignment and Section panels display in the ribbon.
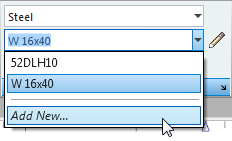
- In the Section panel, select
Add New from the Section drop-down menu.

The Section dialog opens.
Note: You can also access the Section dialog in the same way for some structural elements as columns, beams or bars. - Add a
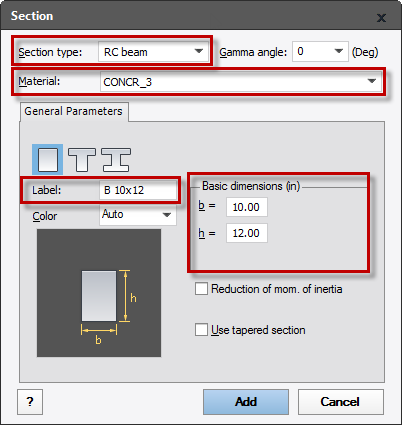
B 10x12 section by setting the following parameters:
- Section type: RC beam
- Material: CONCR_3
- Label: B 10x12
- b: 10.00
- h: 12.00.

- Click Add and close the Section dialog.
- In the bottom right corner of the Section panel, click the arrow icon to open the Attributes Manager dialog.
 Note: In the Attributes Manager dialog you can check sections available in the project and you also can add new ones. For more information about the Attributes Manager, see Attributes Manager.
 - Click
New to add additional sections to the project.
The Section dialog opens.
- Add a
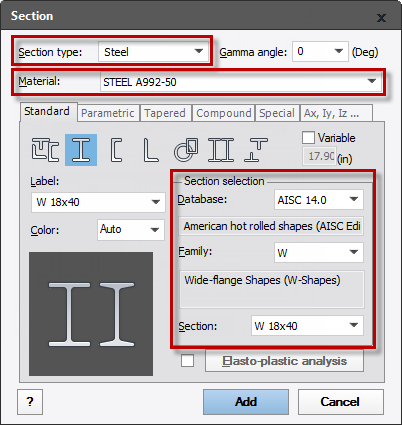
W18x40 section by setting the following parameters:
- Section type: Steel
- Material: STEEL A992-50
- Database: AISC 14.0
- Family: W
- Section: W 18x40.

- Click Add.
- Repeat this process for the
W18x50 section.
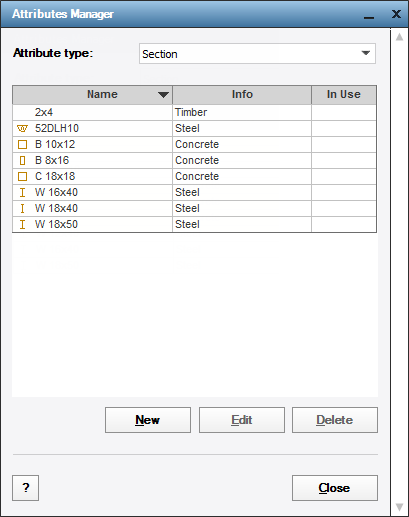
The additional sections appear on the list as shown below.

- Close the Section and the Attributes Manager dialogs.
- Save the project as Tutorial_Alpha_Sections.rstructure.