Creating a canvas
Jump to Mobile or Windows 10
When you open SketchBook Pro for the first time, a canvas is already created for you. But, what if the canvas created is not the size you want? There are an assortment of tools for customizing your canvas. If you want some basic information on canvases, resolution, and size, check out What is a canvas.
How to rotate a canvas
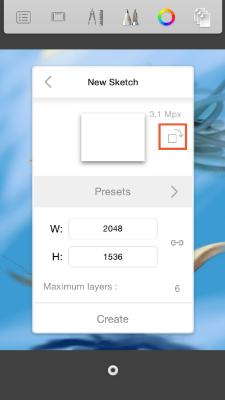
When creating a canvas, there should be an option for rotating your canvas. Use it to set the orientation to either portrait or landscape.
In some versions, above the canvas orientation icon, you’ll see the size of your canvas in Mpx (Megapixels). Below the canvas dimensions will be the maximum number of supported layers, based on the canvas size and device performance.
How to set the canvas size
Are you looking for a way to change the size of your canvas? Do you have a project that requires a high-resolution image? If so, selecting a larger canvas will help. During creating, go into the canvas options to do this. You will have two options, one contains a list of predefined canvas sizes and the other is for entering your own dimensions. These links will take you to how: Desktop, Mobile, or Windows 10. If you want some basic information on canvas size, check out What is a canvas.
Creating a canvas in SketchBook Pro Desktop
Unlike the mobile and Windows 10 versions, in SketchBook Pro Desktop, you don't need to set the orientation of your canvas during creation. This can be done at any time, using the Transform puck.
To create a new sketch, from the lagoon, select  and flick toward
  . You could also use the following hotkeys: Cmd+N for Mac or Ctrl+N for Windows. If you want to change the default canvas size, use Preferences.
Setting your saved default file format
Do you need your files saved as PSD, but they keep getting saved as a TIFF by default? Sure you can use Save As every time you save to select what you want. But, why not change your default saving option?
Do one of the following:
- For Windows users, select Edit > Preferences, then tap the General tab.
- For Mac users, select SketchBook > Preferences, then tap the General tab.
Tap the format you want to enable it.
Tap OK.
Changing the default canvas size for new files
By default, the size of a new image is the size of the display.
Do one of the following:
- For Windows users, select Edit > Preferences, then tap the Canvas tab.
- For Mac users, select SketchBook > Preferences, then tap the Canvas tab.
Then, select either of the following:
- To specify a custom size, select Use width and height of window. Enter the width and height in the fields provided (choose from pixels, inches, cm, or mm).The maximum size is 6400 x 6400 pixels for the 32-bit version or 8192 x 8192 for the 64-bit.
- To use the default display size again, select Use width and height of window.
Creating a canvas in SketchBook Pro Mobile
When you have finished a sketch and want to start another one, use  New Sketch to create one.
In the toolbar, tap  and select New Sketch. The maximum number of layers is displayed next to the canvas size.
You can also scan a real-world sketch to bring it into SketchBook Pro and go from there. Check out How to scan sketches.
and select New Sketch. The maximum number of layers is displayed next to the canvas size.
You can also scan a real-world sketch to bring it into SketchBook Pro and go from there. Check out How to scan sketches.
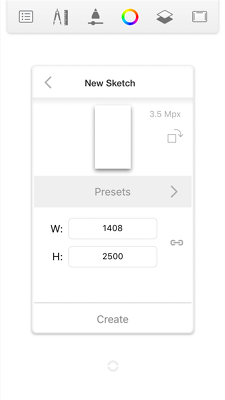
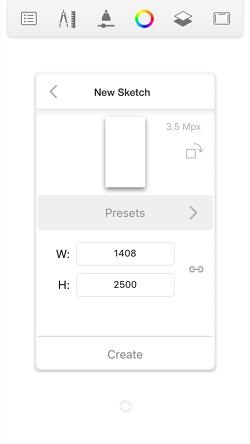
iOS users: Creating a custom canvas size
In the toolbar, tap
and select New Sketch. The panel changes, displaying more options.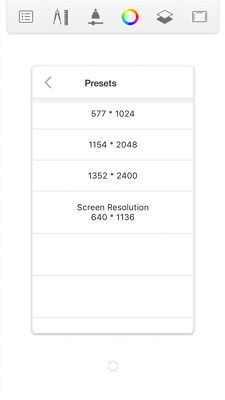
If you would like to scan in an image, load it, and continue sketching, check out How to scan sketches.
Enter a height and width. The file size and maximum number of layers is displayed. If you don’t want to keep the proportions, remove the check from Keep Proportions.
Tap Create. Tap the last entry again to create the canvas.
If you would like to scan in an image, load it, and continue sketching, check out How to scan sketches.
Android users: Creating a custom canvas size
In the toolbar, tap
and select New Sketch. The panel changes, displaying more options.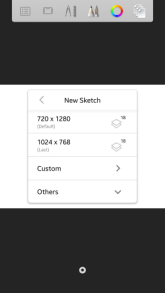
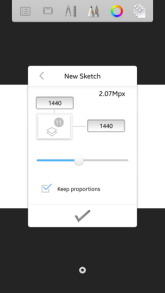
Select Custom. Enter a height and width. The file size and maximum number of layers is displayed.If you don’t want to keep the proportions, remove the check from Keep Proportions.
Tap
 . Tap the last entry again to create the canvas.
If you would like to scan in an image, load it, and continue sketching, check out How to scan sketches.
iOS users: Selecting a custom pre-defined canvas size
Tap
, then .Select Presets.
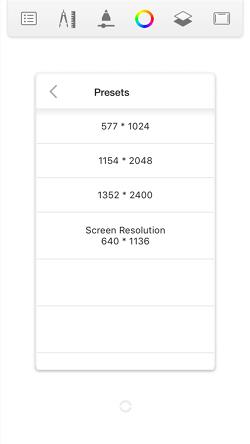
Look through and select the option that best suits your needs.
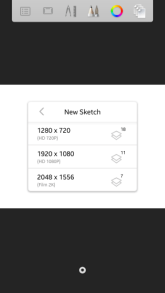
Android users: Selecting a custom pre-defined canvas size
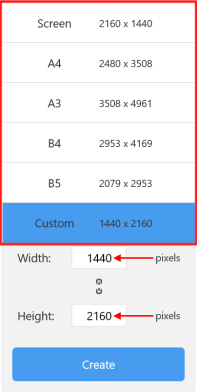
Are you about to start a project for the web, mobile, or video/film? If so, we have added some suggested preset canvas sizes. This is a good place to start, if you are unsure what canvas size you need.
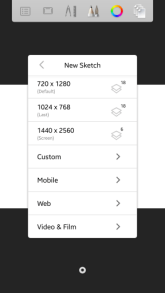
- Tap , then .
- Select Other.
- Look through and select the option that best suits your needs.
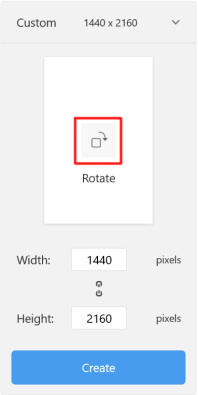
Rotating the canvas
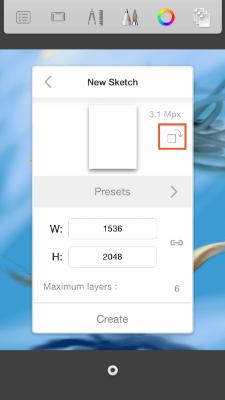
When creating a canvas, there’s an icon to rotate your canvas. Tap it to toggle the orientation between portrait and landscape mode.
There are a couple other things you might notice. Above the canvas orientation icon, you’ll see the size of your canvas in Mpx (Megapixels). Below the canvas dimensions is the maximum number of supported layers, based on the canvas size and device performance.
Creating a canvas in SketchBook Pro Windows 10
When you have finished a sketch and want to start another one, use New Sketch to create one.
If you're a subscriber, you can also create a custom size.
In the toolbar, tap and select New Sketch. A new canvas is created that’s screen size.
Creating a custom canvas size
If you want to choose from an assortment of preset canvas sizes or create a custom one, check out the following:
Select
 > New Sketch and tap to access a dropdown menu.
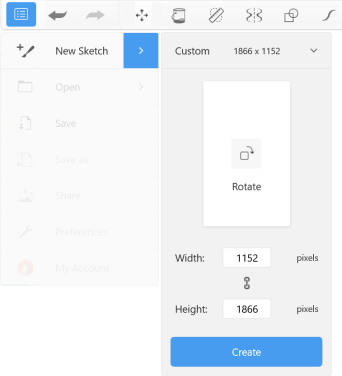
Choose one of the following:
To set the size of your canvas
When creating a canvas, you may want to set the size of your canvas. You have a couple options:
Tap the Custom menu and select from the preset sizes in the list.
Tap the Width and/or Height fields and enter your values.

If you want to lock the proportions, ensure the icon between the two field looks like  .
To unlock the proportions, ensure the icon looks like
.
To unlock the proportions, ensure the icon looks like  .
.
To set the orientation of your canvas
To change the orientation of your canvas, tap the middle of the canvas image.
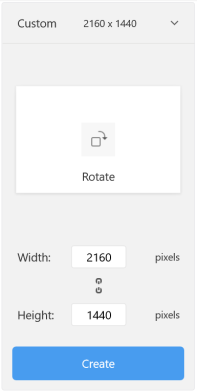
When finished, tap Create.
Setting things up to work high-res
When looking to work in high-res, there are a couple things you need to set up. You will need to go between the desktop version of SketchBook Pro and Windows 10.
- In the preferences for the desktop version, in the Canvas tab, change the resolution to 300 and set your default canvas size to whatever you need.
- In the desktop version, create a canvas and save it as a TIFF. You will use this saved canvas as a template, so you want the file to be read only.
- Locate the saved image and right-click (Windows users) and select Properties.
- In the General tab of the Properties dialog, change Attributes to Read-only. Now, you’ve created a template that can be brought into the Windows 10 version of SketchBook Pro.
- Open SketchBook Pro Windows 10, tap Open, and select the high-res canvas template file. When you save the file, it will save a copy, keeping your template save.
If you want to see the process, check out this video.