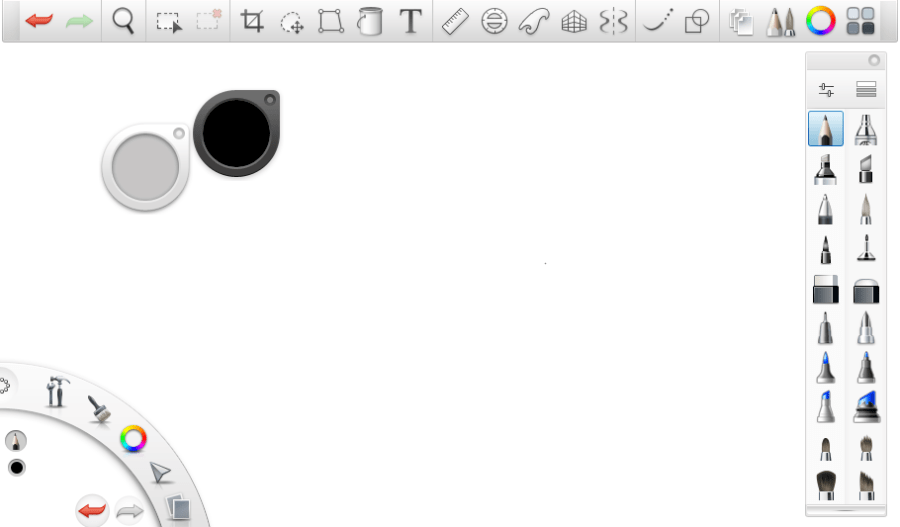
Basics for Getting Started in SketchBook Pro
Jump to Mobile or Windows 10
Get started with an introduction to the interface and the most basic interactions.
Check out this video: Autodesk SketchBook How-To: Setting Up Your File [YouTube].
Getting started in SketchBook Pro Desktop

The subscription version has the following functionality:
- Brush Puck
- Brush Palette – including advanced brushes and the customizable Brush Library
- Color Puck with the Color Picker, transparent color, as well as color and fill palettes
- Full Copic Color Library and Copic markers and colorless blender
- Layer Editor with blend modes, grouping, and unlimited layers
- Lagoon and toolbar with perspective guides, rulers, distort, and much more
- When FlipBook is selected, the animation interface will appear
For information on how to set the canvas size, see Creating a canvas.
What do I do next
After creating a new sketch, here are some articles that could come in handy:
- selecting a brush
- Color Editor
- Autodesk SketchBook Tools
- Importing images
- Changing the language of the UI
Getting started in SketchBook Pro Mobile
Here are some suggested articles for what to do next:
- Basic UI elements
- Customizing your UI in SketchBook
- Autodesk SketchBook Tools
- Selection tools
- Using the Gallery
- Importing images
- Layer Editor
- Changing your image to black and white
- Zooming and changing your view
Getting started in SketchBook Pro Windows 10
Now, you'll see the canvas, toolbar, Brush Puck, and Layer Editor. Let's look at the file options in the toolbar. Click here to learn about the tools.
| Icon | Tool Name and Purpose |
|---|---|
 |
New Sketch – Create a sketch and set your canvas size. Choose from a set of preset sizes or create a custom canvas size. |
| Your maximum canvas size is 10K by 10K. | |
 |
Open – Grab an existing sketch and continue working on it. |
| Save – Save your sketches out as TIFFs. | |
 |
Save a copy – Save your sketch without overwriting the original. |
| Preferences – Access the various preferences in SketchBook Pro Windows 10. | |
 |
Help – Access the online help, where you can find answers to your issues, as well as tutorials and much more. |