
Fill Out and Submit Forms on Mobile
In the Autodesk Construction Cloud app, tap to open an In progress form in the Forms tool.
Tip: If you know the name of the form, you can use the Search field to bring up a form or form template.Note: Depending on the type of form, forms built in the Template Builder or PDF forms, your screen will vary. Follow the instructions accordingly for each type.You can edit the form details, including:
- Report Date
- Location: These must be preconfigured in your project. Learn more
- Description
- Due date
Note:- A new form will start in the In progress status and change when submitted based on the type of form.
- The ID number can't be edited and is assigned by default according to the next available number from your existing your project forms.
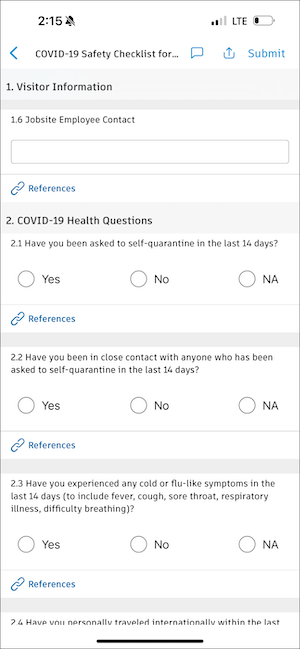
For forms built in the Template Builder, you may be asked to enter in text, select from multiple options, pick from a list, and more.
For Equipment, Materials, and Work Log sections, there will be corresponding Add buttons, where you will be directed to enter in specific information about the relevant topic.
You can add references to relevant photos and issues or leave notes on a specific question.
- Tap
 at the bottom of any question.
 - Tap Add for any photos or issues or tap Note (iOS) or Add note (Android) to provide context to your response.
- Tap Done.
Note: Some questions may require a reference to an issue or a photo based on your response to the question. This is set up by your form template creator or manager.- Tap
If your form requires a signature, you can sign by tapping Tap here to sign in the Signature section.
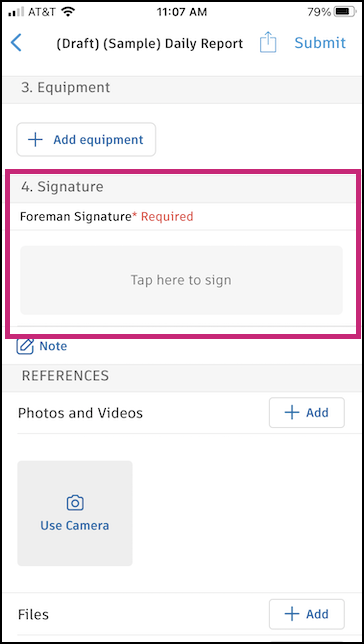
Draw your signature in the box. If needed, tap Clear in the bottom right corner to erase and enter your signature again. Once done, tap Save.
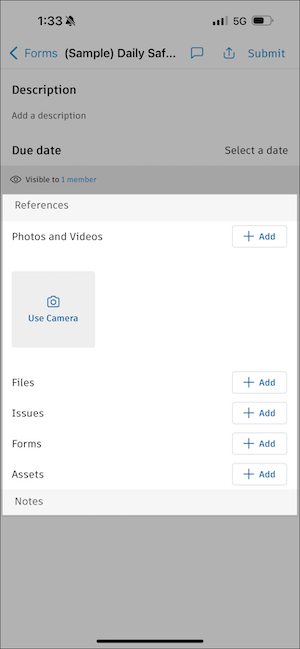
At the bottom of the form, you can also add notes and references to the entire form, including relevant photos, files, issues, forms, and assets.
Note: Required fields will be noted with a red asterisk label. If the form has assigned sections, you will only be able to edit the sections assigned to you.When complete, tap Submit at the top-right corner of the form and confirm.
Note: If you are only filling out your assigned section, tap Submit section at the top right of the section name to submit your response.
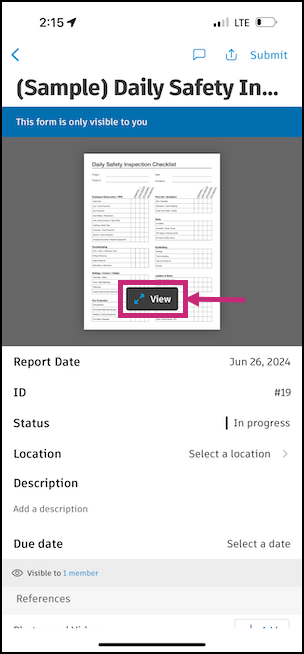
For PDF forms, tap View (iOS) or Edit (Android) on the thumbnail of the PDF.
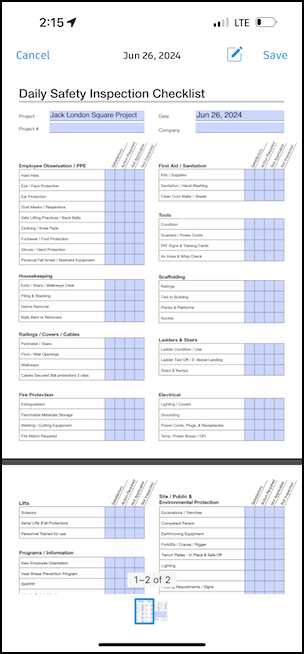
Edit the fields in the form. There may be boxes you can enter text in or checkboxes that you can select. Some information may be prepopulated if your form is set up to populate certain information like the project name and date.
To save:
- Android: Tap the back arrow.
- iOS: Tap Save at the top-right corner.
Scroll to the bottom of the form page and you can also add notes and references to the entire form, including relevant photos, files, issues, forms, and assets from your project. Tap Add next to any reference and select accordingly.
When complete, tap Submit at the top-right corner of the form and confirm.
- You can add attachments and references to photos, files, issues, and more to connect workflows or provide more context on your forms. Learn more.
- You can make and view comments on forms to promote collaboration like providing more context or mentioning your coworkers to review parts of the form. Learn more.
Once a form is submitted, depending on the form settings, it will close or move to the In Review status.