Custom RFI Fields
Custom RFI fields allow you to track additional information for each RFI on your project. These custom fields can include preset values for quick completion when the RFI is created.After the custom RFI fields are added, you can activate or delete the fields as needed in the RFI tool settings.
Add a Custom RFI Field
Click RFIs from the left navigation to open the RFIs tool.
Click Settings menu
 and choose Custom fields.
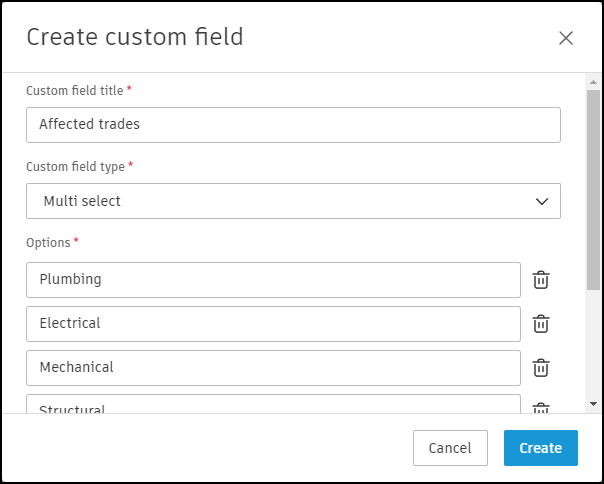
Click Create custom field.
Enter a title for the custom field.
Select a custom field type. Available types include:
- Multi-select: Allows someone to select multiple, preset values for the field.
- Numeric: Allows someone to input a numeric value for the field.
- Single-select: Allows someone to select a single, preset value for the field.
- Text: Allows someone to enter a text value for the field.
If you selected the multi-select or single-select field types, define the options for someone to select.
Add a description if needed and click Create.

By default, the created custom field is active and can be selected when creating an RFI.
Deactivate a Custom RFI Field
- Click RFIs from the left navigation to open the RFIs tool.
- Click Settings menu
 and choose Custom fields.
 - Click a custom field from the list to open the Edit custom field menu on the right.
- Toggle the Active switch to make the field inactive.
Inactive fields can be deleted by clicking the  icon. Then click Delete again in the confirmation message.
Repeat steps 1-3 to open the Edit custom field panel and edit any of the custom field properties as needed.
