
You can create multiple part size variations for your parametric drainage structure or piping part families by modifying each column associated with an individual part size row.
- Open the Infrastructure Parts Editor.
- Open a catalog to the Parts tab.
- Select a part family from the Navigation Panel.
- Click the Part Editing tab.
- Click a row in the Part Editing table.
Each column adjacent to the Part Size Local Name represents dimensions for that part, which were exposed to the Parts Editor from the parametric shape template for the part family.
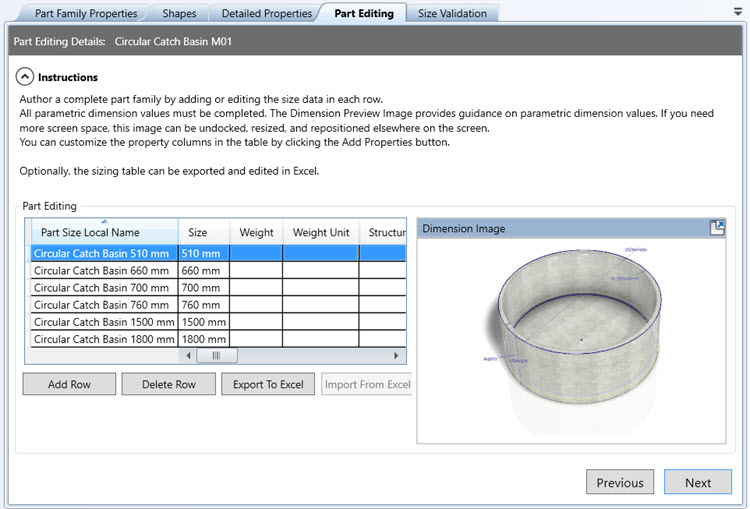
- Use the scroll bar to review all of the dimensions for your part family.
Note: Dimensions in the part editing table marked with a single asterisk are required geometry parameters. See the Parameters Reference for more information.
- To create new part size variations, click the Add Row button.
Each row represents a different part size. Double-click a value in a column for the selected part size row and input new values to modify that part size. Click a row and then click the Delete Row button to remove the selected part size.
- Optionally, you can click Export to Excel to modify the sizing table in an Excel spreadsheet. When finished, click Import from Excel and select the updated sizing table to update part sizes for the part family using your spreadsheet.
- When finished, click Next.
- The recommended next step is to validate part family sizes in the Size Validation tab.