
Upload with References
Overview
Starting with version 17.x, Desktop Connector includes an enhanced Upload with References workflow that provides a more intuitive and controllable experience for uploading design files and their references to both Forma and Fusion connectors.
Desktop Connector is optimized for uploading CAD projects, assemblies, and design files with their references. For extremely large datasets or highly complex file structures, consider breaking your uploads into smaller, more manageable batches for optimal performance.
What's New?
The Upload with References workflow has been redesigned with the following enhancements:
- Multi-step wizard interface with Select → Review → Upload flow
- Enhanced file tree visualization showing all files and their references
- Missing reference detection with clear warnings and options to proceed
- Destination preview showing exactly where each file will be uploaded
- Drag & drop support for files and folders
- Related Data folder organization for complex reference structures
- Smart reference resolution for all file types that support reference gathering
- Inventor Project File (IPJ) handling with user-friendly selection dialogs
Supported File Types
The Upload with References workflow supports automatic reference gathering for various CAD file types from applications including Autodesk Inventor, SolidWorks, AutoCAD, 3ds Max, Alias, Civil 3D, and many others.
For a complete list of all file types that support reference gathering, see Design Files with Reference Gathering Support.
Other file types can still be uploaded through this workflow, though reference gathering may be limited.
How to Access Upload with References
Automatic Upload with References
Desktop Connector includes an "Always ask to include references" setting that automatically triggers the Upload with References workflow when you drag and drop files into your Forma or Fusion connector in File Explorer.
This setting is enabled by default and applies globally to both Fusion and Forma connectors.
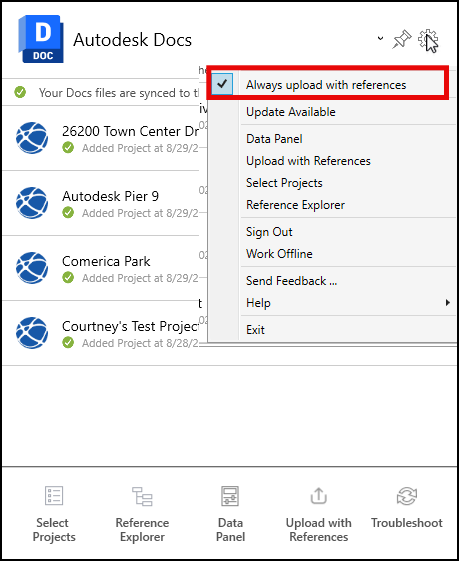
To disable automatic Upload with References:
Click the Desktop Connector tray icon

Access Settings from the home screen gear icon
Toggle the "Always ask to include references" checkbox to enable or disable automatic triggering
When enabled: Dragging any files or folders into your connector drives will always ask if you want to upload with references instead of performing a simple upload.
When disabled: Drag and drop operations work as they did in 16.x versions, uploading with reference support for the files in your selection, but Desktop Connector will not search for all references outside of the selection that was added.
Manually Upload with References
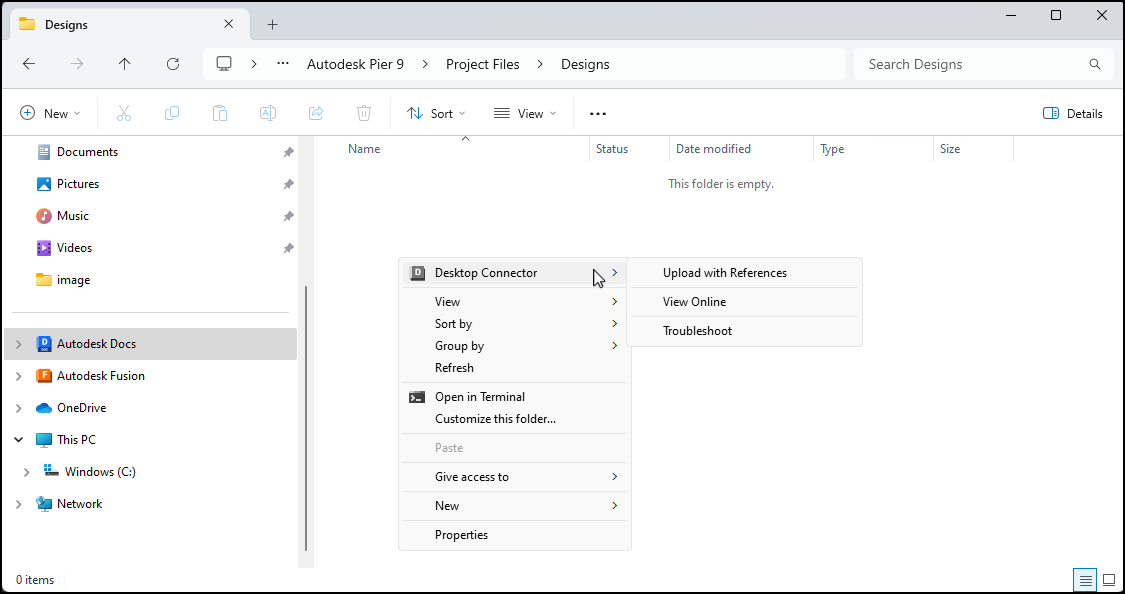
From File Explorer
Navigate to your desired upload location within your Fusion or Docs connected drive
Right-click in an empty space
Select Desktop Connector > Upload with References
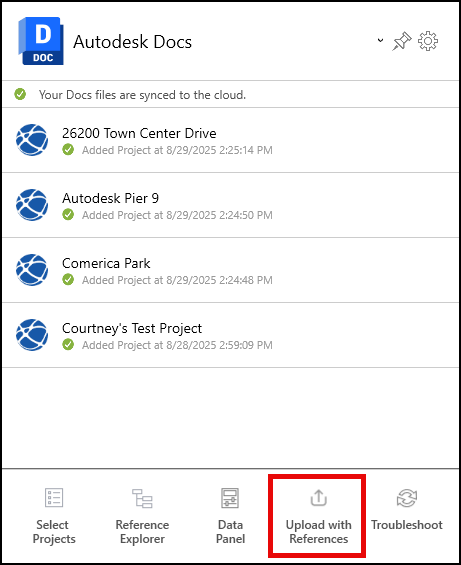
From Desktop Connector Home Screen
Click the Desktop Connector tray icon
Select your connector (Forma or Fusion) if you have multiple
Click Upload with References from the home screen
Upload Workflow
Step 1: Select Files and Configure
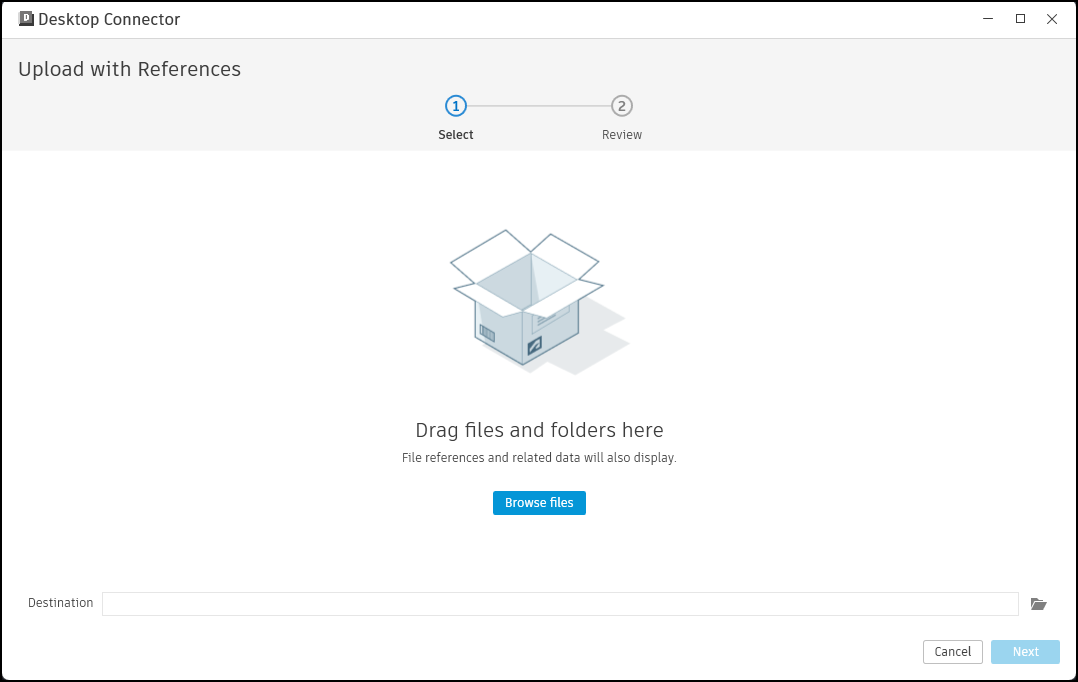
Add Files to Upload
You can add files in the following ways:
- Drag and drop files or folders directly into the dialog
- Browse files to select individual folders
- Multiple file selection from the same parent directory
Inventor Project File Selection
When uploading Inventor files, you'll be prompted to select an Inventor Project File (.ipj):
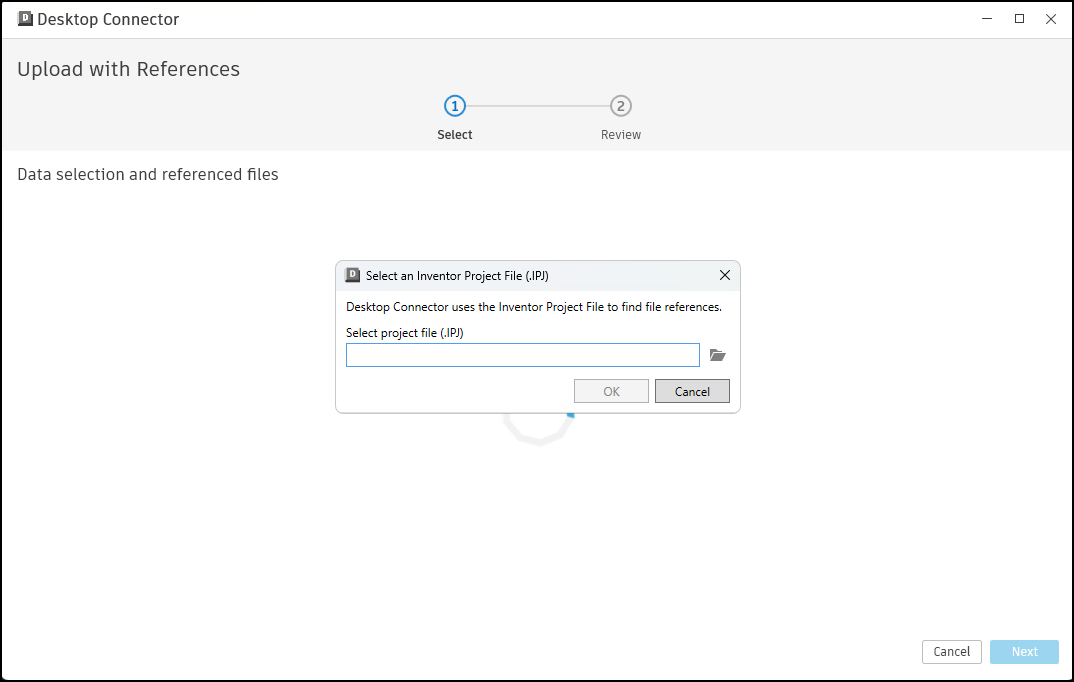
- Automatic detection: If Inventor files are detected, the IPJ selection dialog appears
- Browse for IPJ: Click Browse to select the appropriate project file
- Project reload: Changing the IPJ file will reload the dataset with new references
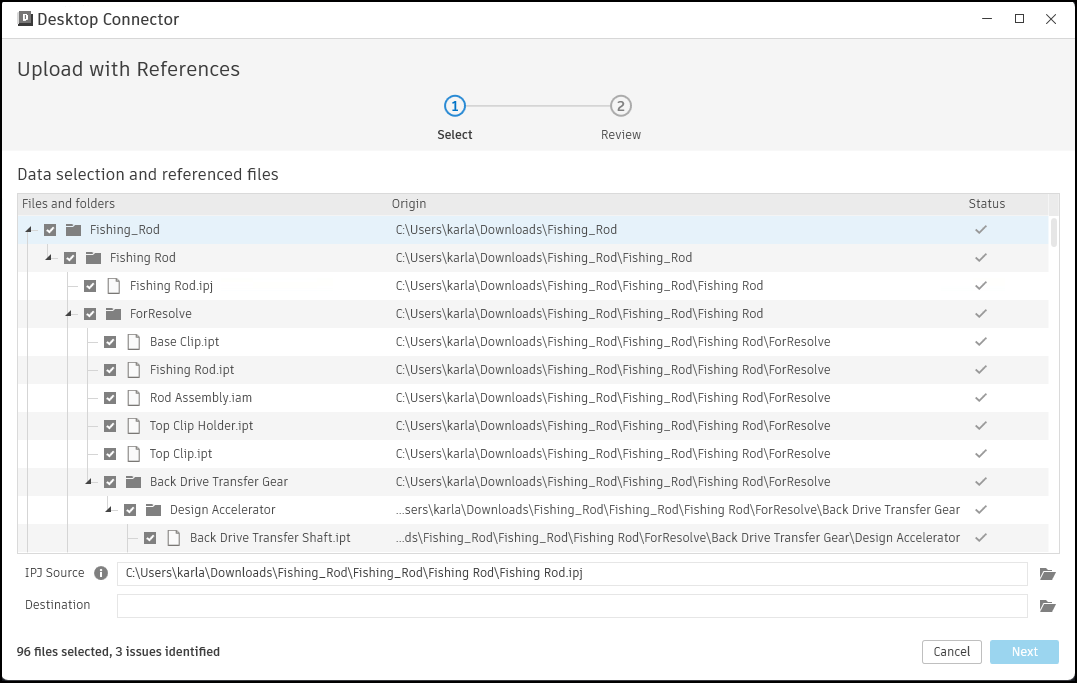
Review File Tree
The tree view displays:
- File hierarchy showing the folder and file hierarchy
- Reference status indicating found and missing references
- File selection checkboxes to control what gets uploaded
- Origin paths showing source file locations
- File count summary in the status bar
Select Destination
Browse to choose your target folder in Forma or Fusion
Step 2: Review Upload Plan
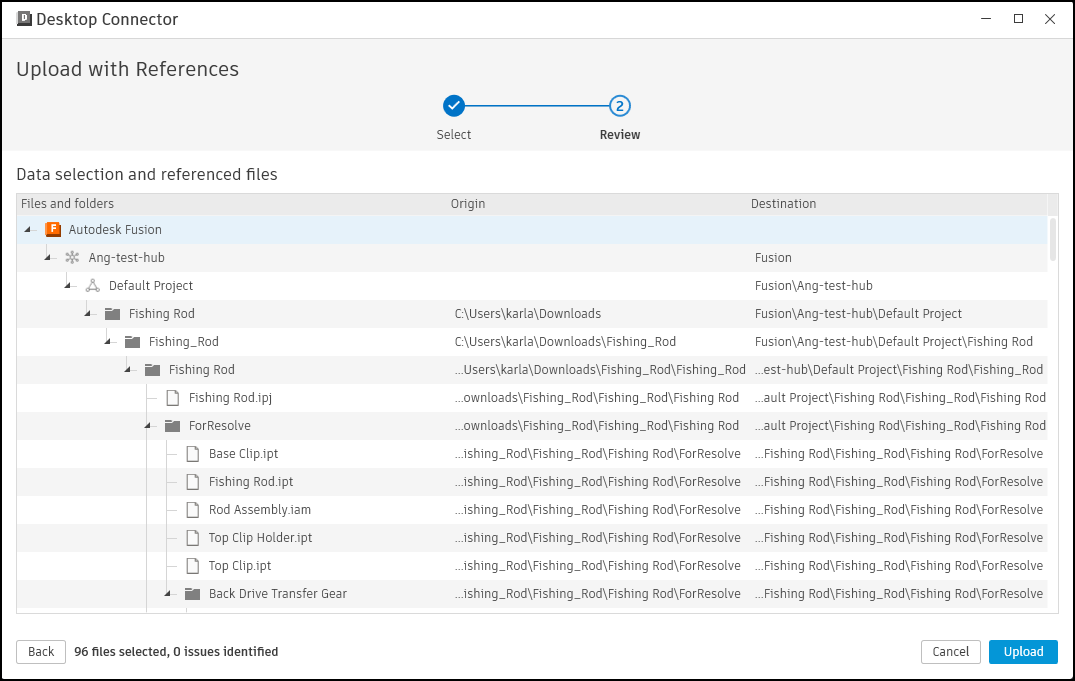
The Review page shows the final upload plan:
- File list with all selected files
- Destination paths showing exactly where each file will be uploaded
- Related Data structure for complex reference hierarchies
Related Data Organization
Files with references outside the main folder structure are organized into a Related Data folder. The folder structure is different for Forma and Fusion.
Forma puts the Related Data folder in the relevant folder adjacent to the host file.
|--Hub
   ├── Project
      ├── Project Files
         |-- Folder 1
            |-- MainAssembly
               |-- MainAssembly.iam
               |-- Related Data Folder Structure
            |-- Components
               Part1.ipt
Autodesk Fusion places all related data in a shared Related Data folder at the root of the project.
|-- Hub
   |-- Project
      |-- Folder1
      |  |-- MainAssembly
      |     |-- MainAssembly.iam
      |  |-- Components
      |     |-- Part1.ipt
      |-- Related Data
Step 3: Handle Missing References
If missing references are detected, you'll see a warning that identifies which references cannot be found:
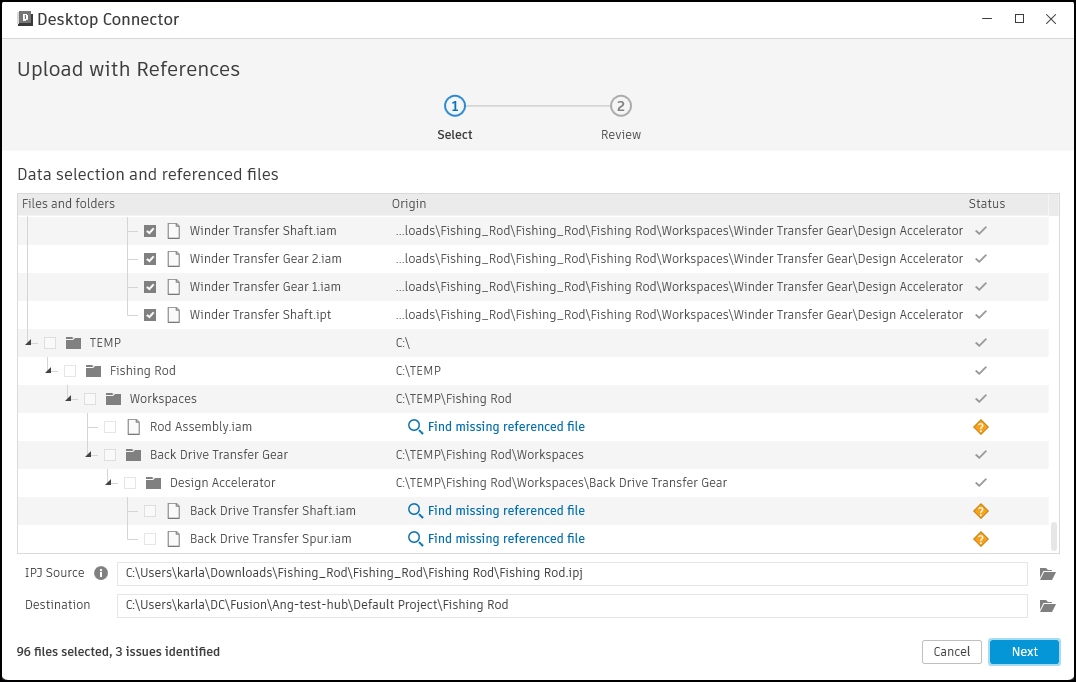
Options:
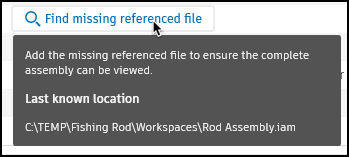
Find missing referenced files: Actively locate and replace missing references before uploading. If you hover over this option, you'll be provided with the last known location of the referenced file.
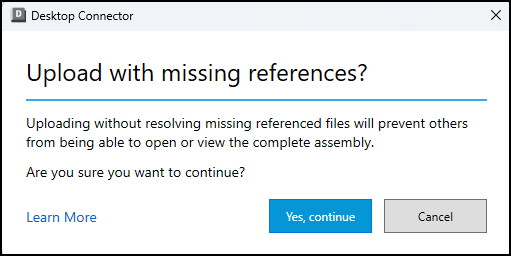
If you choose to proceed without resolving missing references, you'll see an additional confirmation dialog:
Using Find Missing Referenced Files
When you click "Find missing referenced files", Desktop Connector will:
- Allow file browsing - Let you navigate to locate the missing referenced files
- Enable file replacement - Replace missing references with the correct files from new locations
- Update reference paths - Automatically update the design file to point to the newly located files
- Validate connections - Verify that all references are now found before proceeding
This enhanced workflow ensures that your uploaded design files maintain all their critical relationships and dependencies, preventing broken links in your cloud data.
Automatic Reference Resolution
When you successfully locate a missing reference file, Desktop Connector can automatically apply the same location to resolve other missing references:
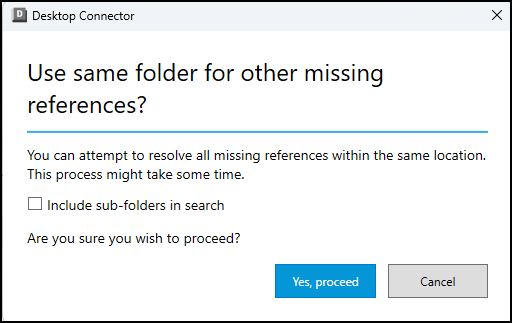
The "Use same folder for other missing references?" dialog appears when:
- You've located one missing reference file in a new location
- There are additional missing references that could potentially be found in the same location
Dialog Options:
- Include sub-folders in search: When checked, Desktop Connector will search the selected folder and all its subdirectories for other missing reference files
- Yes, proceed: Applies the selected location to automatically resolve other missing references using the same folder (and sub-folders if selected)
- Cancel: Continues with manual resolution for each missing reference individually
This feature is particularly useful when entire project folders have been moved or when working with projects where multiple referenced files are stored in a common directory structure.
Step 4: Upload and Monitor
After clicking Upload:
- Files are copied to your workspace in the cloud
- Upload jobs appear on the Home Screen
- Progress tracking shows upload status for each file
- Error handling appears on the Desktop Connector home screen for any upload issues
Key Features and Benefits
Smart Reference Resolution
- Automatic discovery of referenced files in assemblies, models, and other datasets
- Project-aware analysis for Inventor files using IPJ settings
- Cross-format support for mixed CAD environments
Enhanced User Control
- Selective upload - choose exactly which files to include
- Visual confirmation - see the complete upload plan before proceeding
- Missing reference handling - clear warnings with options to proceed
Improved Organization
- Preserved folder structure where possible
- Related Data folders for complex reference hierarchies
- Consistent naming and path handling
Troubleshooting Common Issues
Missing References
Problem: Some referenced files cannot be found during the upload process
Solutions:
Use Find Missing Referenced Files (Recommended):
- Click the "Find missing referenced files" button when the warning appears
- Browse to locate each missing file in its new location
- Let Desktop Connector update the reference paths automatically
- Verify all references are resolved before proceeding with upload
Manual Preparation:
- Verify all referenced files are accessible from your local machine
- Check that Inventor Project File (.ipj) paths are correctly configured, if relevant
- Consider copying missing files to expected locations before starting upload
- Use Reference Explorer to preview all references beforehand
Alternative Approaches:
- Update your CAD software's project settings to point to correct file locations
- Reorganize your local file structure to match expected reference paths
Upload Failures
Problem: Files fail to upload after starting the process
Solution:
- Check the Home Screen for detailed error messages
- Verify you have upload permissions to the destination
- Ensure file sizes are within limits (6 GB maximum)
Best Practices
Before Upload
- Close all CAD applications that might have files open
- Verify reference paths in your CAD software before upload
- Organize files in logical folder structures when possible
During Upload
- Review carefully on the Review page before clicking Upload
- Don't modify files in the source location while upload is in progress
- Monitor progress on the Home Screen
After Upload
- Verify upload completion on the Home Screen
- Test file references by opening files in the cloud
- Check Related Data folders for externally referenced files
Related Concepts: