
Manage projects
- About managing projects
- The Select Projects dialog
- Project syncing errors
- Renaming projects and hubs
- Deleting files and folders: Recycle Bin and cloud workflows
About managing projects
You can select and add up to 80 projects to your Autodesk Forma or Autodesk Fusion connectors in File Explorer  . By adding only the projects you need, you can better manage your local storage space.
Project management is unified across both Forma and Fusion connectors:
- The 80 project limit is shared across both connectors (total of 80 projects combined, not 80 for each connector)
- The same Select Projects dialog manages projects for both Forma and Fusion
If you're signing in for the first time and already see projects selected, your organization may have pre-configured them for you. You can still add or remove projects at any time using the Select Projects dialog below. See the Admin Project Subscription Deployment Guide in the Admin Guide for details.
The Select Projects dialog
Whether it's your first time signing in or you're adding and removing projects later, project selection always happens in the same Select Projects dialog.
Opening the dialog
First sign-in: When you first Sign in to Desktop Connector, the Select Projects dialog opens automatically so you can make your initial selections.
Anytime after that: Right-click the Desktop Connector tray icon
 and click Select Projects.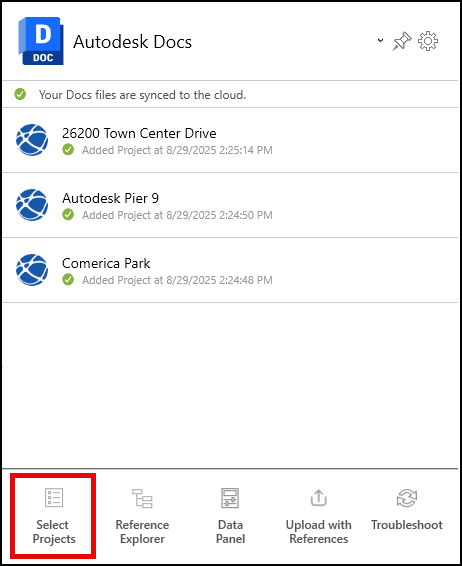
The dialog lists all the projects you have access to in a single list, with tools to help you quickly find and manage your selections — see Find Your Projects Faster below.
Add or remove projects
Browse or search for your projects.
Select projects to add, or deselect projects to remove them from their related Forma or Fusion connector. You can select up to 80 projects combined across Forma and Fusion.
Click Save.
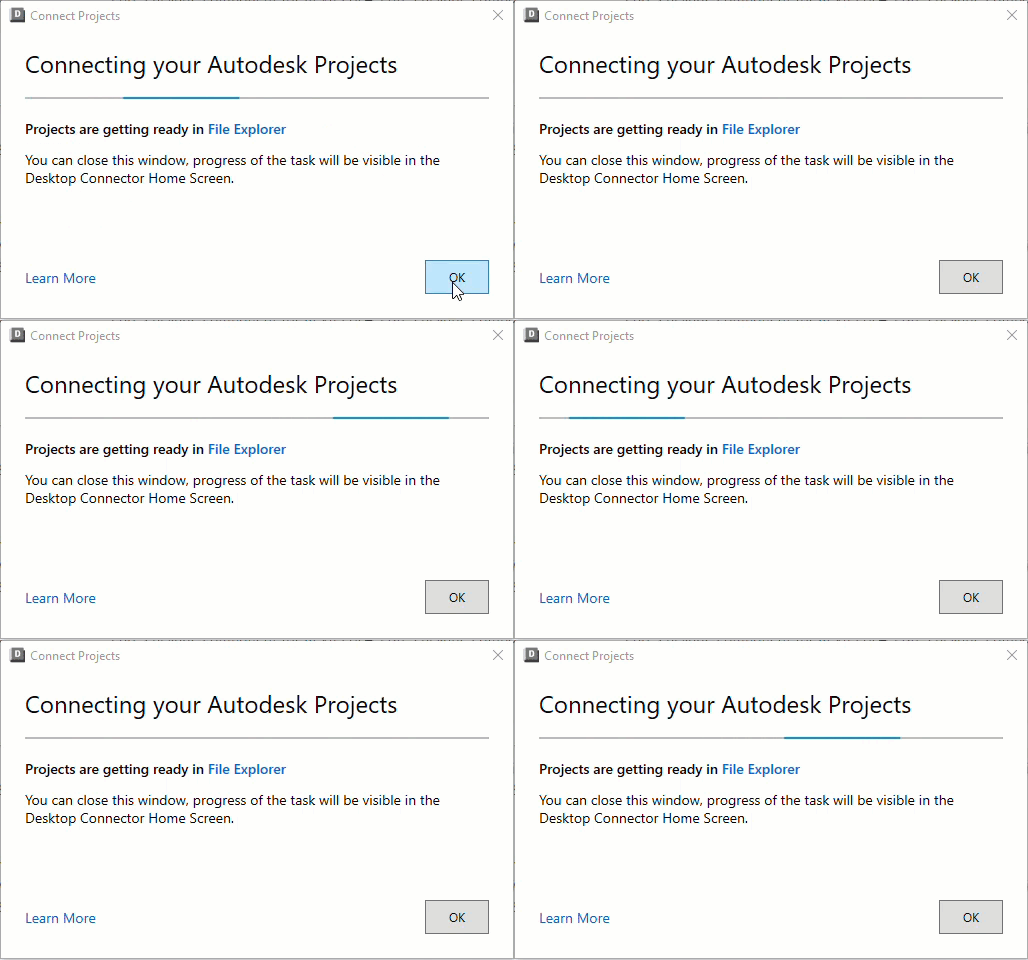
Desktop Connector will begin adding your new projects and removing any you deselected from File Explorer. You can view their progress on the home screen.
Click OK to close the dialog box.
Find your projects faster
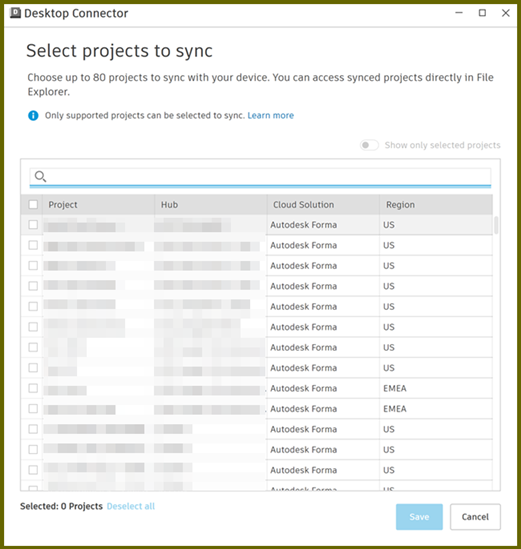
The Select Projects dialog makes it much easier to find and manage projects, especially if you have access to a large number of them:
- Search as you type: Type in the search bar to instantly filter the list by project name, hub, cloud solution, or region. You no longer need to scroll through your entire project list to find what you're looking for.
- Sort: Click any column header (Project, Hub, Cloud Solution, or Region) to sort the list, making it easier to group projects by hub or region.
- Show only selected projects: Turn on this toggle to filter the list down to just the projects you've already selected. This is a quick way to review or audit your current subscriptions without searching through every project you have access to.
- Deselect all: Click this link to clear every selection at once, which is useful when you want to start your selection over from scratch rather than deselecting projects one at a time.
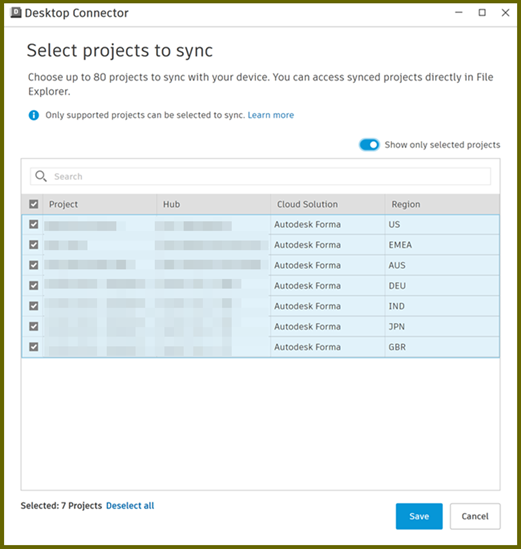
Missing items in Project Selection dialog
Some items may not appear in the Select Projects dialog.
Project Templates:
- Project Templates are managed in Forma web and do not appear in the Select Projects dialog.
- Projects created from a Project Template continue to sync as usual. For information about Project Templates, see Configure Templates in the Forma help.
Component Libraries:
- Component Libraries are managed by Forma Hub Admin and are not intended to be user-selectable projects.
- Starting with Desktop Connector 2027.2, Component Libraries are excluded from the Select Projects list. For information about Component Library templates, see DOCS Help | Library
Project status indicators
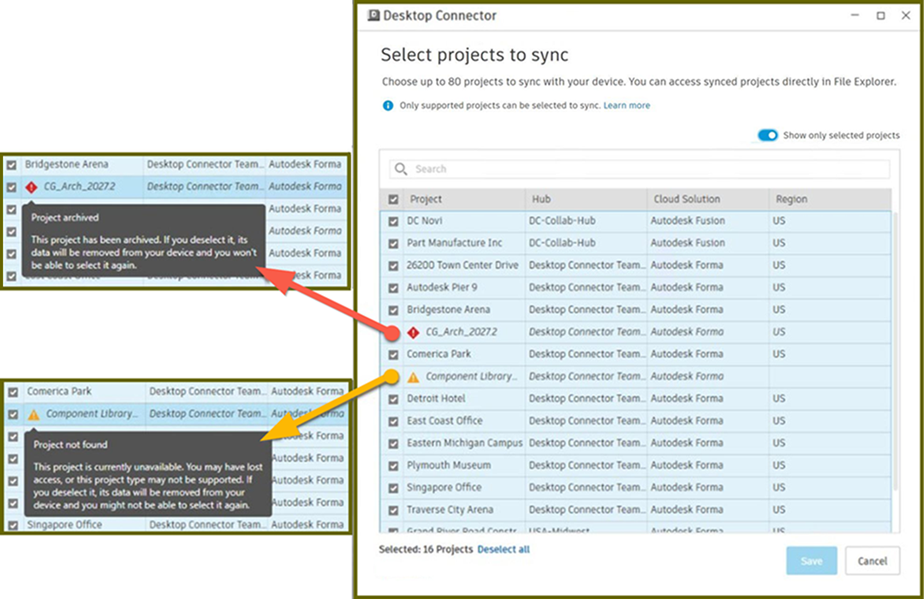
The Select Projects dialog displays an icon next to projects that are archived or otherwise unavailable so you can spot them at a glance:
- Project archived (red icon): This project has been archived. If you deselect it, its data will be removed from your device and you won't be able to select it again.
- Project not found (yellow icon): This project is currently unavailable. You may have lost access, or this project type may not be supported. If you deselect it, its data will be removed from your device and you might not be able to select it again.
Hover over either icon in the dialog to see its tooltip. If you see one of these indicators, check the project's status in Autodesk Forma or Autodesk Fusion on the web, and remove it from your selections if you no longer need it.
Project syncing errors
Occasionally, a syncing error may occur when there is a failure to update a project's data between your connector and the cloud data source.
You will see a 'Couldn't sync project' message in the home screen.
To resolve this error:
- Right-click the tray icon and click Select Projects from the menu.
- Remove this project. See Add or Remove Projects for more information.
- When your project is removed, click Select Projects from the menu and add it again.
The remove and add activities will display in the home screen.
Renaming projects and hubs
Do not rename the hub or project through Windows File Explorer. Renaming of the hub or project should be done through the Forma or Fusion web interface. If the hub or project is renamed using File Explorer it can break Desktop Connector file syncing.
. After Renaming Hubs:
- Make sure local files are synced and/or backup any local unsynced changes.
- Exit Desktop Connector.
- Follow steps to Reset Desktop Connector.
- Restart Desktop Connector and Select Projects.
After Renaming Projects:
Make sure local files are synced and/or backup any local unsynced changes.
Go to "Select Projects" in Desktop Connector from the home screen.
Use Show only selected projects or search by the old project name to find the renamed project, then deselect it.
Click Save and monitor the Home Screen. Wait for all projects to complete being removed.
Return to "Select Projects". The dialog will now reflect the correct project name.
Search for or browse to the renamed project and select it.
Click Save, wait for the project to complete adding, and File Explorer will show the correct name.
Deleting files and folders: Recycle Bin and cloud workflows
When you remove files or folders in Desktop Connector, the way deletions are handled depends on whether the files are synced, cloud-only, or local-only. For a full explanation of deletion workflows and recovery options, see Recover Deletions.
Related Concepts:
- Admin Project Subscription Deployment Guide - How administrators can pre-populate project subscriptions for new installations
- Is it possible to expand the maximum project limitation in Desktop Connector 16.0?