
Create, Edit and Delete Custom Attributes
You can create custom attributes and add them to folders to help define and structure metadata categories for files the folder.
- Access Custom Attribute Creation
- Create Custom Attributes
- Edit Custom Attributes
- Delete Custom Attributes
Access Custom Attribute Creation
There are different access points for creating custom attributes both at project level and at the folder level.
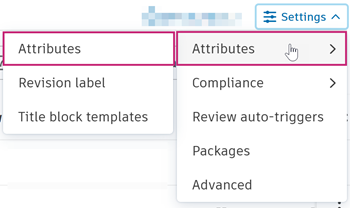
Project level custom attribute creation access
Project administrators can access project level settings:
Click the Files tool.
Click Settings.
Hover over Attributes.
Click Attributes.
Folder level custom attribute creation access
Members with Edit permission or above can:
- Click the Files tool.
- Click the More menu
 of the relevant folder in the folder tree.
 - Hover over More.
- Click Attributes settings.
Create Custom Attributes
Whether you've accessed project or folder level attribute settings, the creation process is as follows:
Click Create attribute.
Complete the required Name and Type fields. For Type you can select from either text field, date, drop-down list, or large drop-down list as detailed below.
You can also enter a Description.
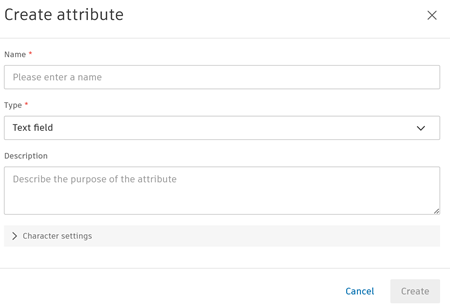
The following sections detail how to create the different attribute types after you've selected one from the Type field.
Text field attributes
Text field attributes let members enter a value in a text field. You can add the following Character length and Character type constraints:
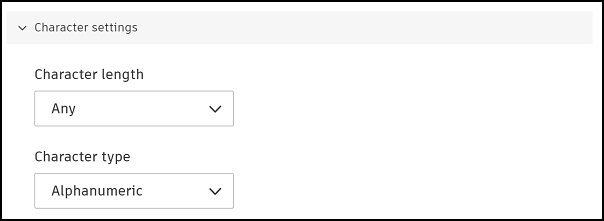
Character length: Select from Any, Fixed, or Range.
- Any: Allows members to enter a maximum 255 characters as a value.
- Fixed: Fix the value length to be an exact number between 1 to 50 characters.
- Range: Select a value ranging from 1 to 50 characters.
Character type: Select from:
- Alphanumeric: Any characters including symbols.
- Text: Alphabetical characters only. No numbers or symbols.
- Numeric: Numbers only. No symbols.
Date attributes
Date attributes let members select a date value from a calendar picker.
Drop-down list attributes
Drop-down list attributes let members choose from a defined list of values. You can add a maximum of 400 values of 32 characters each. The name of each value must be unique.
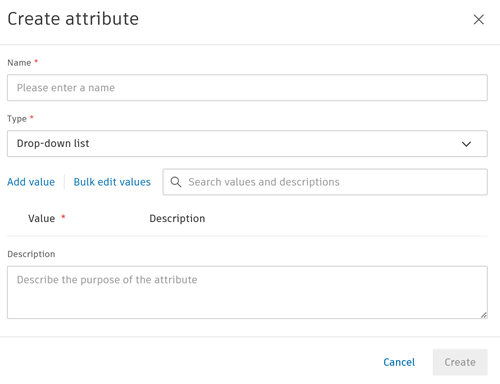
Click:
Add value to enter individual values.
Bulk edit values to add, edit, and delete values in bulk.
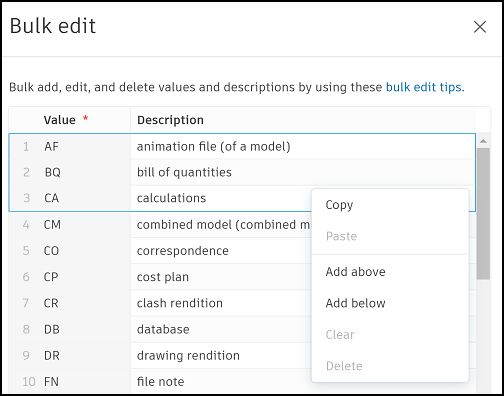
Click and drag to select one or more adjoining cells and right-click in your selection to view options to:
Action Description Shortcuts Copy Copies the content of the selected cells. Use operating system shortcuts. For example, Ctrl + C / Cmd + C Paste Pastes copied content into selected cells. Not compatible with Safari or Firefox browsers. Use keyboard shortcuts as an alternative. Use operating system shortcuts. For example, Ctrl + V / Cmd + V Add above Adds empty rows above your current selection. Number of rows matches your vertical selection. — Add below Adds empty rows below your current selection. Number of rows matches your vertical selection. — Clear Clears the content of the selected cells. Backspace. Clears a single cell or all selected cells. Delete Deletes the selected value and description rows. —
To add your new values, ensure that there are no duplicated or blank value cells before clicking Done.
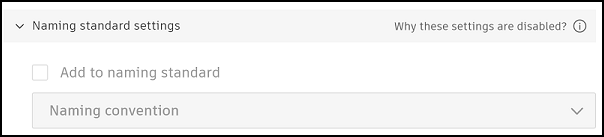
Project administrators can also add the attribute to the naming standard (either the naming convention or related attributes) if the naming standard enforced isn't applied to folders which contain files.
Click Create.
Large drop-down list attributes
Large drop-down list attributes work like drop-down list attributes, but support up to 2,000 values instead of 400. You can create a maximum of 10 large drop-down list attributes per project.
Large drop-down lists are created by downloading an XLSX template and entering values and descriptions.
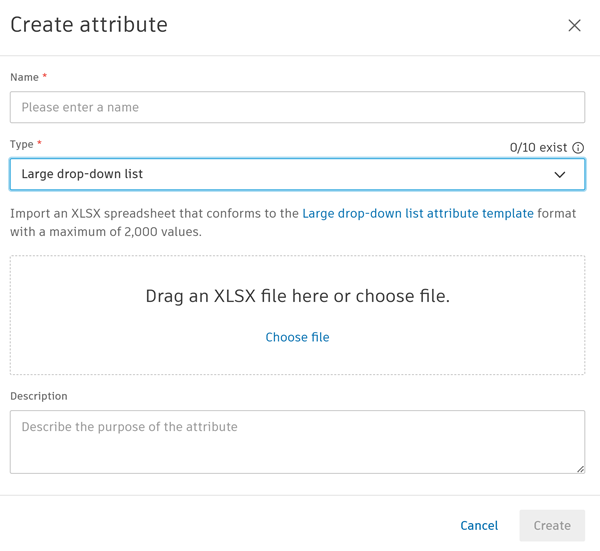
Click Large drop-down list attribute template in the Create attribute dialog.
The Large drop-down list attribute template will download to your local downloads folder.
Open the template.
The Large drop-down list attribute template has 3 tabs:
- INSTRUCTIONS: This details how you can add values and descriptions, including requirements and limitations. Read these instructions before
- EXAMPLE: This is an example set of values and descriptions which adhere to the requirements and limitations.
- TEMPLATE: This is where you enter your values and descriptions.
Enter the values and their descriptions in the TEMPLATE tab.
- You can enter a maximum of 32 characters for each Value field and a maximum of 255 characters for each Description field.
- Only the Value and Description field values will be imported
- Rows are inserted in the order they appear in the spreadsheet.
Save your changes.
Drag the saved file into the dropzone in the Create attribute dialog. You can always upload the file as necessary.
The system checks if your entries have any errors. For example, duplicate values, values which exceed the character limit, values entered for one column but not the other.
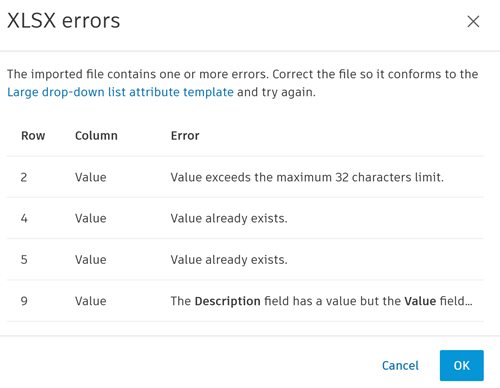
If there are any errors, fix and save these in your file before dragging them into the dropzone again.
Click Create.
If you are creating an attribute at folder level, you can now choose to set the attribute as Required as long the folder doesn't contain files and the holding area isn't holding files for that folder.
Click Save to also add this custom attribute to the folder you are currently in (and all its subfolders).
Edit Custom Attributes
You can edit custom attributes depending on your permission level and how the attribute was added.
| Access / permission | Edit attributes you added | Edit attributes added by others | Edit naming standard or required attributes |
|---|---|---|---|
| Project Administrator | Yes | Yes | Subject to Exceptions |
| Member (Edit/Manage) | Yes | No | No |
Exceptions:
If an attribute is added to a naming standard or is set as required for folders that contain files, no one can:
- Rename or delete values in a drop-down list or large drop-down list attribute. Values can only be added.
- Edit the character length or type in a text field attribute.
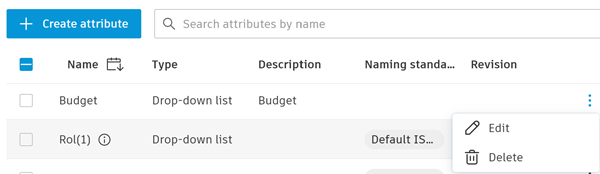
Click the More menu
of the relevant attribute that you want to edit or delete.Click Edit.
Edit Text field, date, and drop-down list attributes
These attributes are edited directly from the Edit attribute dialog:
Make your changes subject to the restrictions in the previous table.
Click Save.
Note: Changes to text field attribute character settings do not automatically update existing file attribute values. Noncompliant values are highlighted in yellow in the Files list and must be manually edited to comply with new constraints.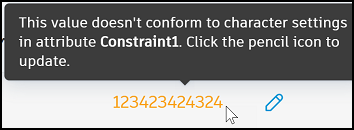
Edit large drop-down list attributes
You can edit the name and description of a large drop-down attribute directly from the Edit attribute dialog. However, the values and their descriptions are edited by downloading the existing values in an xlxs file, editing and saving the file, then uploading again.
Click Replace values in the Edit attribute dialog.
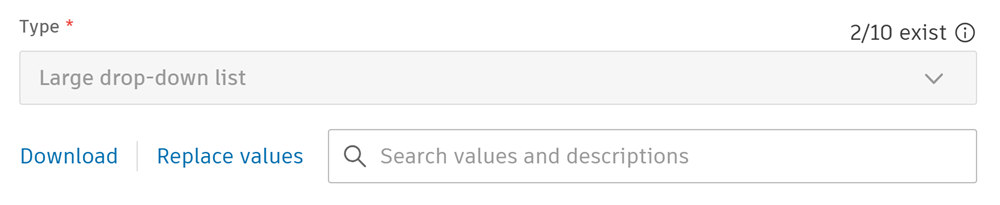
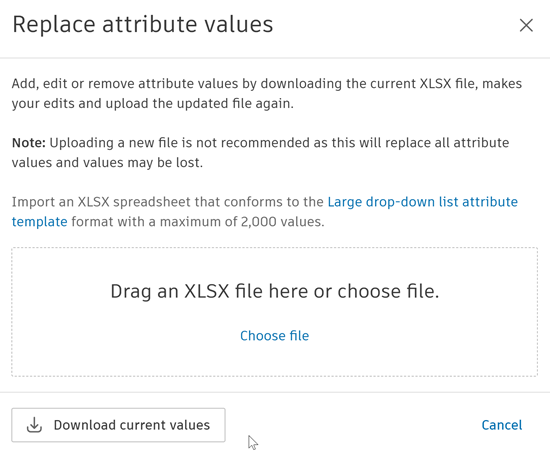
Click Download current values. This downloads an xlsx file of the attribute values to your local downloads folder.
Open the downloaded file and add, edit, or remove attribute values and their descriptions as necessary. Your changes are subject to the restrictions in the previous table.
Save your changes.
Drag or upload your saved file into the dropzone in the Replace attribute values dialog.
The values and their description will now display.
Click Save.
Delete Custom Attributes
Project administrators can delete custom attributes. Members with Edit permission or above can only delete attributes they've added themselves.
You can delete custom attribues subject to the following exceptions. Attributes can't be deleted if they are used in:
- Naming Standard
- Revision label
For example:
- If the Classification attribute is created from an ISO 19650 template and imported via XLSX, it can't be deleted.
- If an naming standard is applied to a folder which now contains files, its attributes can't be deleted.
- Attributes selected for Revision label can't be deleted.
Click Delete.
The dialog warns you that the attribute and all related data will be permanently deleted from the associated folders and subfolders.
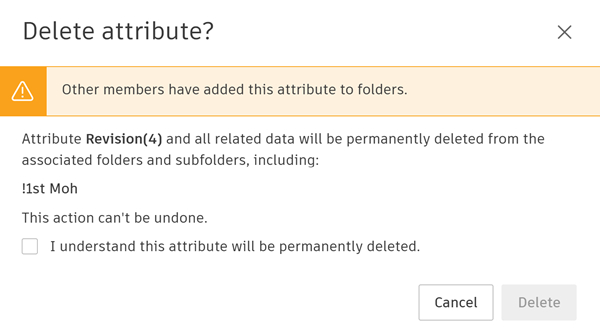
Click I understand this attribute will be permanently deleted.
Click Delete.