About Clip History
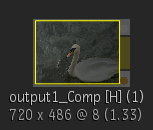
Use clip history to track and update operations you have applied to a clip. The Timeline History view expands a clip, providing a view of your operations. You can also use the clip history in Batch or Batch FX as an access point for modifying clips. Clips with history have a "H" icon when displayed on the desktop. In the Batch or Batch FX schematic, a [H] appears beside the clip name under the clip proxy.
 |
|
|---|---|
| Desktop clip with history | Batch FX clip with history |
Certain tools, including those that do not have an equivalent Batch or Batch FX node, such as Reverse, appear with a lowercase "h" icon when rendered. In this case, you can view the clip's history in the History view, but not make changes to that tool, or any upstream tools in the pipeline. To edit these effects, you need to rebuild the effect in the tool originally used to create it. You can use the Match button in the timeline History view to help you locate the clip to its source in the workspace.
Clips that have a clip history contain sources and intermediates. Sources are any of the original clips used to build an effect, for example, clips captured using an EDL. Intermediates are clips that are created when building a clip that uses multiple effects or operations.
A simple way of using clip history is to load a rendered clip back into the last editor that was used to create the clip. For instance, you load a clip into the Colour Corrector, modify the colour, and render a new clip. You decide that you want to change the colour slightly, so you press Shift and double-click the “H” icon of the new clip to go back into the Colour Corrector with the settings restored. You tweak the values slightly, and then render another clip (which has its own clip history).
If multiple tools were used to create a clip, you can load the result into a Batch or Batch FX setup, explode the history, and make modifications at any point in the process tree. For instance, you may have created a composite by bringing a colour-corrected back layer into the Keyer with a front and key-in layer that may also have been modified (for example, with a Flip). By loading the resulting clip into Batch or Batch FX, you can modify it at any point in the process tree, and then process a new clip.
Clip History Tips
- In the Batch or Batch FX preferences Rendering tab, you can enable Fill with Intermediates in the Cache section to so that each node's cache is filled with the intermediate clips contained in the history. Filling a history tree's cache increases interaction speed and avoids the need to reprocess effects that were already rendered. If an intermediate clip corresponding to a step in the history is deleted, the cache for that particular node is not filled.
- If you modify and then render an intermediate that is part of a clip history, all the clip history elements after the rendered event are also rendered. Additionally, all instances of the intermediate used in the clip history are modified. If the same intermediate appears in another clip history, however, it is not modified — once you modify an intermediate in a clip history, any copies you made of the intermediate in other clip histories are discrete.
- If you have a Paint or Stabilizer element in your clip history, all modules that precede the Paint or Stabilizer module will not be editable. You can, however, modify the elements before the Paint or Stabilizer element by selecting the element immediately preceding the Paint or Stabilizer element in the history, and then using Match to create a clip with the same history in the Source Area. You can then use the result clip from the match. The history is expandable and editable.
- The duration of a clip created in the Paint tool is not retained. For example, enter the Paint tool with None selected, and then create a scene that is 30 frames. Then go into a tool such as Action and make some changes. When you view the clip history and click the Paint tool element, the clip will contain one frame only.
- When you enter a tool from clip history, in and out points mark the duration in the source clip that was used in the clip history (unless the entire clip was used). If you then make a modification and process the result, only the duration of the clip marked by in and out points is rendered, unless you park the cursor before the in point. If the cursor is parked before the in point, media is added to the head frames, starting from the cursor position.
- Note the following when accessing the history of Action clips:
- When accessing the history of stereo output, you can change either the left or right eye output, or both.
- When accessing the history of clips containing multiple outputs, you can change the output enabled in the Action Output List but you can only have one output enabled.
- You cannot change an Output mode to Stereo if the previous output was not stereo.
