To Measure Distance, Length, Angle, Loop, or Area in Models or Drawings
Perform all measure workflows using the Measure tool panel.
What's New: 2022, 2024.2
Measure Overview
Measure can be used in the Assembly, Part, and Drawing environment.
In the Measure tool panel you can:
Specify the dual units and precision values. When one or more User Coordinate Systems (UCS) is defined in a file, you can specify the UCS to use. Results update if you change the value.
In an assembly file, choose a selection priority from the tool palette: Component, Part, or Edges and Faces.
Note: The tool palette displays the selection priority options docked in a convenient location next to the property panel. The palette can be separated from the property panel and placed wherever you like. You can easily dock it with the property panel.

Toggle between Minimum Distance, Center to Center, and Maximum Distance, for the distance delta value.
Copy one or all values in the Measure tool panel.
In the graphics window:
The geometry you select to measure remains highlighted in the graphics window.
The Measure selection set 1 and selection set 2 display different colors in the graphics window.
Note: You can change the color of the highlighted selections using Application Options

Colors tab by selecting a color scheme from the Color Scheme list.
In Assemblies, when part or component are selected, mass is calculated in measurement.
Note: To restart measure selections, click anywhere in the graphics window.
| Measure Linear Distance, Length, Angle, Loop, Area, or Mass |
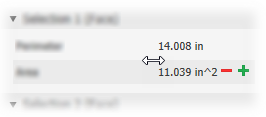
Information on each selection displays in the measure tool panel and in the graphics window. The Measure tool panel shows all possible values for your selections as well as the result from both selections. Clicking a value in the Measure tool panel displays the selection and the measurement in the graphics window. The value field column can be resized. Pause the cursor to the left of the value and click-drag to resize the column - On the ribbon, click
  . Or, click Measure on the marking menu. . Or, click Measure on the marking menu. - In Inventor assemblies only, if desired, select a selection priority: Component, Part, or Edges and Faces.
- Select the Advanced Settings drop-down arrow and set the dual units and precision values. If available, select the User Coordinate Systems (UCS) to use.
- In the graphics window, click to select geometry to measure:
- Length of an edge Click to select the edge.
- Diameter of a cylindrical face or circle Select the face or edge.
- Radius of a cylindrical face or arc Select a face or arc.
- Position of a point from the origin Click to select the point. The position of the point relative to each axis of the active coordinate system displays.
- Distance between points Click to select the first point, and then click to select the second point. When you select the second point, the position of the point from the origin and delta position relative to the first point displays.
- Distance between any 2 of the following geometries: Lines/axis, arcs/circles, splines and any type of surfaces, sketch point/non-planar face Click to select the first geometry, and then click to select the second geometry.
- Distance between two components in an assembly Select the first component, and then select the second component. A minimum distance value displays. The minimum distance between two components can be an edge, face, or vertex.
Note: Changing the priority also changes the type of minimum distance measurement you can perform, such as minimum distance between components or parts. The command defaults to Select Faces and Edges priority. When you use Component Priority in an assembly, you can select only components as valid selections, not faces. Changing the selection priority after the first selection resets the command. - Arc length Select an arc.
- Angle Use one of the following methods:
- Select 2 lines, edges, or faces.
- Select 2 points, and then hold down SHIFT and select the third point of the angle.
- Select an arc or circle.
- Select a line or axis and then select a planar faces.
- Area and loop Select the contiguous, enclosed region to measure.
Note: To include sketch loops in the Select Other list, select the Advanced Settings option Detect Sketch Loops. The default setting is ON.
To copy one or all values: Right-click a value and select Copy or Copy All from the context menu. - Click Done to close the panel or Restart to initiate a new measure sequence. You can also initiate a new sequence by clicking in a blank area of the canvas.
Note: - Minimum Distance and Center to Center Distance display at the same time when at least one of the following types of geometry are selected:
- Arc/Circle
- Ellipse
- Cylinder/Cone/Torus
- Sphere
- Maximum Distance displays when 2 of the following types of geometry, on the same plane, are selected:
| 

|
Use Measure to Enter Values in Dialogs
In most dialog boxes, you can use the Measure command to enter values .
In a dialog box or property panel, on the drop-down list for a box that requires a value (for example, Taper or Distance in the Extrude dialog box), click Measure.
Note: Not all lists contain the option.
In the graphics window, click to select the geometry to measure..
The measurement displays.

 Colors tab by selecting a color scheme from the Color Scheme list.


