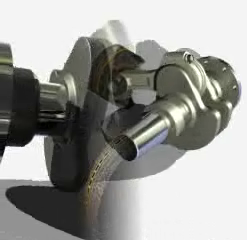
Model Animation in Studio

Inventor Studio uses assembly constraints and parameters as animation input enabling you to animate the same mechanistic movement you are designing into your product. You can also suppress constraints and animate components in an unconstrained condition. Constraint selection commands, such as Select Top and Select All, help in selecting multiple constraints after which, with one context menu selection, you can suppress the selection set or add it to Animation Favorites.
When you animate a component, camera, or light the result is an action placed in the animation timeline. Animation actions are easily modified either directly or through the same dialog box used to create them. You can drag the action along the timeline, edit the start or end time positions, and mirror the action for an easy reversal of the action. You can rename the Studio nodes in the Scene or Animation browser. Renaming in one browser affects both.
Video Producer, part of Inventor Studio, enables the use of multiple camera footage, called shots, still shots, and shot transitions to produce a more cinematic animation.
Composition of animation
Composing an animation can be as simple as creating a turntable camera or as complex as a fly-by camera following a path while your product goes through its paces and interacts with other objects. You determine the level of complexity. As always, keeping it simple makes it easier and faster to produce.
When composing an animation consider the following:
- What is the purpose of the animation? Is it to show off product functionality or to make a simple animation such as a turntable with the product center stage? Write down the things you want to accomplish with the animation.
- Where should the cameras be placed?
- Do I need shots from multiple cameras? How many different angles do I need?
- Should I use props to show my product in its environment? Where should I place them?
- How long will the animation be?
If you have not created a storyboard before, here are a few steps toward making a simple one. These steps can be done digitally (various software products are available for such purposes) or by hand.
- Decide if props are used. If yes, we recommend that you create a wrapper assembly and add the content you want in that assembly.
- Create and position your cameras, render test images for each camera angle.
- Write down the corresponding animation action, whether component, camera, or lighting, that is to take place with the camera angle images.
Production of video footage
Use Inventor Studio to use one or more cameras to create composited animations. Video Producer has commands to combine the footage from one or more cameras, from any of the animations in the open document, into video footage. Additionally, there are shot transitions, such as fade and gradient wipe, that enable a more cinematic look for your animation.
Using Video Producer you can:
- Use shots from any camera, of any animation within the same document, to produce a single animation. The shots can be a range of frames/time or as simple as a still shot.
- Specify the portion of camera footage to use.
- Specify transitions such as fading at the beginning or end, and between shots.
- Modify the span of the shots and transitions
When you activate the Video Producer command, the software takes snapshots of all existing cameras and places them in the Shot browser in the dialog box. The number of shots captured depends on the number of cameras you defined for your images and animations, and how many animated sequences each camera captured. For example, a camera animated as a turntable camera has one snapshot to represent the animation. A camera animated three times in an animation has three shots in the browser, one for each animated sequence.
Use transitions to blend two shots with an effect between them. You can create and maintain multiple productions inside your assembly.
Rendering of animations
Inventor Studio provides commands for rendering during the animation design process or for final output.
If, during animation design, you are curious what your animation looks like, but not concerned with the final rendered appearance, you can do a preview render. Preview renders use the standard Inventor graphic system for producing the animation output. You can quickly render the animation to see component motion and camera animation without waiting the lengthy time that is required for a realistic rendered result.
Once the animation meets your requirements, render it with full lighting and reflection using the Shaded render type or you can use the Illustration type to produce a more cartoon looking rendering. Also, if you used Video Producer to composite various camera shots and transitions into video footage, render its output.
When you use the render animation command you can:
- Preview Render using the standard Inventor graphics for output. Preview Render uses the current scene lighting for rendering.
- Render Shaded and Illustration type output with specific settings for each type.
- Render specific frames, time range, or the full animation and output them as image sequences or in video formats (wmv or avi).
- Specify output size by selecting from a list of preset values or specifying any size and ratio up to 3000 x 3000 pixels.
- Select a frame rate from the list of commonly used frame rates.
- Render video footage from Video Producer
