
The Task Pane gives you quick access to frequently used features, and groups these features into task-related views. Use the Task Pane to create, manage, display, and publish maps.
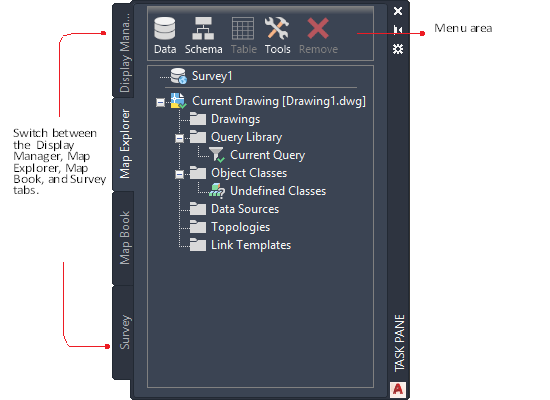
The Task Pane
There are four tabs:
- Display Manager, where you manage features stored in data stores (databases, geospatial data files, and raster files), attach drawing files, and change the appearance of features. Each geospatial feature class is a layer in Display Manager. You can add drawing layers as well.
- Map Explorer, where you view the elements of your map project. Such elements include the files you connected to as sources, queries you used and saved, and templates for linking drawing objects to data. Use this view to query in objects from attached drawings and to view the data for any object.
- Map Book, where you divide a large map into "tiles." Each tile is rendered on a separate page. You can publish map books in various formats, both for printing and for online display.
- Survey, where you bring in and work with survey point data.
Each view of the Task Pane has its own menu area. You can also right-click any item in the Task Pane to see a customized menu for that item.
Use these techniques for the Task Pane
- To switch between views, click the tabs on the Task Pane.
- To see options for the current Task Pane tab, click an icon in the menu area at the top of the Task Pane.
- To hide the Task Pane, click its Minimize button. Hold your cursor over the Task Pane title bar to see the Minimize button. To display the Task Pane after hiding it, move your cursor over its title bar.
- To make the
Task Pane a floating palette, grab its title bar and drag it to the desired location. Drag the title bar to a window edge to dock it again.
Note:
To minimize the Task Pane each time you move your cursor away from it, right-click the Task Pane title bar and turn on Auto-hide.
- To close the
Task Pane, click the X in its top right corner. Hold your cursor over the
Task Pane title bar to see the X.
Once you have closed the Task Pane, you can redisplay it. In the Planning And Analysis workspace, click
 .
.
Map Explorer
Use Map Explorer to manage the data sources included in your current map.
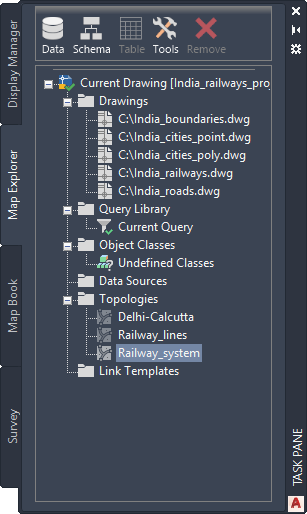
Use Map Explorer to manage the following:
- feature sources (such as Oracle, SHP, and SDF)
- attached source drawings
- drawing queries
- object classes
- external data sources for drawing objects
- topologies
- link templates
To attach a drawing to the current map
- Drag the file from File Explorer to the Map Explorer tab of the Task Pane.
To use a database in a drawing
- From File Explorer, drag a database file to the
Map Explorer tab of the
Task Pane.
If the Map Explorer tab does not immediately display the data source, right-click a blank space in the Map Explorer tab. Click Refresh.
- Right-click the
Data Sources folder on the
Map Explorer tab and select
Attach.
AutoCAD Map 3D toolset automatically creates the required files for communicating with the database application. However, for some database types, you must configure these files yourself.
Do one of the following:
Display Manager
The Display Manager lets you create display maps. Each display map contains a set of styled layers. You can have more than one display map in a map file, and you can style the same data differently in each one.
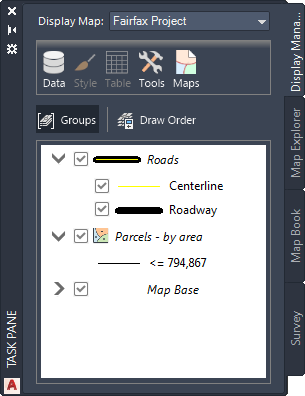
Use Data Connect to add features to your map, or drag data sources into Display Manager to add them as layers. For example, drag an SDF file from File Explorer into the layer area to add it.
Use these techniques in the Display Manager
- To change the appearance of a layer, select it and click

- To view and edit the attributes for a layer, select it and click

- To change the draw order of the layers, select a layer and click Draw Order. Drag the layers into the order in which you want them to appear in your map.
- To see options specific to a layer, right-click any layer.
Selecting a layer also displays a contextual tab in the ribbon, with the available options for that layer. See Shortcut Menus
To use the Style Editor to style geospatial features
- In the SampleMap.dwg file, select the Parcels layer in Display Manager.
- To change the color of the parcels, click the
Style button in the
Task Pane menu area.
- Click in the Style field in the middle of the Style Editor window.
- Select a different Foreground color and click OK.
- Close the Style Editor by clicking the X in its top right corner. The changes are displayed in your map.
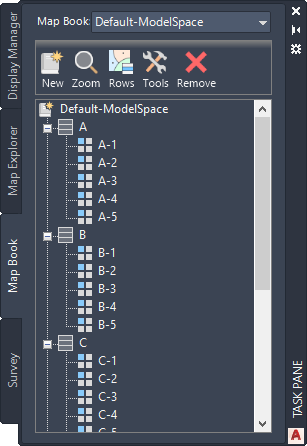
Map Book
Use the Map Book tab to create printed maps, map books, and multi-page DWFs from styled maps. Map Book uses the AutoCAD Sheet Set Manager, and provides a tree view of the tiles in the map book, like pages in an atlas. Use navigation arrows to move between tiles in your map.
To create a map book
Survey
Use the Survey tab to import and organize survey data points.
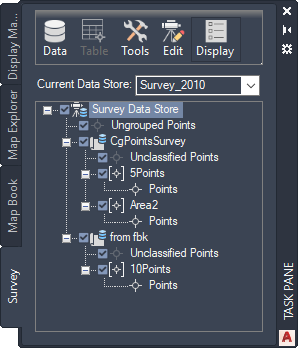
Use the Survey tab to import and organize survey data.
To work with survey data
To continue this tour of AutoCAD Map 3D toolset, go to Properties Palette