
Publishing Compounds for material authoring
What is publishing?
MaterialX Publishing refers to the process of exporting, organizing, and distributing materials and shaders. With Publishing, Lookdev artists can create libraries of predefined shaders for reuse, which can be easily shared with other artists. Note that publishing is only possible with compounds inside of MaterialX data type tabs.
Publishing a Compound
To publish a graph as a Compound, select the nodes to be included in the Compound and right-click on an empty section of the graph, choose "Create Compound". Rename the Compound if desired, then right-click on the Compound and choose "Publish yourCompoundName...". The Publishing Settings window will appear.
Publishing Settings
Set parameters for the Compound to be published in the Publishing Settings window:
- Node Name: The Compound Node name is extracted from the Compound name by default however a custom name can be type in manually as well.
- Node Group: Enter the name of the Node Group you want the Compound to appear in. This Node Group will appear under the Library path set under Save To.
- Node Info: Enter any extra information about the Compound here. This info will appear in the MaterialX file as metadata.
- Save To: Indicates the path to the folder where the Compound will be published to. By default, the path points to the User Library set in the LookdevX Preferences window. Custom paths can be set by clicking Browse. If a custom path is set, you will be asked whether you want to add it to Global Libraries and to make the node discoverable. Clicking Yes will add the path to the Global Libraries section of the LookdevX preferences, and the folder chosen will be added to the Node Library in LookdevX to be used in your graphs.
- Location: Allows quick selection of Libraries saved to the LookdevX Preferences window. Clicking the dropdown arrow will show the list of choices including User Library, Custom and any Global Libraries defined in the LookdevX Preferences. By default, it is set to User Library. If a custom path is entered in the Save To section, Location will switch to Custom automatically.
Publishing preferences
You can set a preference for where compounds get saved in the LookdevX preferences dialog. To access the LookdevX preferences, open the Options menu in LookdevX and choose LookdevX Preferences. This opens the Maya Preferences window to the new LookdevX section.
There are two preferences for publishing Compounds:
User Library: Sets the directory path to where published Compounds are saved when publishing from LookdevX. This directory also serves as a source when importing compounds with the Tab menu.
Global Libraries: Sets the directory path(s) to external libraries from which Compounds are loaded or written to. Multiple paths can be set using the options provided.
- New: Creates a new entry in the Global Libraries list. Enter a path manually, or click Browse to set the path.
- Edit: Allows the editing of an existing Global Library path.
- Browse: Opens an Explorer window to pick a desired path.
- Delete: Deletes the selected Global Library path.
These paths can be managed using the environment variable LOOKDEVX_GLOBAL_LIBRARIES_PATH and setting it to the path of the library folder location(s). When the environment variable is used, the Global Libraries path option in the LookdevX preferences window becomes greyed out and inaccessible.
Using Custom Nodes
After publishing a Compound, you can create instances of the custom node by pressing Tab or opening the Node Library.
- If published to the User Library, the Compound will appear under
User/<Node Name>if no node group was specified, orUser/<Node Group>/<Node Name>if a node group was specified. - If published to a Global Library, the Compound's location in the Node Library will depend on the folder name on disk.
- If published to a custom path, the Compound may not appear in the Node Library. To make LookdevX recognize Compounds published to custom paths, add these paths as Global Libraries in the Publishing preferences.
After importing, details of the published Compound can be found in the Info tab of the property editor when the Compound is selected in the graph.
Viewing a Node Definition
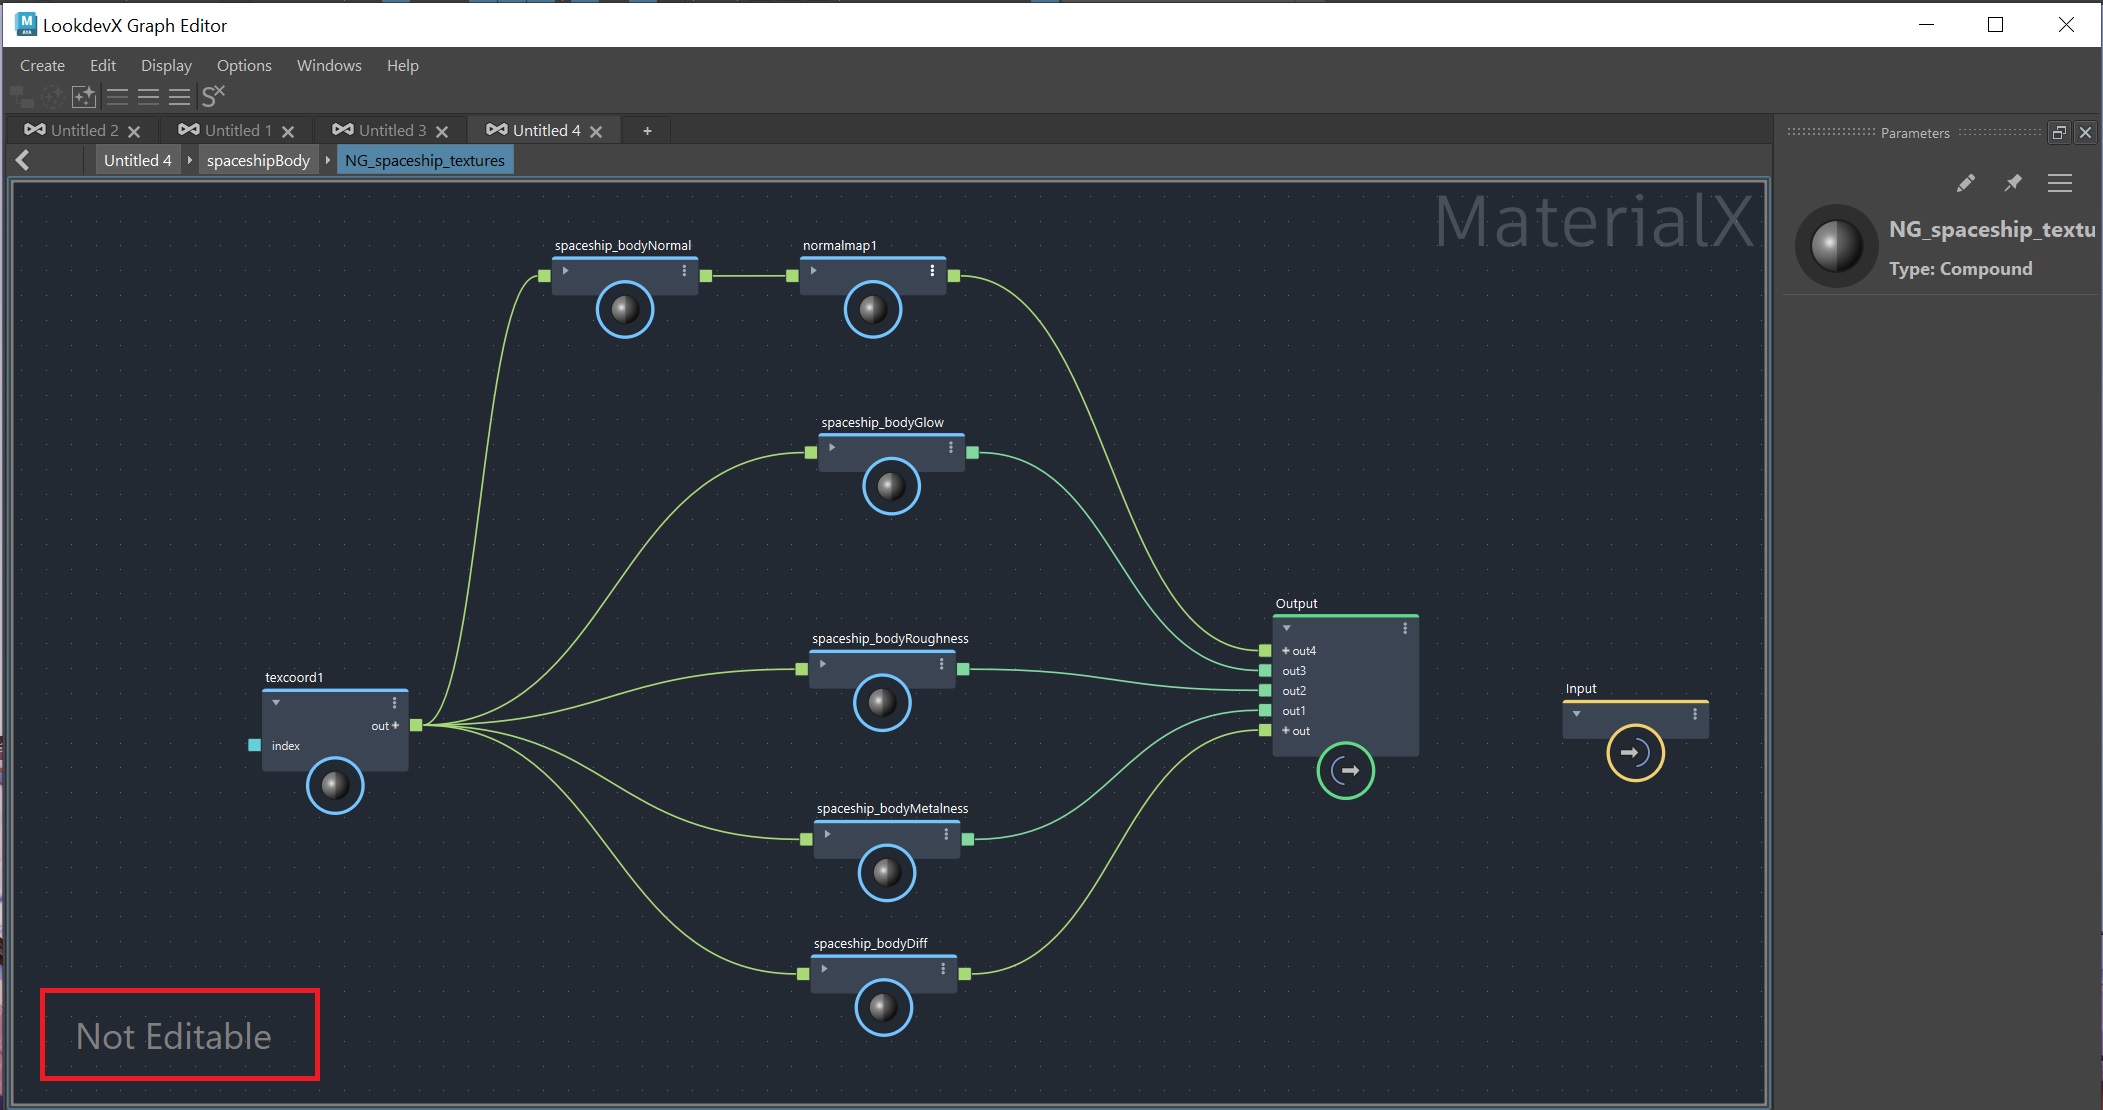
After creating an instance of a custom node, you can view its implementation by right-clicking on the Compound and selecting "View Definition". This action dives into the node and displays the underlying graph that describes its behavior. The same feature also works for all nodes from the standard library, which are implemented as node graphs. By default, the implementation is not editable as indicated by the "Not Editable" label in the bottom left corner of the LookdevX graph.
Make Editable
Instances of Compounds in the graph can be made editable. After importing a published Compound, righ-click on the Compound node and choose Make Editable. The Compound is made local to the scene and can now be iterated on. Double-click the Compound node to enter the node and to start editing the underlying graph. Compounds that are made to be editable, can be re-published as new Compounds.
Default Geometric Properties
On MaterialX ports, it's possible to set a default geometric property or defaultgeomprop. They are an alternative to setting a value or making a connection manually. If a defaultgeomprop is set, the value of the specified geometric property will be read during shader evaluation. Examples of geometric properties are texture coordinate, position, normal, tangent and bitangent. They are especially useful for ports on Node Definitions to provide a default value. Instead of defaulting to a constant value, it allows the port to default to the value of a geometric property, hence the term default geometric property.
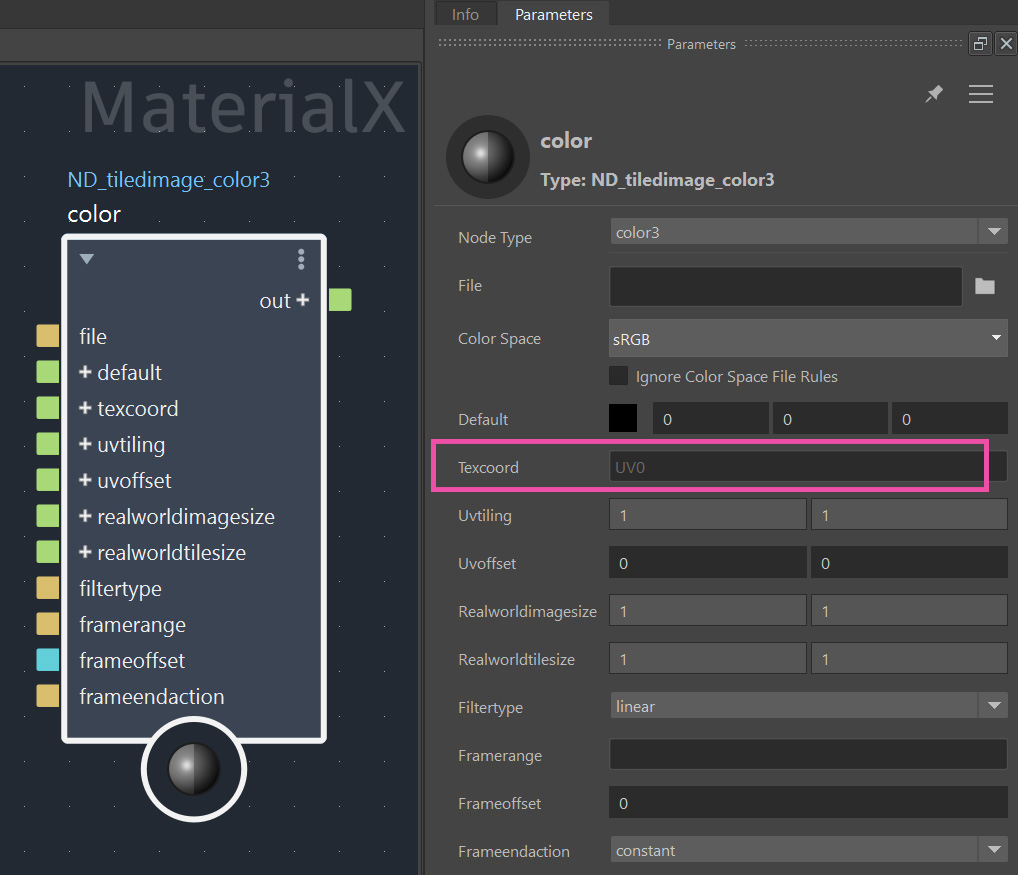 MaterialX nodes in LookdevX include a default geometric property for many key geometric properties such as Texcoord as seen in the image above.