
In the following steps, we will apply three constraints:
- Constrain the vertical faces of the Billet and Top Plate in X and Z directions, as it is a quarter symmetry model.
- Constrain the top face of the Top plate.
- Apply a Rigid (Explicit) constraint to the Base solid, as it has a rigid material.
- In the Assembly tree, under Subcase 1, right-click . If Subcase 1 is not present, right-click to create it.
- Select the vertical faces on the Top Plate and Billet that align with the Base, and are perpendicular to the X axis, as shown in the figure.
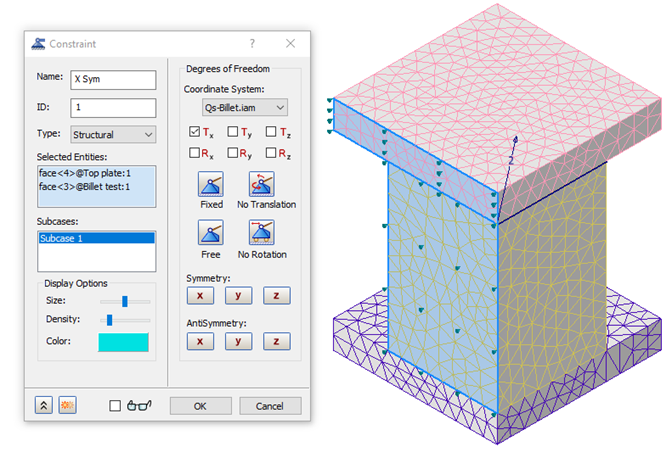
- In the Constraint dialog, under Degrees of Freedom, select Tx to constrain the two faces in the X direction. Change the name of the constraint to X Sym.
- In the lower left of the dialog, click
Create Duplicate
 to save X Sym and keep the dialog open for creation of another constraint.
- Right-click in the Selected Entities field and, if necessary, select Clear All to remove the faces selected for X Sym.
- Select the two adjacent vertical faces of the Top Plate and Billet that align with the Base, and are perpendicular to the Z axis.
- Select Tz to constrain the two faces in the Z direction. Rename this constraint to Z Sym.
- Click
Create Duplicate
again, select the top face of the Top Plate, and select Tx and Tz degrees of freedom.
- Name this constraint Top Face, then click OK to add it to the subcase.
- Under Subcase 1, right-click , change the Name to Rigid Constraint, and change the Type to Rigid(Explicit).
- Hover the cursor over the bottom Rigid Plate, then right-click
.
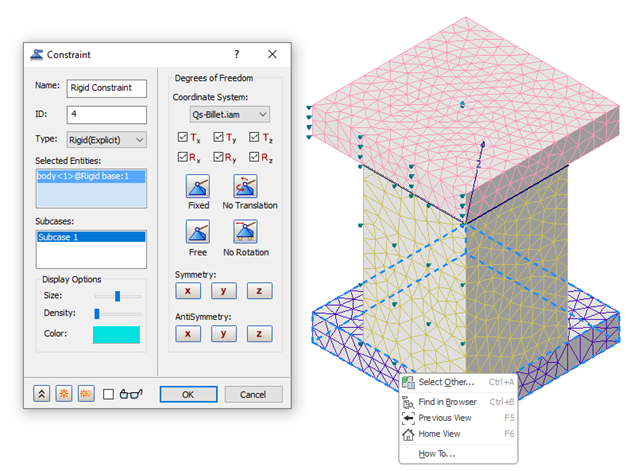
Note that all six degrees of freedom are selected.
- Click OK to close the Constraint dialog.