
The Slope Arrow tool creates sloped surfaces.
You can use a slope arrow for the following types of elements:
- roofs
- soffits
- floors
- structural floors
- ceilings
For example, to create a flat sloping roof, draw a slope arrow from the lower edge to the upper edge of the roof boundary.
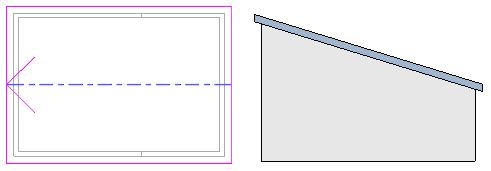
When you draw a slope arrow, you can enter property values to specify the height at its head and tail, or a slope value. The tail of the slope arrow must be on one of the sketched lines that defines the boundary. This sketched line cannot be slope-defining (unless the slope arrow is at a vertex), because that would specify conflicting slopes for the same segment.
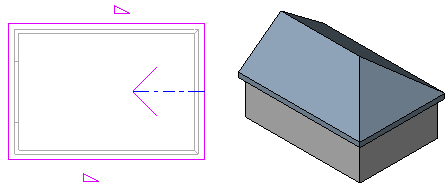
The following example shows a hip on a gable roof. The slope arrow properties are defined as Specify = Slope, Height Offset at Tail = 4’ 0”, and Slope = 9”/12”.
When to use a slope arrow
Use a slope arrow when
- you want to draw the slope in a plan view.
- you know the height at the top and bottom of the element plane, rather than the slope angle. For example, you can use slope arrows to adjust a flat roof to satisfy a particular height at a drainage point.
- the slope is diagonal across the surface or not square to an edge.
- the slope starts and ends at atypical points on the surface.
- you want to create a dormer.