
1.2 Templates for Other Design Codes
Subjects Covered
- Default materials for different design codes
- Templates from existing templates
Outline
Autodesk Structural Bridge Design may be used for projects that require design checks to more than one design standard. If this is a requirement it may be convenient to set up templates that contain material data relating to design parameters pertaining to other codes of practice. If templates have already been defined for Eurocodes is a simple procedure to start a new section/beam/project from the EU templates, change the design code as required and then save as a new template. In this way the EU material properties are converted to equivalent properties specific to the new code. It should be noted that the material names remain unchanged, but these may be edited before saving.
Alternatively, if a complete structure, beam or section is defined using one design code, and then the design code changes, the appropriate materials are automatically re-assigned. Other code specific data may be deleted but a warning message is issued if this is the case.
In this example we use the Design Section template created in example 1.1, called “EU Section.sbt”, to provide the starting point for a new template called “LRFD Section.sbt”.
Procedure
Start the program.
Exit the Home screen using the
ESCkey or the back button

Use the menu item File | New | Create From Template and select the template file “EU Section”.
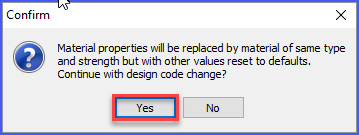
Use the menu item Options | Design Code | AASHTO LRFD to change the design code. A warning/information message should be issued. Enter “Yes” to continue (twice).
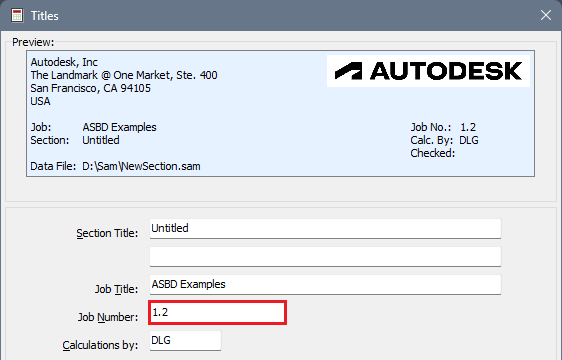
In the Titles form, leave the same name in the Job Title field but set the Job Number to “1.2”.
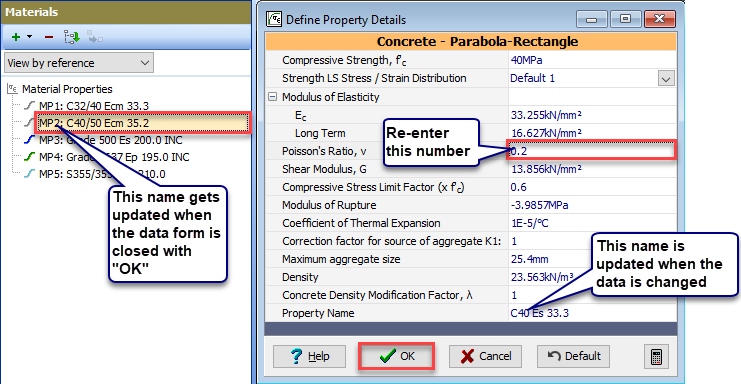
In the Materials navigation window it can be seen that although the design code has changed the material names still relate to Eurocodes. To change these it is simply a matter of opening each material in turn, by clicking on it in the navigation window, and overtyping one of the characters in one of the data fields before closing the form with the ✓ OK button. This will result in a more appropriate name but any name may be entered in this field if required.
Save this data to a template using the menu item File | Save As Template | My Template using the filename “LRFD Section.sbt”.
Close the program.
Summary
The data created in this example is just an illustration of how templates can be defined for multi-code projects. It also shows how templates can be saved and used by other users.