
Invite and manage members (Fusion Manage Extension)
This content applies only if you have the Fusion Manage Extension. If you don't have the extension, follow these instructions instead.
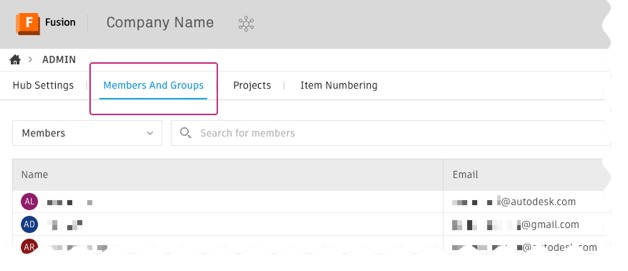
As a hub administrator, you can invite members, assign roles, and manage their access to your hub. All member management tasks are performed in the Fusion web client under the Members and Groups tab.
To access the Members and Groups tab:
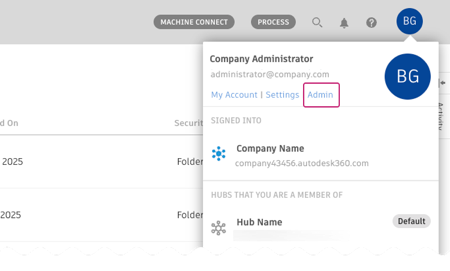
Click your profile image in the top-right corner of the Fusion web client.
Click Admin > Members and Groups.
Invite members to a hub
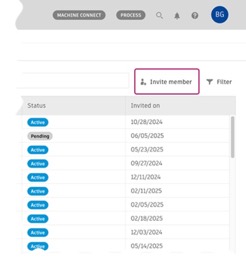
In the Members and Groups tab, click Invite member.
Enter one or more email addresses of the people you want to invite, separated by commas.
Click Invite.
Invited members receive an email with a link to join the hub. Until they accept, they’ll appear in the member list with the status Pending. You can resend or withdraw invitations from this list as needed.
Resend or withdraw invitations
In the Members and Groups tab, click the name of a member with the status Pending.
A side panel with the member's details opens.
In the Details section, hover over the status field and click More
 .
.
Choose Resend Invite or Withdraw.
If you resend the invitation, the member receives a new invite email. If you withdraw the invitation, the member will be removed from the list and will no longer be able to accept the original invitation. If they try to do so, they will receive an error message.
Change a member's role
In the Members and Groups tab, click the member's name whose role you want to change.
A side panel with the member's details opens.
In the Hub access section, click the drop-down menu to choose a new role:
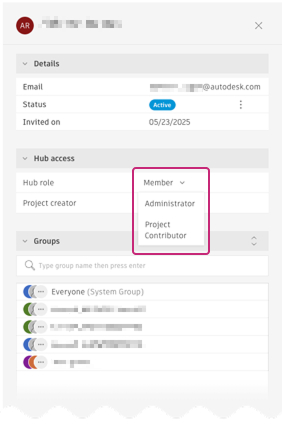
- Member: Can create and save Fusion designs
- Administrator: Can manage member permissions, hub settings, security, and other admin tasks
- Project contributor: Limited to contributing to a specific project
Select the new role.
(Optional) Toggle Project creator if you want this member to create new projects.
Role change rules
| Current role | Can change to |
|---|---|
| Project contributor | Member |
| Member | Administrator, Project contributor |
| Administrator | Member |
Role changes take effect immediately and update the member's access throughout the hub.
You may also want to change the member's role for specific projects. See Manage people in projects.
Search and filter members in a hub
When managing large teams, use the search and filter tools to quickly find and organize members.
Search for a member
Go to the Members and Groups tab.
Type the member's name in the search field.
As you type, the member list automatically filters to show matching results.
Click a member to view or manage their profile.
To clear your search and return to the full member list, delete the text in the search field or click X.
Filter members by status
Click the filter icon
 in the top-right corner of the member list.
Select a status filter.
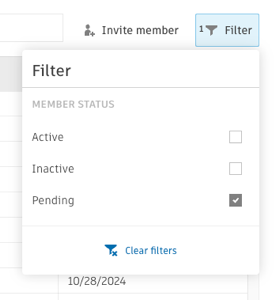 Note: Only one status can be selected at a time.
The member list updates automatically to show only members matching your selected status.
To clear filters, click the filter icon ![]() again and select Clear filters or manually deselect the filter.
again and select Clear filters or manually deselect the filter.
Activate or deactivate a member in the hub
In the Members and Groups tab, click the member's name whose status you want to change.
A side panel with the member's details opens.
In the Details section, hover over the status field and click More
.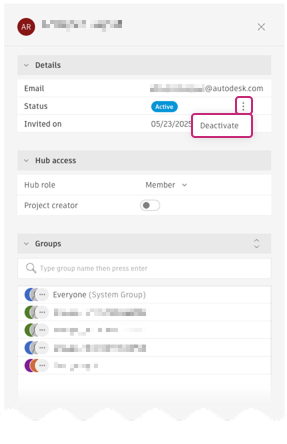
Click Deactivate or Activate.
When you activate a member, they are restored to the same role they had prior to deactivation, and their access to projects continues as before.