
Activity 3: Rough using adaptive clearing
In this activity, you will use an Adaptive Clearing strategy to remove the majority of excess material (roughing).
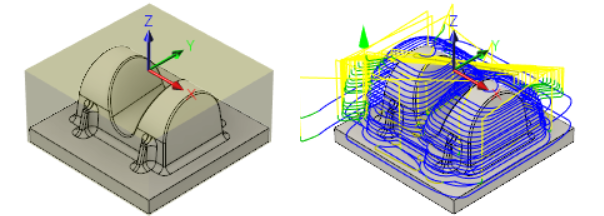
Unmachined stock material (left). Part with a Adaptive Clearing applied to it (right).
Prerequisites
- You have created a tool library (Activity 2).
Steps
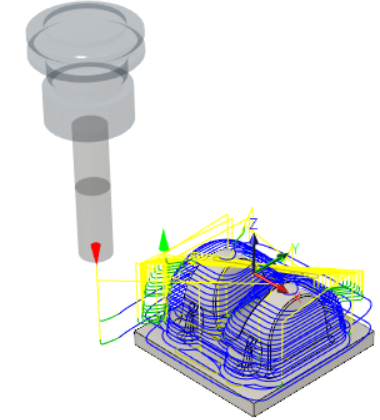
In the Adaptive dialog, select the #10 - Ø20 R1 mm bullnose tool.
On the Manufacture toolbar, Milling tab, select 3D > Adaptive Clearing
 .
.On the Tool tab
 , click Select to access the tool library.
Select the tool 10 - Ø20 R1 mm - bull nose from the Tutorial4 library just created.
Click Select to close the Select Tool dialog.
Note: The Geometry tab allows you to override the default model and confinement settings. In this example, the default stock, model, and WCS orientation as previously defined in the setup will work and you do not need to change anything.
Set the height settings so you machine down only to the flat area of the part, omitting the rectangular base of the part.
- Click the Heights tab
 .
. - From the Bottom Height drop-down menu, choose Selection.
- For the Bottom Reference, select one of the vertices along the bottom face as shown in the following image:
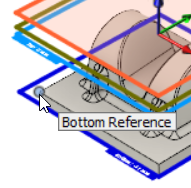
- Click the Heights tab
Specify the machining passes parameters.
Click the Passes tab
 .
.Enable the Machine Shallow Areas checkbox.
Set the Maximum Shallow Stepover to 1 mm.
Set the Maximum Roughing Stepdown to 25 mm.
Leave the Fine Stepdown at 2.5 mm. Note: This parameter automatically updates with the Maximum Roughing Stepdown setting.
Enable the Flat Area Detection checkbox.
In the Stock to Leave group, set Radial Stock to Leave to 0.3 mm.
Note: Observe that the Axial Stock to Leave value is automatically updated to reflect the Radial Stock to Leave value.Click OK to automatically start calculating the toolpath. A preview appears on the canvas.
Activity 3 summary
In this activity, you used an Adaptive Clearing strategy as a roughing operation to remove the majority of the excess material.