
Activity: Create and assign a PLM role to a group
This feature is part of an extension. Extensions are a flexible way to access additional capabilities in Fusion. Learn more.
The workspaces that you see as well as the tabs within them and what you can do in each tab are controlled by the permissions set within a role. Roles are then assigned to one or more groups. Then, when someone is added to a group, they inherit the permissions of the roles assigned to the groups they belong to. See Security for more information on creating and managing roles and groups.
For example, in order for the Relationships tab to be visible in the Components and Drawings workspaces to your users, you will need to add permissions to view and edit the Relationships tab to a new or existing role. In this activity, you'll create new roles with the permissions needed to view and interact with the Relationships tab in the Components and Drawings workspaces.
Prerequisites
Before you can complete this activity, you should complete Tutorial 2 Activity 1 so that you have relationships set up between the Components and Drawings workspaces.
Steps
Access the hub administration.
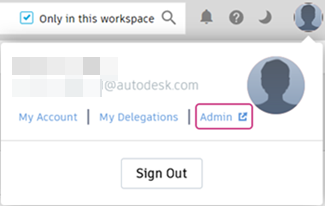
Option 1: In the top-right corner of the Fusion web client, click your profile and select Admin.

Option 2: In the top-right corner of the Fusion Manage Extension site, click your profile and select Admin.
Create a new role with permissions for the Relationships tab in the Components workspace.
Open the Members and Groups tab.
Click the dropdown list, select Groups.
Click an existing group that already has access to the Components workspace.
In the PLM Workspace Access section, click the three dots menu next to the Components workspace and select Manage roles.

This opens the Fusion Manage Extension PLM Roles page in the Fusion Manage Extension site.
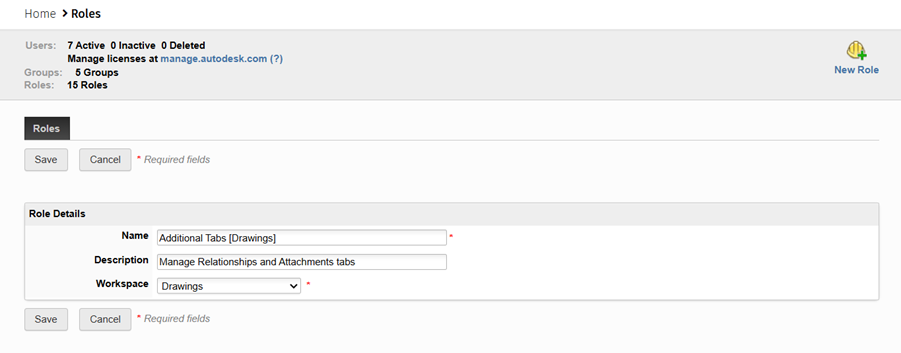
Click New Role.
Enter a Name for the role:
Additional Tabs [Components].In the Workspace drop-down list, select the Components workspace.
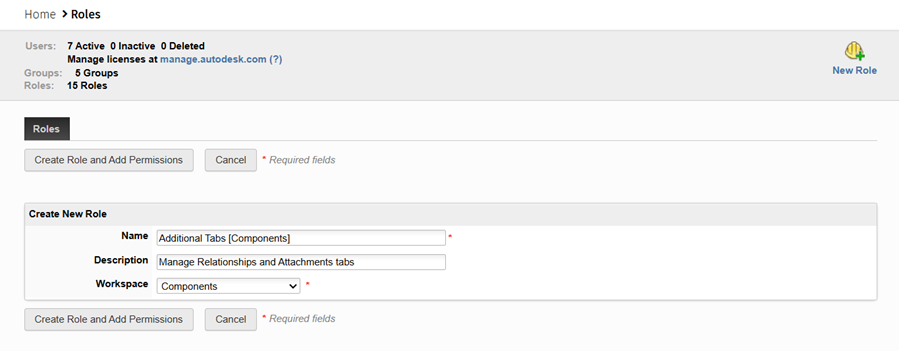
Click Create Role and Add Permissions.
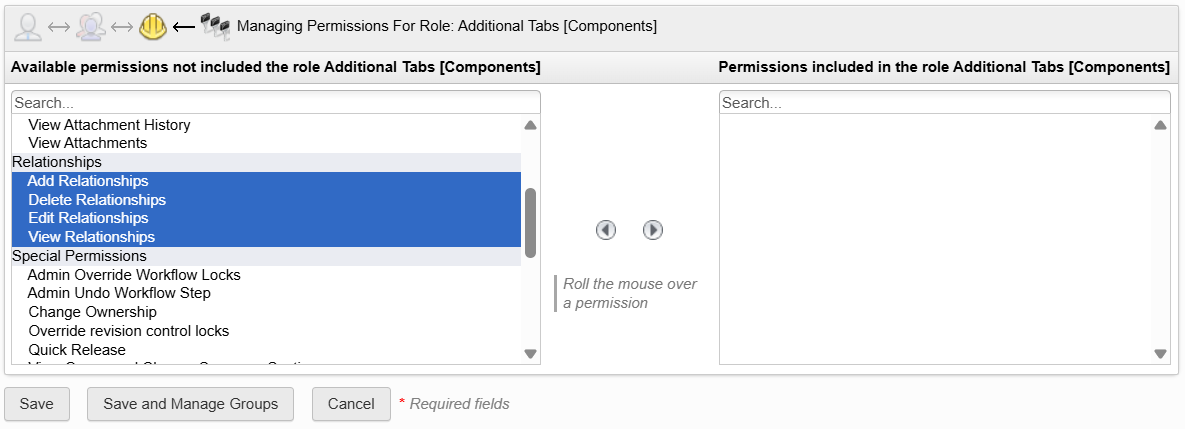
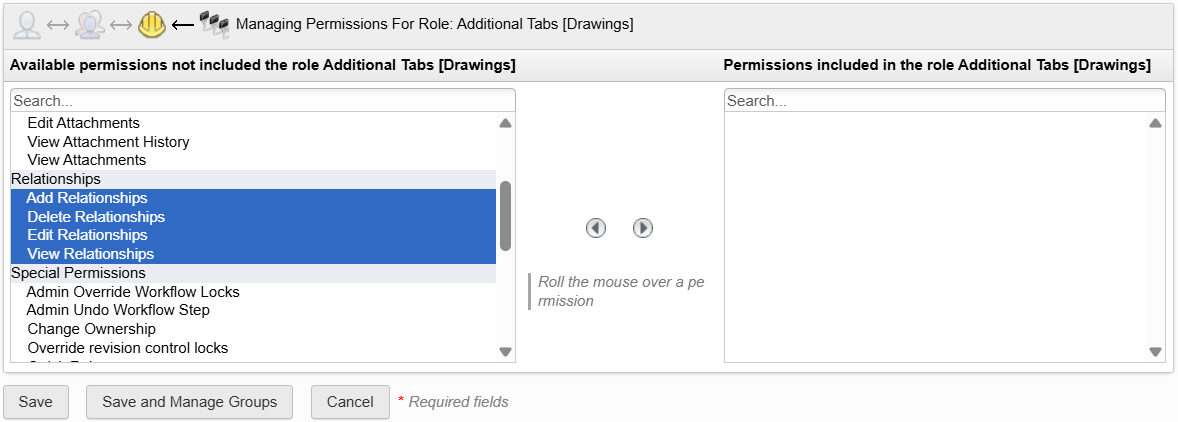
Add all the permissions under the Relationships section.
In the list box on the left, scroll to the Relationships section and double-click the permission to add OR select the permission and click the right-arrow button.
 Note: If you'd like to add permissions for the Attachments tab as well, you may do so now.
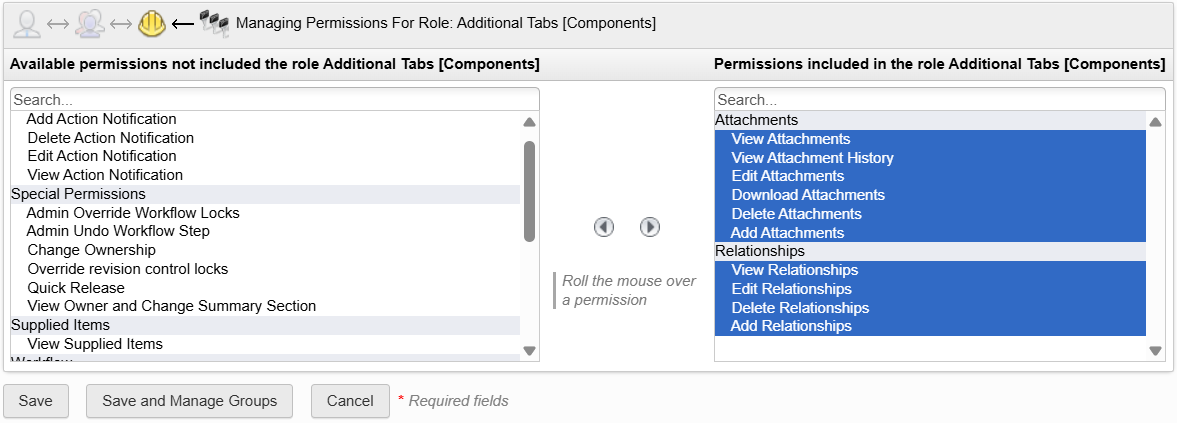
Click Save.
Create a new role with permissions for the Relationships tab in the Drawings workspace.
From the main menu, navigate to PLM Roles page.
Click the New Role icon.
Enter a Name for the role:
Additional Tabs [Drawings].In the Workspace drop-down list, select the name of the workspace the role applies to ie. Drawings.
Click Create Role and Add Permissions.
Add all the permissions under the Relationships section.
 Note: If you'd like to add permissions for the Attachments tab as well, you may do so now.
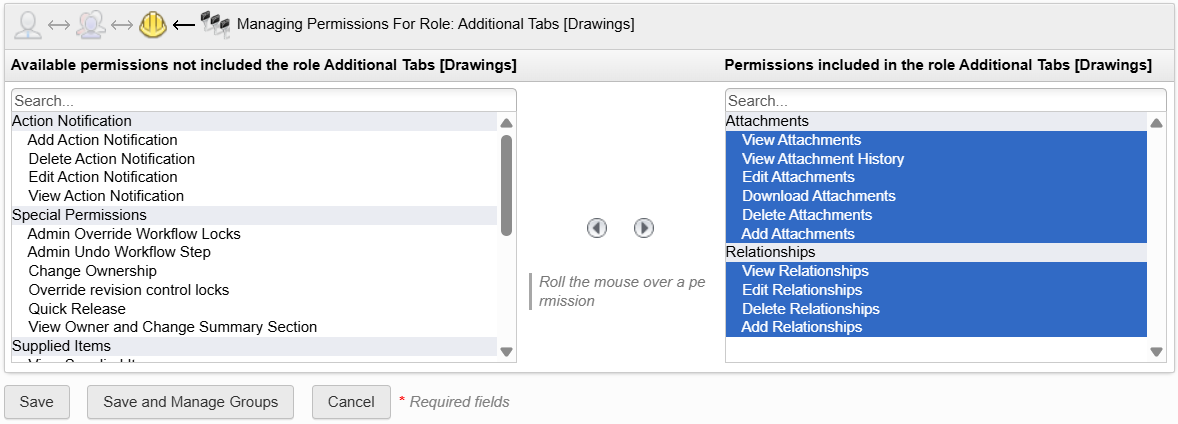
Click Save.
Add the new roles to an existing group that already has access to the Components and Drawings workspaces. Add yourself to the group so that you can experience the results of this new role.
- Return to the main dashboard.
- From your Profile menu, click Admin.
- Click the Members and Groups tab.
- Click the dropdown list, select Groups.
- Click the existing group.
- In the group focus panel, in the PLM workspace access section, click the roles drop-down beside the Components workspace and select the newly created PLM role: Additional Tabs [Components].
- Repeat for the Drawings workspace selecting Additional Tabs [Drawings].
- Click the group again to confirm the roles that have been added to the group.
- Add yourself to the group. See Activity 2 if you are unsure how to do this.
Confirm that you are able to view and add relationships in the Components workspace.
From the navigation menu, select Workspaces > Design and Engineering > Components.
Open any item.
From the Relationships tab, click Add.
Click the drop-down in the top-left corner.
Notice that you can select items from the Drawings workspaces. However, you may not have any drawing items yet to select.
Click Cancel.
Activity 3 summary
In this activity, you:
- Accessed the workspace role management for the hub.
- Created a new PLM Role in Fusion Manage Extension Admin.
- Added permissions to the newly created PLM role.
- Assigned the newly created PLM role to a group.
- Assigned additional existing PLM roles to a group.