In this tutorial, use Keypoint curves to create the outline of the MP3 player casing.
Approach
Choose millimeters as the units for measurement and building, and use X, Y, Z coordinates to position the curves accurately.
To save time, build only one quarter of the geometry, and use symmetry to create the full model.
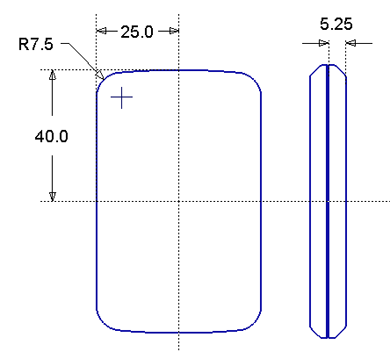
The dimensions of the casing are shown in the following image:
X,Y,Z Coordinates
To specify dimensions and locations in Alias, you refer to the X, Y, Z grid directions.
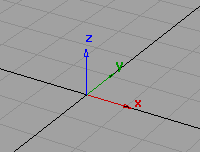
An X, Y, Z location is called a coordinate.
To enter a coordinate, type the X, Y, and Z values into the prompt line. They must always be in the X, Y, Z order, and you can separate the three numbers by either a space or a comma. For example:

Absolute and Relative Coordinates
Coordinates can be specified in two ways: absolute or relative.
Absolute coordinates are always measured from the origin.
Relative coordinates are measured from the last coordinate used.
In the prompt line, (ABS) or (REL) displays, depending which mode you are in. To switch modes, type the letter ‘r’ or the letter ‘a’ either on its own or before typing the coordinate.


The Information Window
As well as entering coordinates in the prompt line, you can use the Windows > Information > Information Window to check or modify the dimensions of lines, curves, and objects.
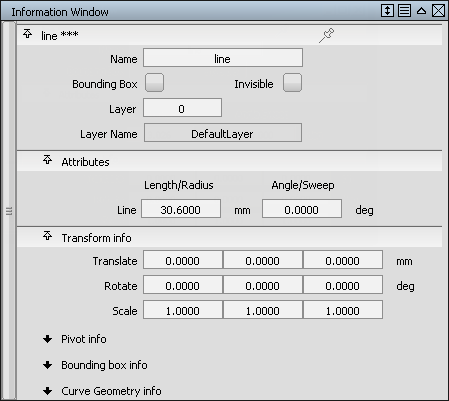
Use the Information Window to specify the radius of arcs.
Create a New File
For this tutorial, create a file and work from the dimensioned drawing to create your model.
- Choose File > New
 to open the file browser.
 A dialog box appears, asking if you want to delete all objects, shaders, views and actions.
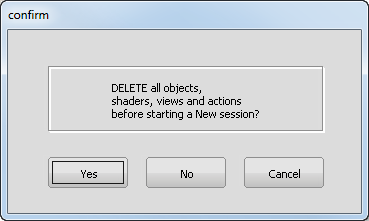
Click Yes.
An empty file is created.
Set Up Modeling Units
When you are using dimensions to specify a model in Alias, first select which units to use.
For this tutorial, you are working in millimeters, so first ensure that the modeling units are set to mm.
- Choose Preferences > Construction Options
 . In the Units section, open Linear and check that the Main Units are set to mm. Close the window.
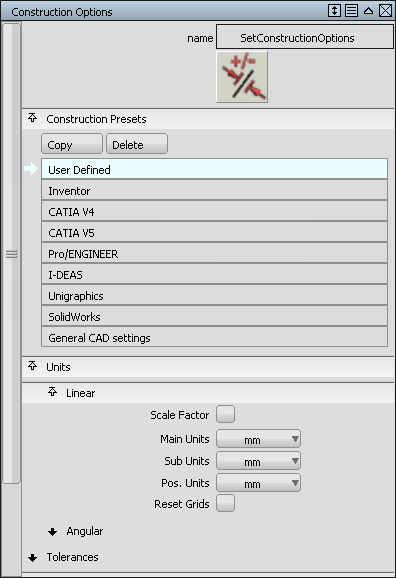
-
To help you visualize the scale of the new model, change the grid spacing.
In the Palette, choose Construction > Grid Preset
 and double-click the icon to open the option window.
 -
Set the Grid Spacing to 10.0 mm in the Preset Grid Options window.
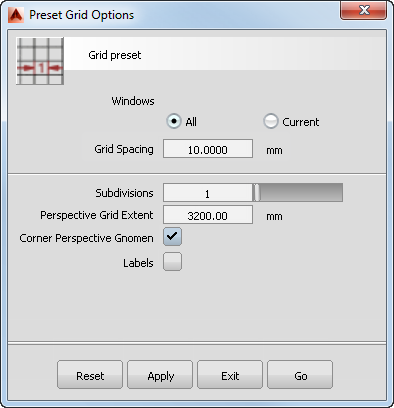
- Click Go to change the grid.
- Maximize the Top window.
- Zoom into approximately ten grid squares vertically; this zoom level gives you a good view for the size of the MP3 player.

Create the Casing Curves
First create the side and top curves of the MP3 player casing.
- Choose Curves > Keypoint Curve Toolbox, then Keypoint Curve Tools > Lines > Line
 and use the
  (Windows) or
  (Mac) key to
  the start of the line to the origin.
 - Grid Snap the end of the line to the grid point 4 grid squares up to create a vertical line 40 mm long.
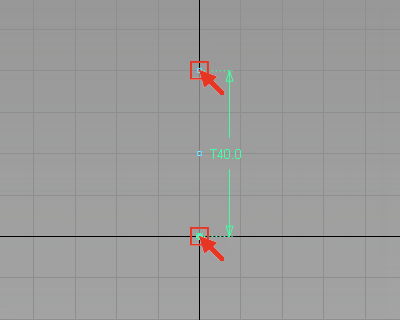
- With the curve still selected, choose Transform > Move
 , type -25,0,0 at the prompt window to move the curve 25 mm to the left in the x-direction, and press Enter.
 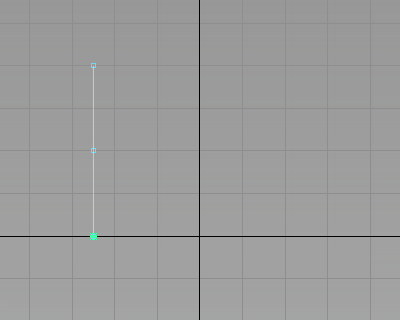 Tip:
Tip:If the last coordinate numbers are zero, then you can omit them. For example, you can enter 25,0,0 as 25 only. However, you enter a coordinate of 0,0,25 in full.
-
Next create the arc for the top of the MP3 player.
The arc defines one half of the design, which you mirror later. It is therefore important that the arc is tangent to the center line, so that it creates a smooth result when it is mirrored.
So first, create a horizontal construction line to help create a tangent arc.
In the Keypoint Curve Toolbox, choose Keypoint Curve Tools > Lines > Line
and use the (Windows) or (Mac) key to to the grid point at 0,40,0. 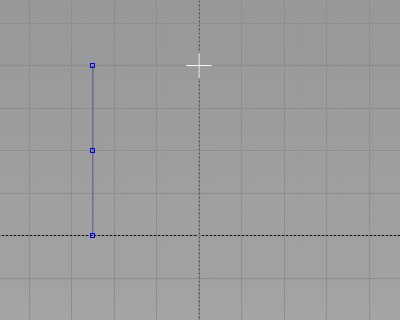
- Using the
 , click to the right of the grid to create a horizontal line.
 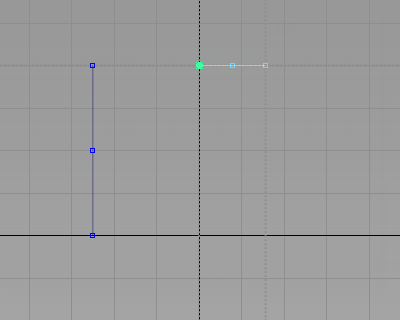 Note:
Note:The length of the line is not important; it must be snapped to the center grid line, and be horizontal.
-
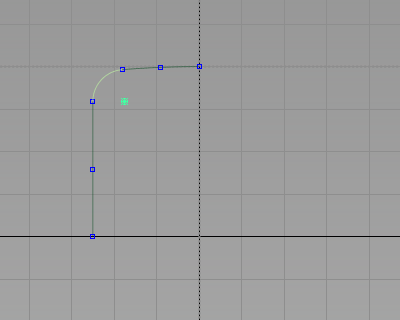
Now create the arc at the top of the MP3 player.
In the Keypoint Curve Toolbox, choose Keypoint Curve Tools > Arcs > Arc Tangent to Curve
 .
. -
You are prompted to
Select curve at location to make arc tangent from.
Click on the horizontal line and, without releasing the mouse button, drag the start point to the left end of the line, where it meets the grid.
Note:The arc start point automatically snaps to the line, so you do not need to use the curve snap (
 and (Windows) or
  and (Mac)).
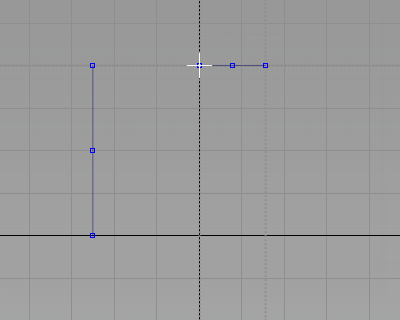
- You are prompted to
Use mouse or enter end point of tangent arc (x, y, z)(ABS).
If you are not in ABS mode, type a and press Enter.
Type -30,38,0 and press Enter to position the end point.
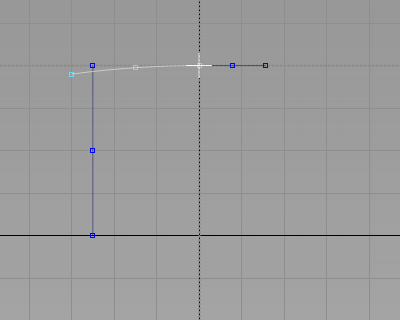 Tip:
Tip:The coordinate given for the end point gives you an arc like the design shown at the start of this tutorial.
Tip:If you want to modify the arc, and design your own shape, in the Keypoint Curve Toolbox, choose Keypoint Curve Tools > Drag Keypoints
 and click and drag the end of the arc until you achieve the desired curve. The curve remains tangent to the center line.
 - You no longer need the horizontal line, so choose Pick > Object
 , select it, and press the
  key to delete it.
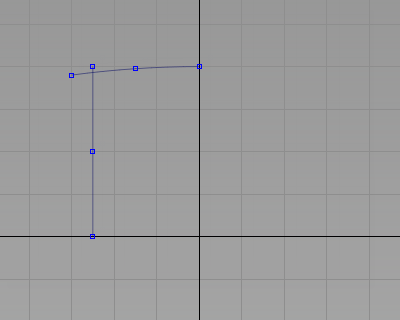
-
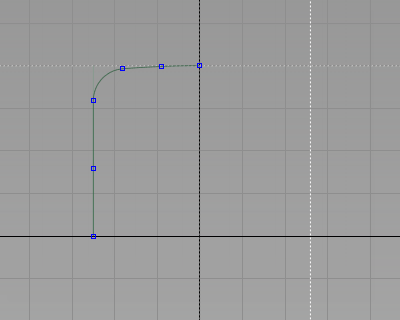
Now use the Curve Fillet tool to create a smooth corner.
Choose Curve Edit > Create > Fillet Curves
 .
. You are prompted to choose a curve.
Select primary filleting CURVE.
- Pick the vertical line.
Then you are prompted to choose a second curve.
Select secondary filleting CURVE.
- Pick the arc.
An Accept button appears and you are prompted to adjust the fillet radius.
Radius = 100.0000. Adjust the radius using mouse or keyboard:
- Type a value of 7.5 and press Enter.
- Click Accept to create the fillet curve. Tip:
Guidelines are created when you use keypoint curves. They appear as dotted lines which highlight when the cursor is near. They can be useful when laying out a design, but you do not need them for this tutorial.
To delete the guidelines, choose Delete > Delete Guidelines
 from the menu.
Save your work
- Choose File > Save As
 to save the current scene.
 - Save your work in the wire folder of the Lessons project.
- Name your file myMP3Player.wire.
For information on creating the Lessons project, or saving your work, see Save your work.