The steps used to select the run component tool and choose options are the same for all types of runs. Refer to these steps to select the appropriate tool and specify initial options, and then refer to the specific procedure for the type of run you are creating.
- Click Architecture tab
 Circulation panel
 (Stair by Component).
 - On the Component panel, verify that Run is selected.
- In the Draw gallery, select one of the following tools to create the desired run type:
 (Straight)
  (Full-Step Spiral)
  (Center-Ends Spiral)
  (L-Shape Winder)
  (U-Shape Winder)
- On the Options Bar:
- For Location Line, select the creation path for the run relative to the Up-direction:

- Exterior Support: Left (1)
- Run: Left (2)
- Run: Center (3)
- Run: Right (4)
- Exterior Support: Right (5)
Depending on the type of run you are creating, it can be helpful to change the Location Line option. For example, if you are creating a winder run and want to snap the left edge to a wall, choose Exterior Support: Left for Location Line.
- For Offset, specify an optional offset value for the creation path. For example, if you enter 3" for Offset and the Location Line is Run: Center, the creation path is 3" to the right of the center line of the stair (in the Up-direction). A negative offset is to the left of the center line.
- For Actual Run Width, specify a value for the run width. This is the value of the run not including supports.
- Automatic Landing is selected by default. If you create 2 separate runs to reach the next level, Revit automatically creates a landing between the 2 runs. Clear this option if you do not want to create landings automatically.
- For Location Line, select the creation path for the run relative to the Up-direction:
- In the Type Selector, select the type of stair you want to create. You can change the type later, if required.
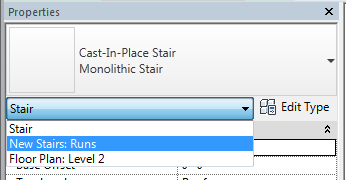
- Optionally, you can specify run instance properties, such as Relative Base Height, and Begin with Riser/End with Riser preferences. On the Properties palette, select New Stairs: Runs, and modify the instance properties as required. See Run Component Instance Properties.

- Optionally, on the Tools palette, click
 (Railing):
 By default, a railing is automatically created when you create a run.
In the Railing dialog:- Select the railing type or select None if you do not want to create a railing automatically. You can also add a railing later, if required. (See Placing a Railing on a Host or Creating a Railing by Sketching.)
- Select to position the railing on the Treads or Stringer.
- Click OK. Note: You will not see the railing created until you finish stair edit assembly mode.
- Follow the procedure for the specific type of run component you are creating (listed in Related Topics).