In this step, we collect the volumes into a CAD Entity Group. In a later step, we will associate this group with a Autodesk® Simulation CFD material.
CAD Entity Groups effectively allow us to assign settings directly to the CAD model.
Open the manifold assembly in your CAD system from the appropriate folder. The folder location depends on the operating system:
Windows 7:
ProgramData\Autodesk\Simulation CFD 2014\Tutorials\ CAD \automation-study
or
ProgramData\Autodesk\Simulation CFD 360 2014\Tutorials\ CAD \automation-study
The ProgramData is not accessible by default. To access it in Windows® 7:
- Open a file browser window (Start menu > Computer).
- From the top left corner, click Organize > Folder and search options.
- Click the View tab.
- Select the Show hidden files, folder, and drives option.
- Click Ok.
If you have any questions, please check with your system administrator.
Windows XP:
Documents and Settings\All Users\Application Data\Autodesk\Simulation CFD 2014\Tutorials\ CAD \automation-study
or
Documents and Settings\All Users\Application Data\Autodesk\Simulation CFD 2014 360\Tutorials\ CAD \automation-study
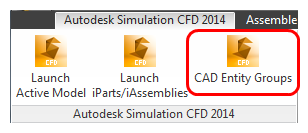
Click the CAD Entity Groups icon from the Autodesk Simulation CFD panel:
- Autodesk® Inventor:

- SolidWorks: CAD Entity Groups
- Pro/Engineer: CAD Entity Groups
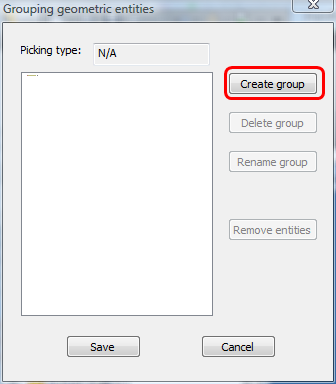
Click Create group.

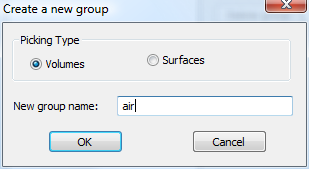
Select Volumes. Enter "Air" for the group name.

Click OK.
SolidWorks Only: From the Selection Filter toolbar, select the Filter Solid Bodies icon. (If the Selection Filter toolbar is not visible, type F5.)
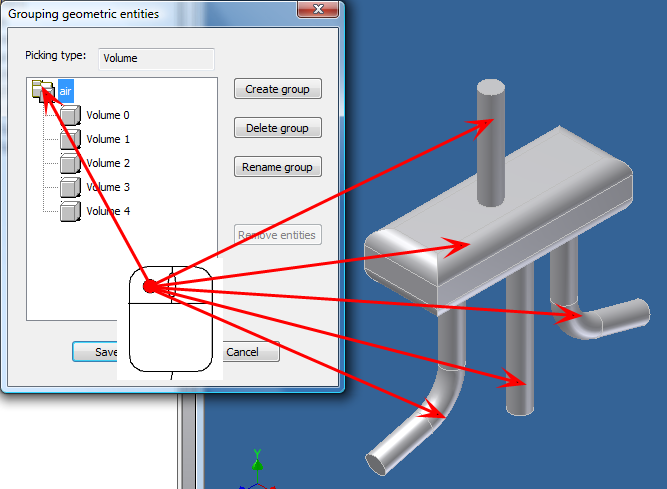
Click the air group, and select the five parts in the model.

Click Save.