The mParticles Collision test is similar to the standard Collision test, but instead of allowing collisions between particles and Deflector space warps, it enables collisions between particles and standard objects applied with the PFlow Collision Shape (WSM) Modifier. Usage is similar to the Collision test, but some details differ due to the nature of physics simulation and the MassFX setup.
Procedure
This procedure describes a simple usage of mParticles Collision to simulate an outer-space encounter between a ball and a bunch of blocks, inside a box.
- Open Particle View (press 6) and drag an mParticles Flow from the depot to the window.
mParticles Flow provides an easy way to create a simple flow with all the elements necessary for physics simulation.
The Perspective viewport now shows a cubic array of blocks (cubic particles created by Birth Grid) and the mParticles World helper icon.
- In Event 001, click the mParticles World operator and then on the mParticles World rollout, click the => button.
This selects the mParticles World helper and displays its parameters on the Modify panel.
- At the top of the Parameters rollout, turn off Apply Gravity.
- In the Perspective viewport, add a Box primitive that encompasses the blocks with room to spare; a cube of 150 units on a side should be about right. Center the box on the blocks.
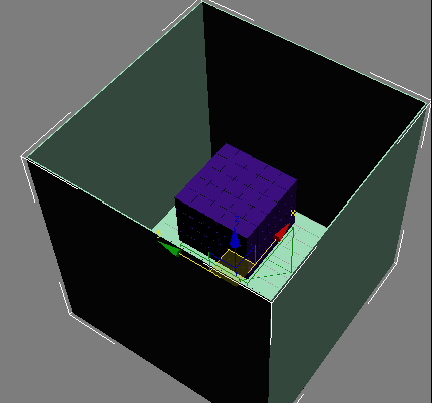
- Convert the box to editable poly, select and delete the top polygon, and add a Shell modifier. Angle the view so you can see down into the box; it should resemble the following illustration:
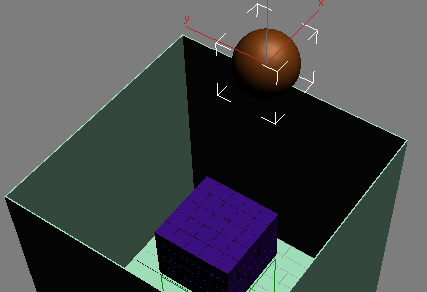
- In the Front viewport, add a sphere of Radius=20 above the right side of the box. The Perspective viewport should now look like this:
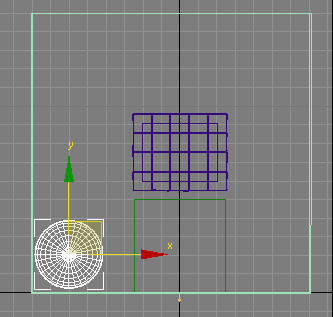
- Go to frame 30, turn on Auto Key, and in the Front viewport, position the sphere just inside the bottom-left corner of the box, as shown:
- Play or scrub the animation. The ball should intersect the blocks as it travels; if not, adjust its path.
- Return to frame 0 and turn off Auto Key.
- Select the sphere and apply the PFlow Collision Shape (WSM) modifier.
- On the modifier Parameters rollout, set Shape to Sphere, and then click Activate.
- Select the box and apply the PFlow Collision Shape (WSM) modifier. Make sure the Shape option is set to Geometry, the default; if not, choose Geometry.
- Click Activate.
The box and sphere are now equipped, thanks to the Collision Shape modifier, to collide with the particles inside the box.
- Back in Particle View, drag an mParticles Collision test to the bottom of Event 001. Click the test so its parameters appear in Particle View, and then, under the Deflectors list (currently empty), click By List.
The Select Deflectors dialog opens, listing only the objects qualified to act as deflectors in mParticles Collsion: the box and sphere.
- Highlight the box and sphere entries in the list (
 +A is one way) and then click Select.
 The box and sphere appear in the Deflectors list.
Because in this example you won't be passing the particles to another event, you don't need Test True If Particle or any of its options.
- Play the animation.
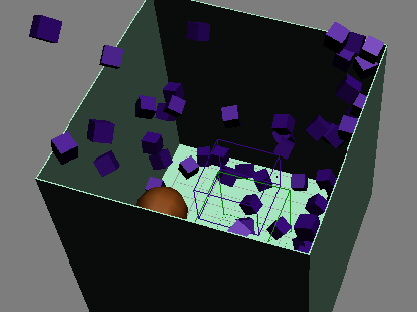
The sphere crashes through the array of particles, sending them scattering, bouncing off each other and the inside of the box. If you extend the animation length to 300 frames or so, you can see them start to fly out of the opening at the top of the box.
Interface
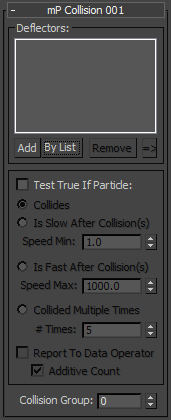
- Deflectors
- Lists the non-particle objects that serve as deflectors in the MassFX simulation. This is the main difference between the mParticles Collision test and the standard Collision: Instead of using Deflector-type space warps, you specify geometry objects to which the PFlow Collision Shape (WSM) Modifier has been applied. The Deflectors list can contain only such objects. If a geometry object is not modified with PFlow Collision Shape, it cannot be considered as a deflector for the mParticles Collision test.
Another important difference is that mParticles Collision simulates collision for all particles in the simulation defined by an mParticles World operator—that is, particles in all events with an mParticles World operator associated with the same mParticles World driver. Regardless of the placement of mParticles Collision test in a particular event, if the test is in the same event as an mParticles World operator, the collision is done for all particles that are under control of that mParticles World operator's driver.
- Add/By List/Remove
- To add an object modified with PFlow Collision Shape to the simulation, click Add and then select the object, or, to add several at one time, use By List. To remove an object, highlight its name in the list and click Remove.
- =>
- To select an object assigned in mParticles Collision, highlight it in the list and then click this button. This selects the object in the scene and makes it easy to access the object parameters.
Test True If Particle group
The primary function of the mParticles Collision test is to define the scene geometry objects with which the particles the in simulation collide. Because the operator works as a test, you can also use it to redirect particles to the next event upon collision. The job of tracking which particles collide and when collisions occur requires additional CPU resources, so if you don't need the test for redirection (and you don't have a wire coming out of the test), turn off Test True If Particle.
Also, if Test True If Particle is off, it doesn't matter which event the test resides in, since it works on a global simulation level. If Test True If Particle is on, then all collisions of particles in the current event with the deflector are counted, and they are used to redirect particles to the next event at the right moment, as specified by other parameters in this group.
The Collides, Is Slow After Collision(s), Is Fast After Collision(s), and Collided Multiple Times options and controls are similar to those in the standard Collision test, with a few differences:
- Collides This option does not have a drop-down list to define the following particle velocity. During simulation a particle has to collide and further velocity is a result of a deflection, so it doesn't make sense to provide the choice of bounce, or stop, or continue. By definition, it's always a bounce.
The collisions are counted during the whole integration step. The test directs particles to the next event only after simulation of the integration step is completed. Effectively, a particle can collide multiple times during an integration step; it will be redirected to the next event if you use the Collides option. The particle, however, is not redirected to the next event immediately after its first collision; it is redirected as a fact of a collision during the integration step.
- Collided Multiple Times Similarly, with this option, a particle is redirected to the next event if during the integration step (and in previous frames cumulatively) if it collided with the deflector at least the specified number of times. And again, it's not redirected to the next event right away, at the moment it collides for the Nth time; it's redirected to the next event at the end of the integration step if the cumulative number of collisions exceeds the value in # Times spinner.
- Will Collide Unavailable.
- Report To Data Operator
- When using the advanced data manipulation tools, enable this option if you need the number-of-collisions data to be used by a Data operator. You can use the Input mParticles sub-operator to retrieve these data in a Data operator.
Available when Test True If Particle is on. Typically you'd use this when the test is not wired to any following event.
- Additive Count
- When on, the reported data represent the total number of collisions a particle had while present in the current event. When off, the test reports only the number of collisions a particle experienced during the last integration step.
Available only when Report To Data Operator is on.
- Collision Group
- Use this setting for collision exclusions, as explained in the mParticles World Helper topic.