NURBS curves are Shape objects, and you can use them as you do splines. You can use the Extrude or Lathe modifiers to generate a 3D surface based on a NURBS curve. You can use NURBS curves as the path or the shape of a loft. (Lofts created using NURBS curves are loft objects, not NURBS objects.)
You can also use NURBS curves as Path Constraint and Path Deform paths or as motion trajectories.
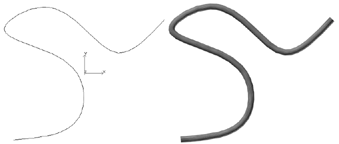
You can assign thickness to a NURBS curve so it renders as a cylindrical object. (The thickened curve renders as a polygonal mesh, not as a NURBS surface.)

A curve and the same curve rendered with thickness
There are two kinds of NURBS curve objects:
Like other Shape objects, NURBS curves can contain multiple sub-objects, which are either dependent or independent.
Creating and Editing Point Sub-Objects
Editing Surface CV Sub-Objects
Creating Independent Surfaces from NURBS Curve Objects
You can also create NURBS curve sub-objects by attaching or importing other objects such as other NURBS curves or spline shapes.
Attaching and Importing 3ds Max Objects
Display Controls for NURBS Models
Both NURBS curves and NURBS surfaces have a Display area in the Modify panel. These controls affect which portions of the NURBS geometry are displayed. Next to the Display area is the button that turns on the toolbox for creating sub-objects.