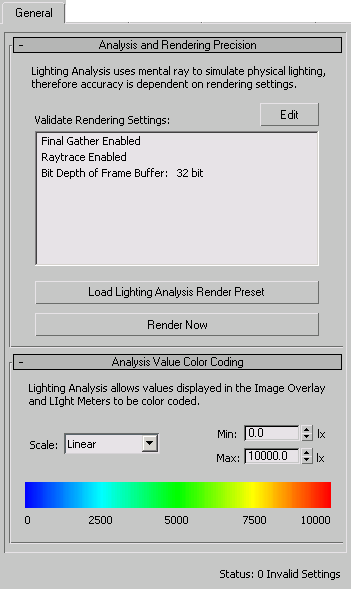
The General panel on the Lighting Analysis Assistant helps you manage mental ray renderer settings.
Interface

Analysis and Rendering Precision rollout

- Validate Rendering Settings
-
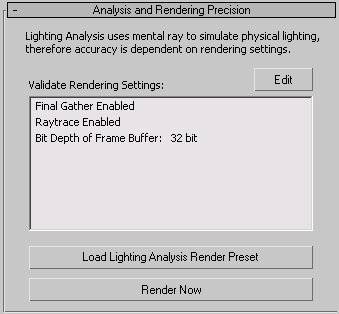
This list shows the expected render settings. If a setting is invalid, it appears in bold: you need to correct the setting, and then click Update Status to confirm your correction.
- Final Gather must be enabled. This setting is on the Indirect Illumination panel
 Final Gather rollout.
 - Raytracing must be enabled. This setting is on the Renderer panel
 Rendering Algorithms rollout.
 - The frame-buffer depth must be floating-point (32 bits per channel). This setting is on the Renderer panel
 Sampling Quality rollout.
Edit Click to open the Render Setup dialog, where you can correct the settings flagged as invalid.
- Final Gather must be enabled. This setting is on the Indirect Illumination panel
- Load Lighting Analysis Render Preset
-
Click to load preset render settings that are valid for lighting analysis.
By default, this preset is mental.ray.daylighting.high. You can change the preset: the other mental.ray presets have valid lighting analysis settings (but you can’t use the 3dsmax.scanline presets with the Lighting Analysis Assistant).
- Render Now
-
Click to render the active viewport.
This button is a shortcut. Typically, you won’t want to render the scene until the status field in the Lighting Analysis Assistant shows “Status: 0 Invalid Settings.”
Analysis Value Color Coding rollout

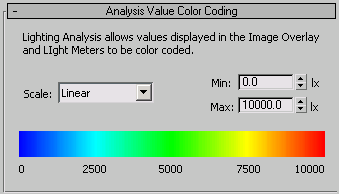
Set the pseudocolor range to use when you render using light meters or the values in an image overlay. The specific kind of lighting that is mapped (for example, luminance, illuminance, and so on) depends on the meter or the overlay effect.
- Scale
-
Choose the scale used to map color values. Can be either Linear or Logarithmic. Default=Linear.
The Logarithmic scale is useful when the illumination of the surfaces of interest is low compared to the maximum illumination in the scene.
- Min/Max
-
Set the minimum and maximum values to map and to represent in the rendering. Values lower than the minimum map to the leftmost display color, and values higher than the maximum map to the rightmost display color. Defaults: Min = 0 lux (lx), Max = 10000 lux (lx).
If the system lighting units are American, these values are displayed as footcandle (fc) values instead of lux.
- Spectrum
-
Shows the spectrum-to-intensity mapping. The numbers below the spectrum can change, depending on the Minimum and Maximum values you have set.