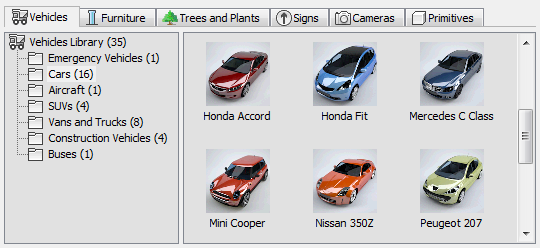
The Civil View Object Library forms the basis for the contents of the Object Placement Style Editor. This panel puts objects from the Placed Objects category into the current scene.
You can also think of placed objects as "path-controlled" objects.
In a library, each object definition is represented by an INI file that stores the object parameters. The structure of an INI file varies depending on the object category; these structures are described in the topics that follow. Using INI files provides a flexible and easily edited way to manage object library resources. It even lets you use object resources in different ways, by referencing the same source object from several different INI files.
You can use the Resource Kit Manager to manage an object library.
Customizing the Civil View Object Libraries
You can customize a Civil View Object Library. Detailed instructions on how to customize a library can be found under each object library category topic.
These are the general rules to follow:
- The Resource Kit Manager provides a simplified approach to editing object library content.
- Up to three Civil View Resource Kits can be active at any time: Country, Project, and Private. It is possible to edit and add your own object library content to any of these resource kits. It is also possible to move object library content from one resource kit to another using the Resource Kit Manager.
-
Objects are defined by INI files, which vary in content between different object categories. Make sure you fully understand the structure of an object INI file before you edit its contents manually.
- In Civil View, material assignment is automated. Make sure that any objects you add to the library comply with the Civil View material library standards.
In general, this means that an object should have the appropriate material channel ID assigned every face. This is how Civil View decides which sub-material to apply to different parts of the same object.
- When you use 3ds Max Design (.max) files as source objects, make sure that the referenced .max file and the object within it does not have any materials applied.
You can check if a material is applied to an object by typing $.material into the MaxScript listener window. If this does not return undefined, you need to remove the material from the object by typing $.material = undefined. Civil View applies a material to the object when you place it into the current scene.
- When you create objects for inclusion in an object library, work in a 3ds Max Design session without running Civil View.
Civil View loads various settings into every scene, including material definitions that should not be stored in object library .max files.
- You can use MAXScript to create your own parametric plug-in objects, which are added to the Civil View plugins directory. For further information, refer to the "Scripted SimpleObject Plug-ins" topic in the 3ds Max Design MAXScript Help.
Object Category Groups

Additionally, with Object Placement Styles it is possible to define a style element that places a group of objects in a scene with a single instruction, rather than having to select one object definition at a time. In this case, individual objects within the selected group are randomly chosen for placement in the scene. For example, this can be useful with vehicles, where you want to place a range of different vehicles onto a highway.