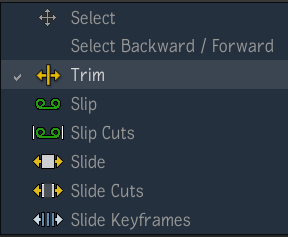
Use the trimming tools to fine-tune your rough edits. You can trim video or audio clips (with or without effects), cuts, and transitions on the timeline. You can trim multiple tracks or segments at the same time. Flame Premium keeps track of the source material that goes into trimmed shots, so you can go back and reintroduce material you had previously trimmed out.
You can trim using the Trim View, with keyboard shortcuts, or gesturally on the timeline. You can also trim by any combination of these methods, depending on your editing style. In Trim mode, the Trim View displays the last (outgoing) and first (incoming) frame above the timeline from the two clips you are trimming, allowing you to visualize your trimming operation. In Slip or Slide mode, the Trim View changes to a four frame display, which, in addition to the incoming and outgoing frames of the clip you are slipping or sliding, also displays the outgoing frame of the preceding clip and the incoming frame of the subsequent clip on the timeline.
The state of the Ripple button has an effect on some trimming operations. You can set the ripple state explicitly before trimming, or on-the-fly by pressing Alt while you are trimming.
Audio tracks are divided into sub-frames. There are 100 sub-frames of audio for every frame of video. When trimming audio tracks, you can trim on a sub-frame level by holding down the Shift key while you trim.
Trimming Quickstart
Use the following procedure to quickly start trimming. This method is certainly not the only way to trim, but should give you a start in familiarizing yourself with trimming in Flame Premium. For more detailed explanations of the various trimming modes, see the related topics below.
- Double-click a cut between two clips on the timeline. The positioner moves to this location, and a yellow or red highlight appears on either side of the cut (depending if Ripple is enabled or not).

The Trim View also opens, (provided that Auto-Toggle Trim View is enabled in ) displaying the outgoing and incoming frame of the two clips.
Tip: You can also access Trim View from the View mode box. In this case, the closest cut on the timeline is automatically selected. You can use the Previous or Next Transition buttons to select a different cut. - From the Editorial Mode box, select Trim.

- Drag the Outgoing or Incoming Trim Offset fields to your desired trim offset value (in frames). The corresponding view (incoming, outgoing, or both), and the timeline clips are updated.

If you are trimming a gap, the Outgoing and Incoming Trim Offset fields remain at 0.
Notice that the offset fields have the same colour borders as the highlight on the timeline cut (yellow when Ripple is enabled, or red when Ripple is disabled).
- Use the loop option of the Play button to loop around your trim with a number of preroll and postroll frames to preview your trim.
