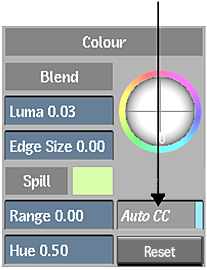
After you create and refine your matte for the key, you can perform basic colour spill removal by gesturally modifying the Spill parameters.
To gesturally remove colour spill:
- In the Master Keyer menu, select Spill from the Sampling box.

- Set the view to Result view.
- Enable Auto CC to apply the Spill settings to the front clip.

- Remove any colour spill. Click anywhere in the image window, and then modify the parameters that appear by dragging the sliders—you do not need to click a specific area.
Drag: To: Range Set the range for the removal of colour spill along the edges of the key. Drag right to soften the edge and remove colour spill further into the key. Drag left to harden, or create a thinner, edge. Hue Modify and suppress colours that are adjacent to the primary sample. The red indicator shows the original value and the yellow indicator shows the current value. The values also appear in the Spill fields. The original values should be good, so make small adjustments only.
- To modify both parameters, move the mouse between them to highlight a parameter, or drag the pen vertically. When you highlight the parameter you want to adjust, drag the slider.
If you do not like the result, you can click Undo to reset parameters directly after you complete an operation. There is only one level of undo in the Modular Keyer.
- When you are finished modifying the displayed parameters, click another area of the image without highlighting a parameter to hide them. Alternatively, you can press any key, such as spacebar or Esc.
The parameters are no longer displayed.
If you are satisfied with your colour spill removal, move on to blending your front and back clips.
If you want to perform additional colour spill suppressions, see Advanced Colour Spill Removal.