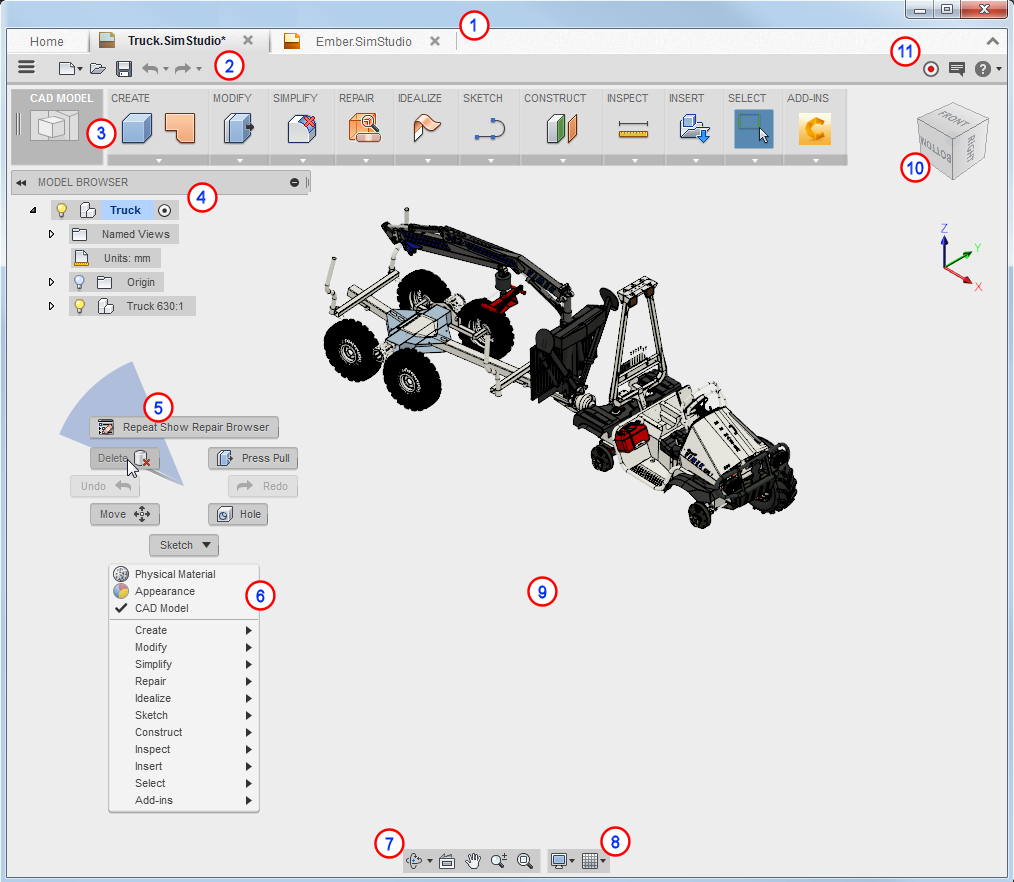
Use the following image and legend as you explore and familiarize yourself with the SimStudio user interface.

Legend
- Design tabs
- Tab displays for each open file.
- Click the Home tab to view recent documents, videos, and the working directory.
- Quick Access Toolbar (QAT)
- Provides access to frequently used commands.
- Next to the three-bar Application Menu.
-
Workspace toolbar
- You access commands in the toolbar panels.
- You can customize and reset the toolbar appearance.
- Click panel drop-down arrows to access more commands.
-
Browser
- Displays an organized view of the data in your design.
- Repair browser displays potential modeling issues.
- You can activate objects, control object visibility, and access context-sensitive menus.
- Switch from the MODEL to the REPAIR BROWSER using REPAIR
 Show Repair Browser.
-
Marking menu
- Right-click in the graphics window to view the menu.
- Provides context-sensitive access to toolbar commands.
-
Overflow menu
- Right-click in the graphics window to view the menu.
- Provides access to toolbar commands.
-
Navigation bar
- Access commands to navigate your model in the graphics window.
- Display settings
- Change visual style, background, work feature visibility, and more.
- Turn on the grid and control how objects interact with the grid.
- Graphics window
-
ViewCube
- Pause the cursor over the ViewCube to activate.
- Quickly change model views by clicking areas of the ViewCube.
- Access other options with the drop-down arrow.
- Infocenter
- View notifications in the Notification Center.
- Click the Help button to access online help.
- Access other support resources with the drop-down arrow.
- Launch the Screencast Recorder to capture and share video.
- Autodesk Screencast is free - download here.
- Once you install Screencast, Infocenter displays the red launch button.