The mental ray Sun & Sky solution is designed to enable physically plausible daylight simulations and accurate renderings of daylight scenarios.
In 3ds Max, this is achieved through the use of two special photometric lights and an environment shader that all work together:
- The mr Sun photometric light is responsible for the sunlight; the direct light from the sun.
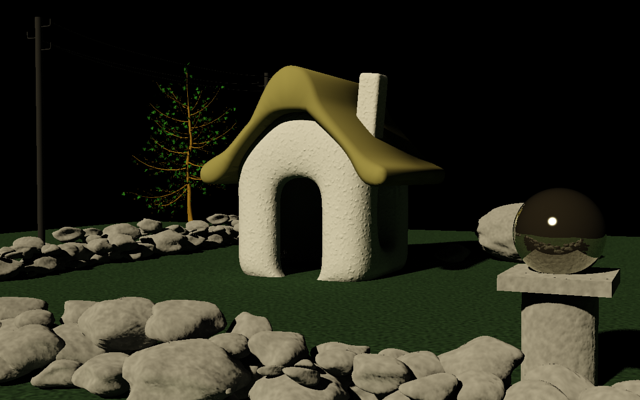
The scene is lit by mr Sun only.
-
The mr Sky photometric light is responsible for the skylight; it simulates the real-world phenomenon of indirect light created by the scattering of sunlight in the atmosphere.

The scene is lit by mr Sky only.
- The mr Physical Sky environment shader is responsible for the visible representation of the sun disk and the sky, both to the camera and in reflections and refraction, as well as for the
virtual ground plane (gray in the following illustration).
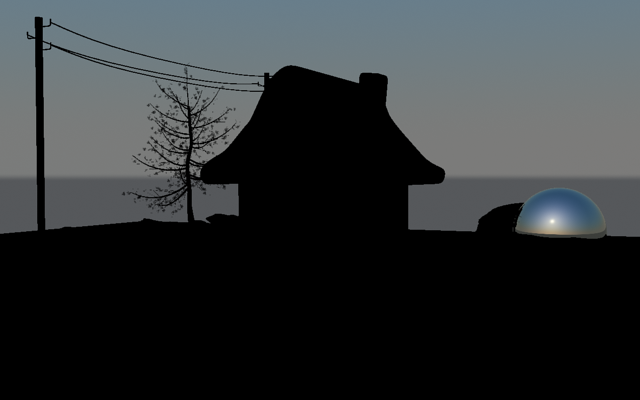
mr Physical Sky is visible, but no lighting is present in the scene.
These lights are meant to be used together: mr Sun and mr Sky appear within the 3ds Max Daylight system. When used in combination, this solution is called Sun & Sky.
These articles, written for 3ds Max Design, have useful information about mental ray Sun and Sky:
- Daylight Simulation in 3ds Max Design 2009 – Getting Started
- Daylight Simulation in 3ds Max Design 2009 – Advanced Concepts
Using Sun & Sky with SSS Materials
To use a mental ray fast SSS material together with the high-dynamic range Sun & Sky solution, be sure to turn on Scatter Indirect Illumination on the material's Advanced Options rollout so that the material can scatter the skylight, which is considered indirect.
Also, turn off Screen (Soft) Compositing Of Layers, also on the Advanced Options rollout; otherwise the output of the SSS shaders is clamped to a low dynamic range and will appear to render black.
Common Parameters
Certain parameters do the same things in mr Sun, mr Sky, and mr Physical Sky. For physical correctness, it is necessary to keep these parameters in sync with each other in all three elements. For example, a sun with a different Haze value than the sky cannot be guaranteed to be physically plausible.
For this reason the concept of parameter inheritance is included. Both the mr Sun light and the mr Physical Sky shader have checkboxes labeled “Inherit from mr Sky” that are on by default. When these are on, the common parameters are all guided by the mr Sky light, which is the central point of control.
With parameter inheritance, you can concentrate on tweaking the parameters in one spot (mr Sky) and, as long as Inherit From mr Sky is on for both mr Sun and mr Physical Sky, you're sure to obtain consistent results.
Procedures
To use mental ray Sun & Sky:
- Make sure mental ray is the active renderer.
- From the Create menu, choose Lights
 Daylight System.
You can also find Daylight System on the Create menu under Systems, and from
 Create panel
  Systems.
- You're prompted to use the mr Photographic Exposure Control. Click Yes to do so automatically.
- Create a Daylight system in the Perspective (or a Camera) viewport: Drag and release to create the compass rose, move the mouse to position the light, and then click to place the light and finish creating the system.
-
 Go to the
 Modify panel, and on the Daylight Parameters rollout, set Sunlight to mr Sun and Skylight to mr Sky.
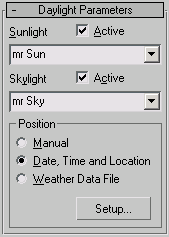
- When you choose mr Sky, you're prompted to add a mr Physical Sky environment map. Click Yes to do so.
The parameters rollouts for mr Sun and mr Sky now appear on the Modify panel.
- Open the
Environment dialog (press
8) and make sure Common Parameters
 Environment Map is set to mr Physical Sky,
Exposure Control is set to mr Photographic Exposure Control.
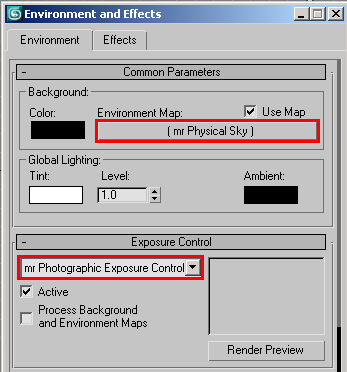 Tip: Should you wish to edit the mr Physical Sky parameters, an easy way to access them is to open the Material Editor (press M) and then drag the Environment Map button from the Environment panel
 Common Parameters rollout to a material slot (sample sphere) in the Material Editor. When prompted for the copy method, choose Instance.
- Open the
Render Setup dialog (F10) to the Indirect Illumination panel and make sure Enable Final Gather is on. Choose the Draft preset as a starting point; this is the leftmost position of the FG Precision Presets slider.
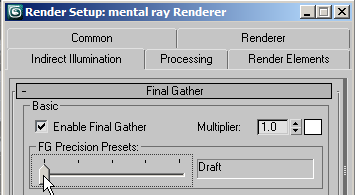 Attention: When using Sun & Sky, make sure Enable Final Gather is on. Because the skylight is a form of indirect light, it can be rendered only with the help of Final Gather. Without final gathering, Sun shadows render as unnaturally dark or black rather than bluish, as they are in the real world.
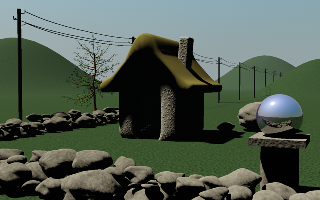
Final Gather off
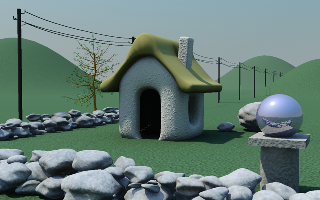
Final Gather on
- Render with Sun & Sky. To specify different times, dates, and locations in the Daylight system for different effects, use the Motion panel
 Control Parameters settings or turn on Manual Override to place the sun by hand.
Tip: For a more pleasing image, adjust the mr Photographic Exposure Control settings.
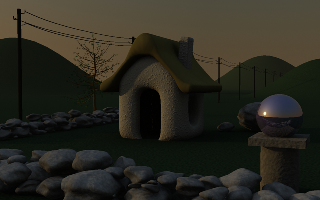
6 AM
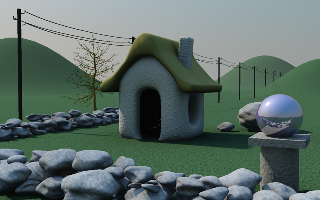
9 AM
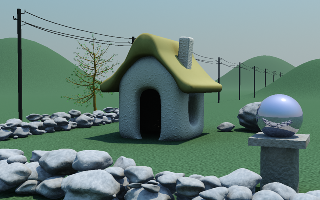
1 PM
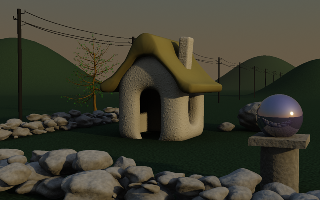
6 PM
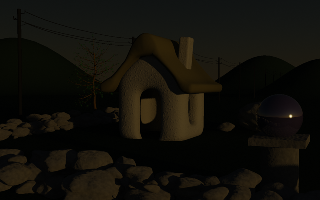
7 PM
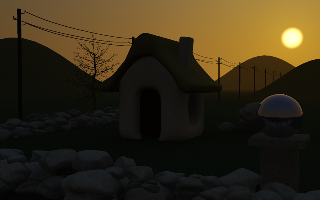
Manual sun position
To see the sun and sky in the viewport:
- Follow the above procedure for adding mental ray Sun & Sky to your scene.
- Open the Viewport Background dialog: Views menu
 Viewport Background.
- In the Background Source group, turn on Use Environment Background.
- At the bottom of the dialog, make sure Viewport is set to Perspective, and then turn on Display Background in the lower-right group of controls.
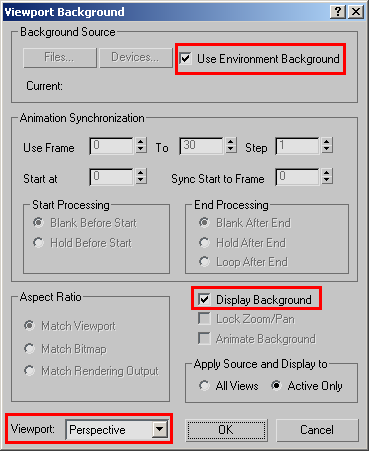
- Click OK.
After a moment, the viewport background changes to show the environment.
- If necessary, orbit the Perspective viewport so you get a view of the horizon.
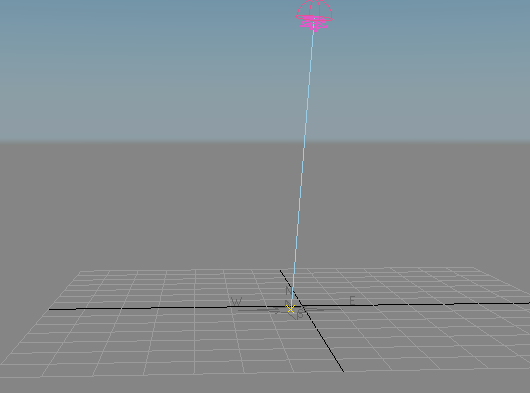
- Go to the Motion panel, select the Daylight object if necessary, and then change the Time group
 Hours or Month setting using the spinner control.
As you adjust the setting, the sky light reflects the change.
- Adjust the hour so the sun is near the horizon, and then, if necessary, orbit the viewport so the sun is visible.
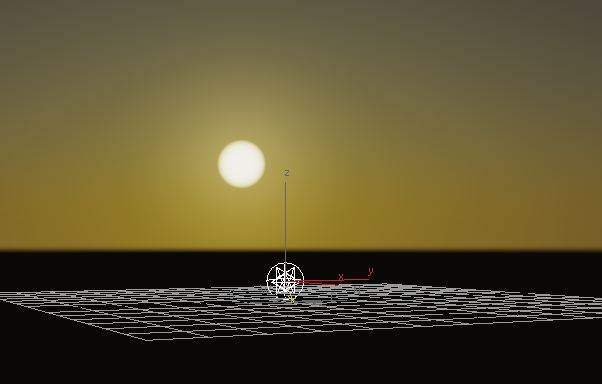
- Go back to the
 Modify panel and adjust the settings on the mr Sky Parameters rollouts such as Multiplier and Red/Blue Tint.
As you adjust the settings, the viewport shows the changes.
The ability to display the mental ray Sun & Sky solution in the viewport lets you adjust parameters interactively, so that you can visualize the results immediately without having to render. Keep in mind, though, that the viewport representation is an approximation of the final result, so you’ll still need to render while fine-tuning the settings.
Interface
Interface (common parameters)
The most important common parameters are those that drive the entire shading and colorization model.
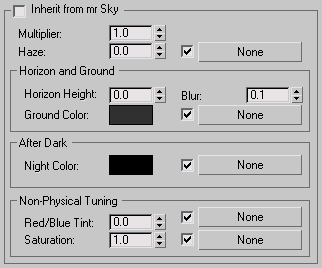
- Multiplier
- A scalar multiplier for the light output. Default=1.0.
- Haze
- In mr Physical Sky, the Haze setting corresponds to the Haze setting used by the Haze-Driven sky model.
Horizon and Ground group
- Horizon Height
- The vertical position of the horizon.
The default value, 0.0, places the horizon at a standard height. However, because the horizon is infinitely far away, this can cause trouble joining up with any finite geometry that is supposed to represent the ground. It can also cause issues rendering locations that are supposed to be at a high altitude, like mountain tops or the top of New York skyscrapers where the horizon really is visibly “below” the viewer.
This parameter allows tuning the position of the horizon. Note that this horizon doesn’t actually exist at a specific height in 3D space; it is a shading effect for rays that go below a certain angle. This parameter tweaks that angle. The total range available range is somewhat extreme, reaching from –10.0 (the horizon is “straight down”) to 10.0 (the horizon is at the zenith). In practice, only much smaller values are actually useful. For example, to push the horizon down just below the edge of a finite visible ground plane, use –0.2.
Note: The Horizon height affects not only the visual representation of the horizon in the mr Sky light, but also the color of the mr Sun itself. In other words, the point where the sun “sets” will change for a Horizon height settings other than 0.0. - Horizon Blur
- The “blurriness” with which the horizon is rendered.
At 0.0 the horizon is completely sharp. Generally only values lower than 0.5 are useful, but the full range is up to 10.0 for a horizon that consists of blur only, with no actual horizon at all.
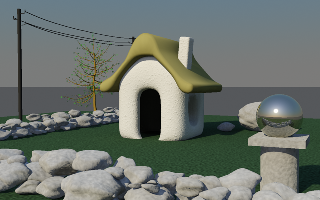
Horizon Height=0.0; Horizon Blur=0.0
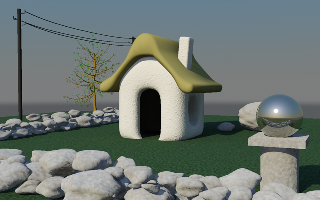
Horizon Height=–0.3; Horizon Blur=0.2
- Ground Color
- The color of the virtual ground plane. Note that this is a diffuse reflectance value (that is, albedo). The ground appears as a Lambertian reflector with this diffuse color, lit by the sun and sky only, and does not receive any shadows.
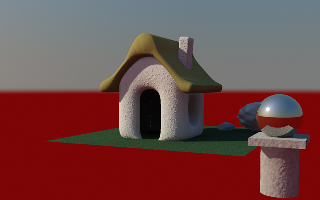
Red ground
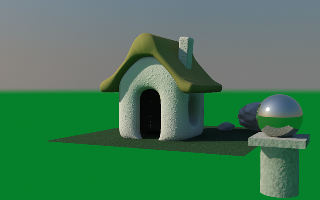
Green ground
Note: In the above images, bounce-light from the ground tints the walls of the house. Also, the virtual ground plane does not receive shadows.Tip: Some sky models neglect the influence of bounce light from the ground, assuming only the sky is illuminating the scene. To compare the output of mr Sky with, for example, the IES Sky light, set Ground Color to black.
After Dark group
- Night Color
- The minimum color of the sky: The sky will never become darker than this value. It can be useful for adding things like moon, stars, high-altitude cirrus clouds that remain lit long after sunset, and so on. As the sun sets and the sky darkens, the contribution from Night Color is unaffected and remains as the base light level.
Non-Physical Tuning group
- Red/Blue Tint
- Gives artistic control over the redness of the light. The default value of 0.0 is the physically correct value (calculated for a 6500K whitepoint), but can be changed with this parameter, which ranges from –1.0 (extremely blue) to 1.0 (extremely red).
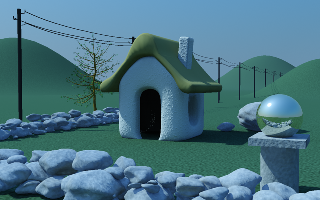
Red/Blue Tint=–0.3
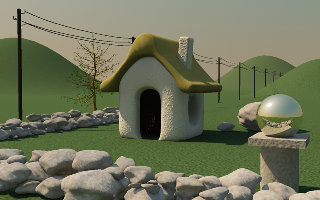
Red/Blue Tint=0.3
- Saturation
- Also an artistic control, where 1.0 is the physically calculated saturation level. The parameter ranges from 0.0 (black and white) to 2.0 (extremely boosted saturation).