Time improvements
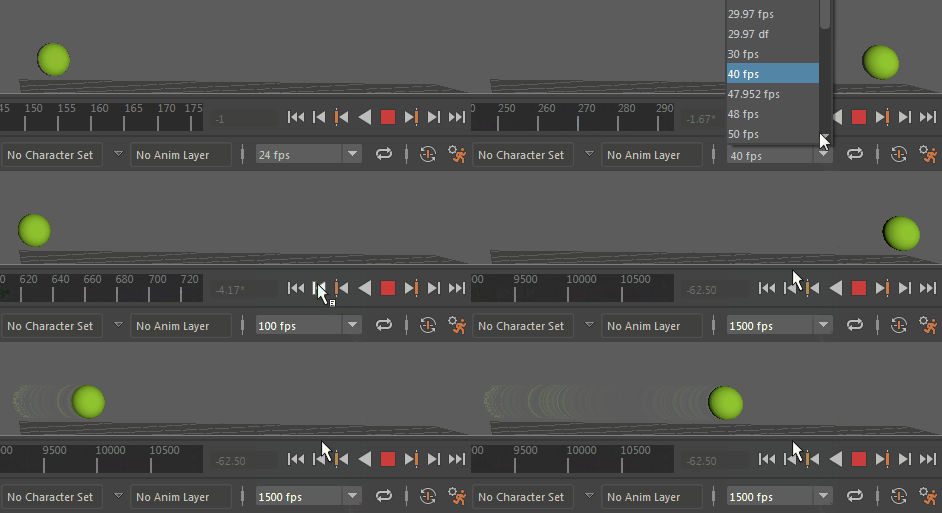
When building complex scenes, much time is spent accounting for different frame rates and timing formats. We've updated how Maya handles time to make these processes less time-consuming by adding support for more frame rates and timecode options. Maya now has a 64-bit tick rate that supports high key precision, and enables support for more frame rates and precise timecodes.
- Additional frame rates
-
The new 64-bit counting system enables support for high key precision which reduces rounding errors and expands the list of supported frame rates. These additional frame rates let you align various media within Maya, without the need for time-consuming conversion.
- 23.976
- 29.97 non-drop
- 29.97 drop
- 47.952
- 59.94
- 44,100
- 48,000
You can specify a frame rate for the scene in the File > New Scene options, Import options, Settings Preferences, or Playback options. Once changed, the frame rate updates everywhere in Maya and is saved with the file and once set, it persists until you change it again.
An asterisk " * " appears next to any number in the Time Slider that has been rounded to indicate that the value has been approximated. This can happen when you switch between Time Code and Frames.
- Enhanced Timecode support
-
Maya's new 64-bit tick rate lets you display and input timecode format throughout Maya, including in MEL and Python commands in the Script Editor.
Note: When saving scenes in binary format (.mb), you may experience precision issues with your ticks. There is a very important note regarding this in the Time precision and binary file formats section of the How Maya Counts Time topic. - Playback options on import
- Now, if you import a file, the Import options have a new Playback Options section where you can choose to use the imported file's frame rate, override it with the scene frame rate, or combine the scene and imported frame rate.
- Updated Time Preferences
- Two Channel Box menu options Sync Timeline Display and Sync Graph Editor Display, have been added to the Time Slider Preferences to let you synchronize your Channel Box selections in the Time Slider or the Graph Editor.
- A Framerate menu has also been added to the Time Slider Preferences and the Snapping option has been renamed to Snap to whole frames to indicate that Maya scrubs without considering sub-frames.
- Updated Playback Options
- A new area, Playback options has been added next to the Range Slider to incorporate the latest time improvements, including a Frame Rate menu that lets you set the scene frame rate located under the Playback controls. The frame rate updates in the viewport after the animation completes its cycle or you stop and restart playback.
-

- A
Loop button
 has also been added to the Playback options with three states so you can toggle the scene animation between three looping states:
- Loop

- Repeat once

- Oscillate (forward/reverse)

- Loop
Graph Editor Improvements
- Autoframe
- Now, when you select a single curve from the
Graph Editor channel box, or when you select a single attribute in the Channel box with
Sync Graph Editor Display activated, the Autoframe option frames it correctly.
Note: The framing applies only to the vertical scale.
- Also, Autoframe is applied when you open the Graph Editor for the first time.
Animation Layers in the Time Editor
Time Editor Animation Layers have been renamed Clip Layers in the documentation to differentiate between them (Time Editor animation clip layers) and the Animation layers used in the Animation Layer Editor. Animation Layers are not supported in the Time Editor as they create conflicts. However, to add layers to Time Editor animation clips, you can use Clip Layers. See Key on Clip Layers.
Time Editor Clip Layer highlighting

The active clip layer is outlined in red