
The Select tool is perhaps the most frequently-used tool in Meshmixer. Many tasks can only be accomplished with carefully constructed selections, so it is worth spending the time to learn the ins and outs of this tool.
The main panel is shown below. At the top you can toggle between Brush and Lasso mode - see info about the Surface Lasso mode below. Most of the time, you will use the Brush mode, where you will be "painting" a set of selected faces.
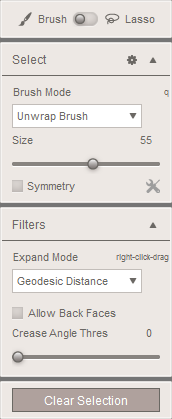
There are three Brush Modes:
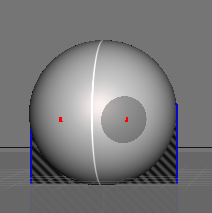
- Unwrap mode selects a highlighted, connected patch of the surface around the brush.
- Sphere mode replaces the grey patch with a semitransparent Sphere, and selects everything inside the sphere. The key thing with Sphere mode is that you can select disconnected regions, so it is good if you are selecting in areas where there are lots of disconnected meshes.
- SphereDisc mode is a sort of hybrid, that uses a Sphere but limits the selection to those faces that are connected (via some path on the 3D surface) to the point under the cursor.
After you paint some faces with a single brush stroke, you can make additional strokes to add to the selection. If you wish to remove from the selection ("un-paint" some faces), hold down Shift or Ctrl/Cmd while applying the brush.
The Size slider changes the size of the Brush/Sphere. Note that you can also change the brush size with the [ and ] hotkeys, or by using sliders in the Hotbox.
When the Symmetry box is checked, the brush stamp is applied on both sides of the symmetry plane, which becomes visible as a white line through your model.

When Symmetry is checked, you can click on the tools icon
 on the right to change the location and orientation of the Symmetry plane. For more information, see the
Symmetry topic.
on the right to change the location and orientation of the Symmetry plane. For more information, see the
Symmetry topic.