Refer to the steps in this topic to use straight stair grips to edit stairs.
| Grip | Description |
|---|---|
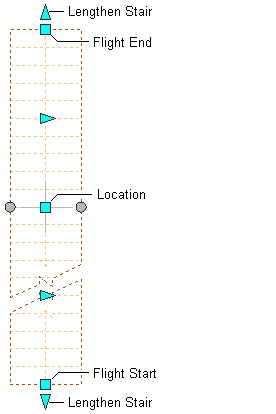
| (Length) | Lets you change the length of a straight stair run. |
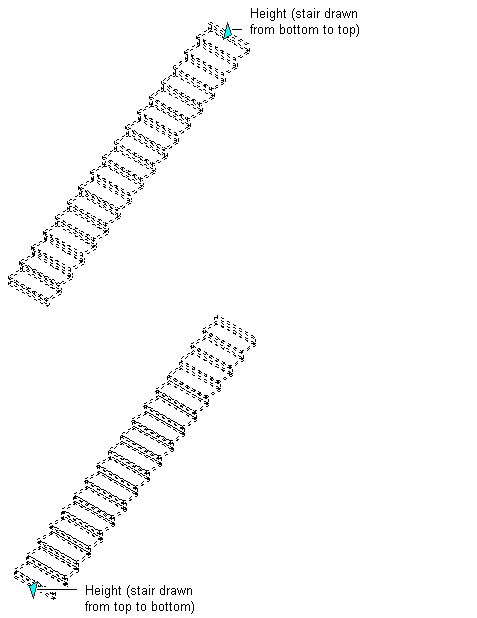
| (Height) | Lets you change the height of a straight stair run. |
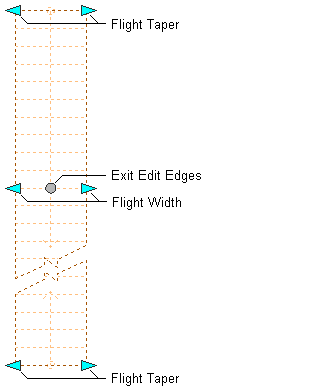
| (Flight Taper) | Lets you change the fight taper of a straight stair run. |
| (Edge) | Lets you change the flight width of a straight stair run by adding an edge. |
| (Edge) | Lets you change the flight width of a straight stair run by moving an edge. |
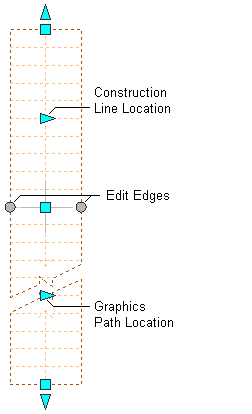
| (Construction Line Location) | Lets you change the construction line location of a straight stair run. |
| (Graphics Path Location) | Lets you change the graphics path location of a straight stair run. |
Editing Stair Dimensions
- Select the straight stair.
- Select the grip for the dimension you want to change.

Straight stair Flight Start and End, Location, and Lengthen Stair grips
- Move the grip until the dimension value you want is displayed, and click once; or enter a value. Note: The Lengthen Stair grips move a straight stair unless it ends with a landing.
- Click the Edit Edges grip to access the edges edit mode (flight width and flight taper). Note: Alternatively, click


 .
. 
Straight stair Flight Taper, Flight Width, and Exit Edit Edges grips
- When you have finished editing the stair edges, click the Exit Edit Edges grip to return to the default stair edit mode.
- Continue editing, or right-click and click Deselect All to turn off grips.
Changing the Location or Position of a Straight Stair
- Select the straight stair.
- Select the appropriate grip to change the location of the stair, its start point, construction line, graphics path, or endpoint.

Straight stair Flight Start and End, Lengthen Stair, and Location grips

Straight stair Construction Line Location, Graphics Path Location, and Edit Edges grips
- Move the stair to the desired location, and click once; or enter a value, and press Enter.
If you want to enter a specific value for the second direction in any edit mode (for example, in the Y direction when editing along the XY plane), press Tab to cycle to the second direction.
You can also lock the movement of the stair along a specific direction. If you enter a value for either dimension direction in the current edit mode, and then press Tab, the movement of the stair is constrained to the second dimension direction. When editing along the XY plane, for example, you can enter a value for X dimension, and then press Tab. The X dimension is locked at that value, and movement of the stair is constrained to the Y dimension direction.
- Right-click, and click Deselect All to turn off grips.
Changing the Height of a Straight Stair
- Select the straight stair.
- Move the Height grip to change the height of the stair. Note: This grip displays only in 3D views of the stair. Height cannot be edited in Plan view.

Straight stair Height grip
- Right-click, and click Deselect All to turn off grips.