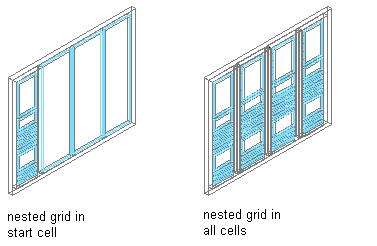
Each door/window assembly grid is one dimensional with either a horizontal or vertical division. By nesting grids in the door/window assembly style, you can create a variety of patterns from simple to complex.

Specifying Door/Window Assembly nested grid locations
Simple Primary Grids
When you nest grids, you start with one primary grid. Then each cell in the primary grid can be filled with another grid. For example, the following illustration has a horizontal primary grid with four cells. You can nest a vertical grid in each horizontal cell to create a simple 2D grid.

Specifying Door/Window Assembly cell divisions 1
The previous illustration shows all cells in the grid with the same cell assignment—a vertical division. But each cell in a grid is independent and can have a separate assignment. For example, the following illustration shows one cell in the primary grid that contains another horizontal grid, the next cell contains a vertical grid with three divisions, and the next cell contains a vertical grid with six divisions.

Specifying Door/Window Assembly cell divisions 2
Multiple Nested Grids
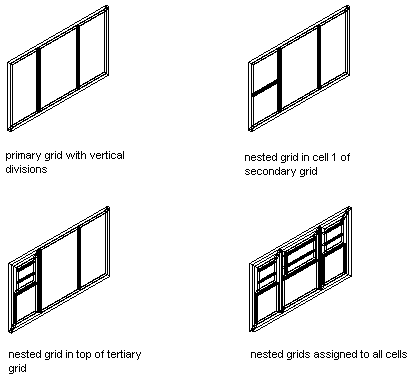
You can continue to nest grids to create multiple levels. For example, the following illustrations show the Standard door/window assembly style grid, the same grid with a nested grid in one cell of the secondary grid, and the same grid again with nested grids in all cells of the secondary grid.

Specifying a nested grid in a door/window assembly
Defining Nested Grids
You can define nested grids on the Design Rules tab of the Door/Window Assembly Style Properties dialog box. The tree on the left side of the tab lists the grids. There is always one primary grid. The primary grid can have one or more secondary grids. Each secondary grid can have one or more tertiary grids and so on.
Each grid has its own cell assignments. You assign cells to contain another grid, a panel infill, or an object such as a door or window.

