Use this procedure to add doors and windows to door/window assemblies.
- Open the tool palette that you want to use, and select a door, window or door/window assembly. Note: Alternatively, on the Home Tab
 Build panel, click one of the following: Window
  , Door drop-down Door
  , or Door drop-down Door/Window Assembly.
- Select the door/window assembly in which to insert the door or window.
You can move or hide the Properties palette to expose more of the drawing area.
- Select the door/window assembly cell marker for the cell in which to insert the door or window.
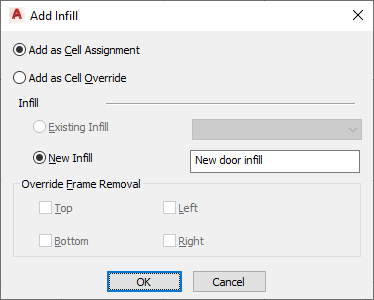
The Add Infill worksheet displays.
- Select the insertion method for the door or window:
If you want to… Then… add the door or window as a cell assignment and have all door/window assemblies using the same style display the same object added to a corresponding cell select Add as Cell Assignment. add the door or window exclusively to the selected door/window assembly select Add as Cell Override. If a door or window of the style you selected already exists in your drawing, Existing Infill is selected by default.
- Select the type of infill for the door or window:
If you selected… Then… Add as Cell Assignment and you want to insert a door or window of the existing style, Existing Infill is selected by default. Click OK. Add as Cell Assignment and you want to insert a door or window of a different style than exists in your drawing select New Infill, Enter a name for the object and click OK. Add as Cell Override and you want to insert a door or window of the existing style and not modify the edge of the frame surrounding the object Click OK. Add as Cell Override and you want to insert a door or window of a different style than exists in your drawing and not remove an edge of the frame surrounding the object select New Infill, Enter a name for the object and click OK. Add as Cell Override and you want to insert a door or window of the existing style and remove an edge of the frame surrounding the object select Top, Bottom, Left, or Right for Override Frame Removal and click OK. Add as Cell Override and you want to insert a door or window of a different style than exists in your drawing and remove an edge of the frame surrounding the object select New Infill and Enter a name for the object. Then select Top, Bottom, Left, or Right for Override Frame Removal and click OK. - Press Enter.